


GR SERIES GAS FRYERS - REMOVAL AND REPLACEMENT OF PARTS
F25125 (March 2003) Page 6 of 24
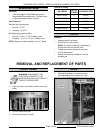
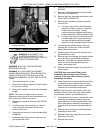
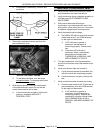
NON FILTER READY SHOWN
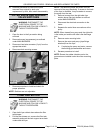
2. When replacing door, install screws and tighten
top and bottom screws enough to hold door in
place.
3. Close door, check alignment and adjust if
necessary.
4. Finish tightening screws to fully secure.
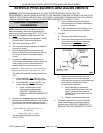
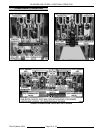
CONTROL THERMOSTAT
WARNING: DISCONNECT THE
ELECTRICAL POWER TO THE
MACHINE AND FOLLOW LOCKOUT /
TAGOUT PROCEDURES.
CAUTION: Do not sharply bend and kink the
capillary tube or damage may occur.
1. Drain shortening from fry tank.
2. Remove burners (as necessary) as outlined
under MAIN BURNERS.
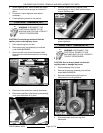
3. Remove knob from control thermostat shaft
then remove control thermostat from mounting
bracket.
4. Disconnect lead wires from control thermostat.
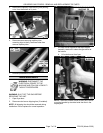
5. Remove the capillary tube retaining and packing
nuts, from the bottom of fry tank.
6. Remove screws securing capillary tube
mounting clips to the fry tank heat tube then
remove capillary tube.
7. Reverse procedure to install and check for
proper operation.
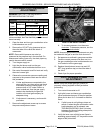
HIGH LIMIT THERMOSTAT
WARNING: DISCONNECT THE
ELECTRICAL POWER TO THE
MACHINE AND FOLLOW LOCKOUT /
TAGOUT PROCEDURES.
CAUTION: Do not sharply bend and kink the
capillary tube or damage may occur.
1. Drain shortening from fry tank.
2. Remove burners (as necessary) as outlined
under MAIN BURNERS.
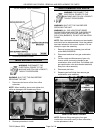
3. Remove screws securing the high limit
thermostat to mounting bracket.
4. Disconnect lead wires from high limit
thermostat.