


GR SERIES GAS FRYERS - REMOVAL AND REPLACEMENT OF PARTS
F25125 (March 2003) Page 8 of 24
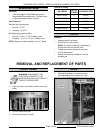
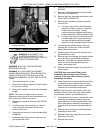
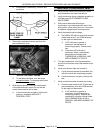
NON FILTER READY SHOWN
4. Reverse procedure to install.
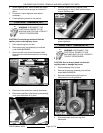
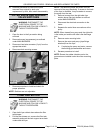
MAIN BURNER ORIFICE
WARNING: DISCONNECT THE
ELECTRICAL POWER TO THE
MACHINE AND FOLLOW LOCKOUT /
TAGOUT PROCEDURES.
WARNING: SHUT OFF THE GAS BEFORE
SERVICING THE UNIT.
1. Remove main burner orifice from orifice
extension.
NOTE: When installing, do not over tighten the
orifice or damage to the threads may occur.
2. Reverse procedure to install.
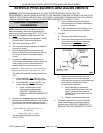
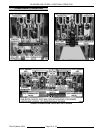
GAS COMBINATION VALVE
WARNING: DISCONNECT THE
ELECTRICAL POWER TO THE
MACHINE AND FOLLOW LOCKOUT /
TAGOUT PROCEDURES.
WARNING: SHUT OFF THE GAS BEFORE
SERVICING THE UNIT.
WARNING: ALL GAS JOINTS DISTURBED
DURING SERVICING MUST BE CHECKED FOR
LEAKS. CHECK WITH A SOAP AND WATER
SOLUTION (BUBBLES). DO NOT USE AN OPEN
FLAME.
NOTE: Gas combination valves are not serviceable
and should not be disassembled. Once the problem
has been isolated to this control, replace it. Do not
attempt to repair the assembly.
1. Remove burners (as necessary) as outlined
under MAIN BURNERS.
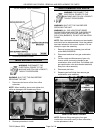
2. Disconnect lead wires from gas combination
valve.
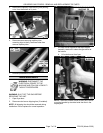
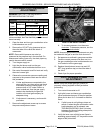
3. On filter ready and Kleenscreen fryers only,
remove cotter pin securing handle to gas
combination valve on/off knob. Pull handle (with
gas combination valve knob bracket attached)
away from valve assembly.
4. Disconnect pilot tube.
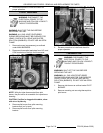
5. Separate gas line fittings then remove gas
combination valve assembly.
NOTE: Remove fittings and piping from gas
combination valve and install (in same orientation)
on the replacement valve.