


3. Plug unit into electrical outlet. Flip the power switch to
On position and allow unit to heat until the ready light
(green) is lit – approximately 13 minutes.
Note: This coffeemaker has an initial heat-up time of 13 min
-
utes. The coffeemaker is designed to remain in the On
position except for extended leave or vacation from your
home. Every time the coffeemaker is turned to the Off
position, it will require a 13-minute heat-up time prior to
its next use.
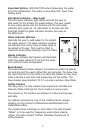
4. If more water is needed, the add water indicator light
(blue) will be lit. If this is the case, slowly pour water to the
fill area until the add water indicator goes out, indicating
that the water reservoir tank is now filled. Or, add water as
indicated in glass indicator window until blue light
goes out.
5. Make sure the ready indicator light (green) is lit. If it is not
lit, wait until it is, to ensure that the water has heated to
the proper temperature, approximately 200°F.
MAKING COFFEE –
IMPORTANT STEPS TO FOLLOW
Before making the first pot of coffee in your new Waring Pro™
Coffeemaker, we recommend operating the coffeemaker twice
using only water. Do not use paper filter or coffee grounds. This
will remove any dust or residue in the system.
1. Place an empty glass carafe in its position on the lower
warming plate.
2. Check to see if the add water indicator light is lit. If it is,
slowly pour water to the fill area until the add water
indicator light goes out. Or, add water as indicated
in the glass indicator window until add water indicator
light goes out.
3. Ready indicator light should be lit, indicating that the
water has reached the proper brewing temperature. Note:
The ready indicator will not light if the add water indicator
is on.
4. Place an empty carafe on the lower warming plate.
9