


HOW TO SAVE ENERGY
* Only open the door when necessary and for as
short a time as possible.
* Store food in an organised way.
* Allow food and drinks to cool before placing
them in the appliance
* Store food covered or packaged
* Do not over-fill the appliance to allow air to circu-
late.
ELECTRICAL CONNECTION
This appliance requires a 230-240V, 50Hz supply
and connection must be through a moulded plug
(with a 5amp fuse fitted) which is fitted to the appli-
ance in accordance with EN 60335, Consumer
Protection, SI 1994 No. 1768, plug and sockets etc
Safety Regulations 1994.
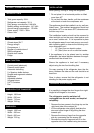
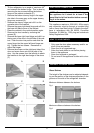
* Tilt the refrigerator to an angle of maximum 45
o
and unscrew the bottom hinge. This is done by
removing the two screws holding the bottom
hinge on the cabinet underside (C).
* Remove the bottom dummy hinge in the oppo-
site side in the same way as the upper dummy
hinge was removed (D).
* Reverse the dummy hinge and refit it on the
opposite side of the cabinet.
* Reverse the upper right hand hinge and refit it in
the lower left hand corner of the cabinet.
* Place the cabinet in the vertical position again.
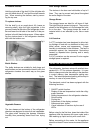
* Dismount he door handle by removing the
screws (E).
* Reverse the lower right hand hinge and refit it on
the top part of the door in the left side of the cab-
inet. Push the door into position and slide the
upper hinge into the upper left hand hinge cas-
ing. Tighten the two screws. Remember to
adjust the hinges.
* Remove the screws on the right hand side of the
door and screw them onto the left side of the
door. Use the screws from the left side to attach
the handles to the right hand edge of the doors
(F).
NOTE: To ensure the correct functioning of
the appliance let it stand for at least 2 hrs
once fitted to its final location before connect-
ing it to the mains.
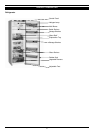
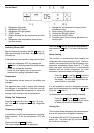
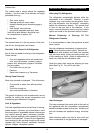
Glass Shelves
The height of the shelves can be adjusted depend-
ing on the position of the shelves projections in the
grooves on the side of the refrigerator chamber.
Minimum distance between the shelves:
VARIABLE INTERIOR DESIGN
Maximum distance between the shelves:
A
B
C
D
E
F
Fig.1
Fig.2
8