


C-4
Gas Instructions
Liquid Propane Cylinder
The liquid propane cylinder manufacturer is responsible for
the materials, workmanship and performance of the tank. If
the tank has a defect malfunctions, or you have a question
regarding the tank, call the tank manufacturer’s customer
service center. The phone number is on the warning decal,
which is permanently attached to the tank. If the tank
manufacturer has not resolved the issue to your
satisfaction, then contact the Customer Service
Representative in your region using the contact information
sheet provided with your manual.
Refilling the Liquid Propane Cylinder
We recommend that you refill the LP cylinder before it is
completely empty.
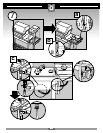
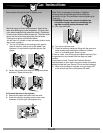
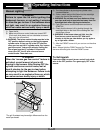
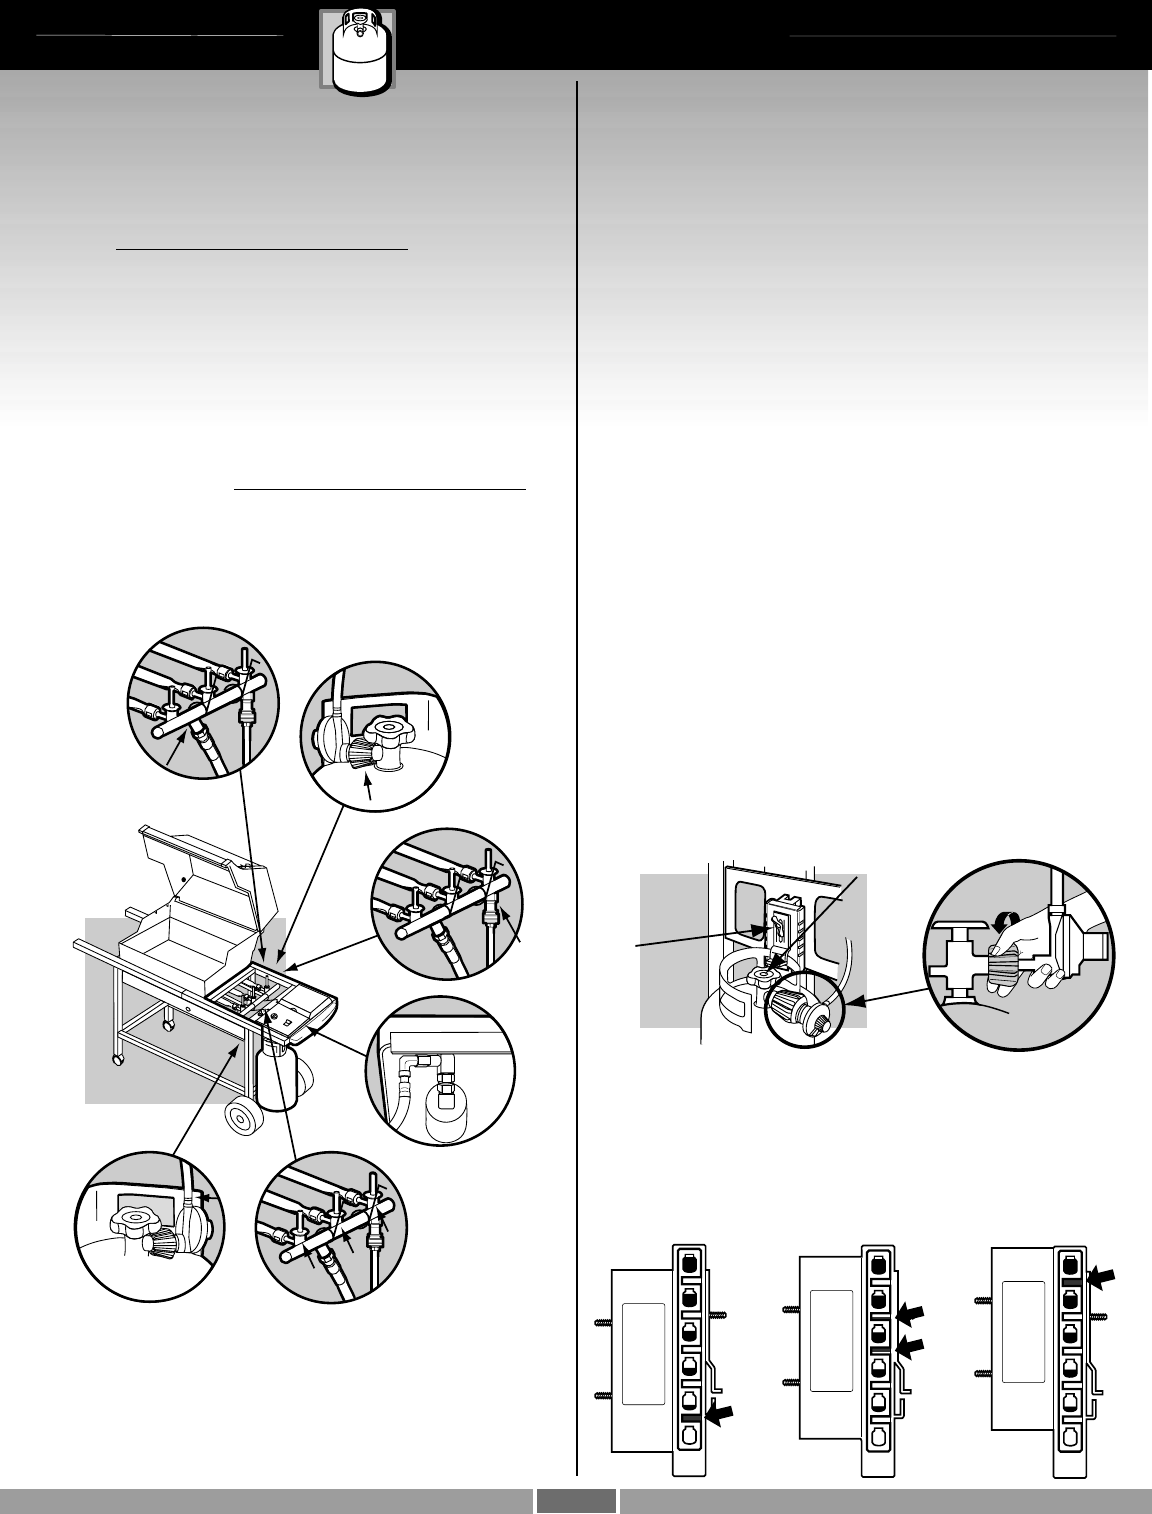
Removal of the LP cylinder
1) Close cylinder valve (turn clockwise).
2) Unscrew regulator coupling by turning
counterclockwise, by hand only.
3) Loosen cylinder lock wing nut and turn cylinder lock up
out of the way.
4) Lift cylinder off.
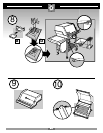
To refill, take LP cylinder to a “Gas Propane” dealer.
ƽ WARNING: We recommend that your LP cylinder be
filled at an authorized LP gas dealer, by a qualified
attendant, who fills the cylinder by weight.
IMPROPER FILLING IS DANGEROUS.
ƽ CAUTION: When transporting the LP cylinder make
sure the plastic dust cover is in place over the
valve. This will keep dust and dirt from the threaded
portion of the valve.
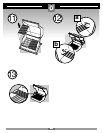
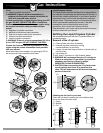
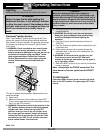
Checking the fuel level in your tank
Check the fuel level by viewing the color indicator level
line on the side of the tank scale.
1) Empty
2) Medium
3) Full
(3)
(1)
(1)
(2)
(3)
(1)
(2)
(3)
(4)
(5)
(6)
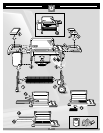
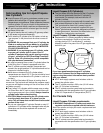
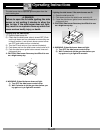
Check:
1) Hose to manifold connection.
ƽ WARNING: If there is a leak at connection (1),
retighten the fitting with a wrench and recheck for
leaks with soap and water solution.
If a leak persists after re-tightening the fitting, turn OFF
the gas. DO NOT OPERATE THE GRILL. Contact the
Customer Service Representative in your region using
the contact information sheet provided with your
manual.
2) Regulator to cylinder connection.
3) Manifold to side burner hose connection.
4) Side burner hose to side burner connection.
5) Valves to manifold connections.
6) Hose to regulator connection.
ƽ WARNING: If there is a leak at connections (2,3,4,5 or
6), turn OFF the gas. DO NOT OPERATE THE GRILL.
Contact the Customer Service Representative in your
region using the contact information sheet provided
with your manual.
When leak checks are complete, turn gas supply OFF at
the source and rinse connections with water.