10
1. Unplug cord from electrical outlet and allow bread maker to cool before cleaning.
2. The bread pan and knead bar must be cleaned after each use to ensure performance. After bread is removed from pan, fill pan
half full with warm water and small amount of dish soap. Set pan in empty sink or on hot pad and allow to soak for 5 to 10
minutes or until knead bar can be lifted off shaft. Twist bar slightly to loosen. The knead bar must soak in water before it can
be removed. Wash inside of pan and knead bar with a soft cloth, rinse and dry. Replace bar on shaft.
Be sure that shaft in pan is kept clean so that knead bar fits properly. DO NOT use any type of utensil or tool to clean the gasket
around the shaft as damage will occur and result in leakage. DO NOT use any abrasive scouring pads or cleansers on bread pan or
knead bar as damage to finish can occur. The coating inside of bread pan may change color over time, which is normal and does not
affect the bread or dough. CAUTION: To prevent personal injury or electric shock, do not immerse bread maker base, its cord or
plug in water or other liquid.
3. Wipe inside of chamber and outside surfaces of bread maker with a damp cloth if necessary. The cover is removable for
cleaning if needed. Simply open it 45 degrees and pull toward you. Wipe cover with a damp, soapy cloth and dry. DO NOT
immerse cover in water or place in automatic dishwasher as water will get in between the parts and cause damage.
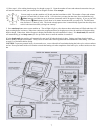
Replace cover by aligning attachment hooks into hinge on back of bread maker. Cover should move freely up and down after being
replaced. See “Parts of Bread Maker”.
OTHER HELPFUL TIPS FOR USING YOUR BREADMAKER
1. BE SURE to allow adequate ventilation around the bread maker when it is in operation. Keep it out of drafts and direct sunlight and
at least four (4) inches away from walls, cabinets and other appliances, especially heating and cooling appliances which interfere with
the internal bread maker temperatures and affect the loaf of bread being prepared.
2. ALWAYS place bread maker on a DRY, STABLE heat-proof countertop or table during use. Since the bread maker contains a
motor, some vibration occurs during the knead cycle.
3. DO NOT cover bread maker with anything during operation as this can cause malfunction.
4. DO NOT TOUCH control panel buttons after bread maker has been turned on as this can interrupt the cycle. Turn bread maker off
after completion of cycle.
5. DO NOT LEAVE bread maker plugged into electrical outlet when not in use to prevent it from being accidentally turned on.
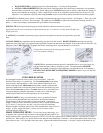
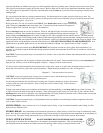
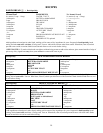
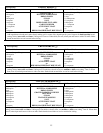
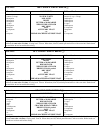
BREAKDOWN OF BREAD/DOUGH CYCLES - To help you understand the bread making process, the following chart breaks
down each cycle’s time in minutes and seconds. These times are approximate and should be used only as a guide. The total process
time is given in hours and minutes, depending on the crust selection made.
REGULAR BREAD AND DOUGH CYCLES
MIX – When turned on, the bread maker mixes ingredients about 5 minutes. The knead bar will start and stop during mixing.
Rest – The dough is allowed to rest about 15 minutes before kneading, faint clicking sounds indicate the bread maker is keeping the
dough warm.
BREAKDOWN OF
BREAD/DOUGH
CYCLES -
BASIC/SPECIALTY WHOLE WHEAT DOUGH
MIX 5 min. 5 min.
5 min.
REST 15 min. 15 min. 0 min.
KNEAD 20 min. 30 min. 20 min.
RISE (1) 34 min. 50 min. 55 min.
STIR-DOWN (1) 16 sec. 16 sec. 16 sec.
RISE (2) 15 min. 14 min.
STIR-DOWN (2) 16 sec. 16 sec.
RISE (3) 50 min. 55 min.
BAKE (LIGHT)
(MEDIUM)
(DARK)
40 min.
50 min.
60 min.
40 min.
50 min.
60 min.
Total Time (Hour-
Minutes)
(LIGHT)
(MEDIUM)
(DARK)
3:00
3:10
3:20
3:30
3:40
3:50
1:20


