5 6
INTRODUCTION
Your Westinghouse Deep Fryer contains a durable stainless steel Oil Tank for long-lasting
use. It is designed to cook a variety of foods in hot cooking oil. A rotary Temperature Dial
allows you to choose a cooking temperature between 285
°
F and 375
°
F for precise temperature
control. The convenient Basket is used to carefully lower food into the oil and provides a safe
way to lift cooked foods from the oil. The removable Control Panel/Heater Assembly and Oil
Tank provide for easy and thorough clean-up.
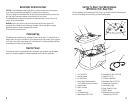
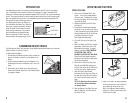
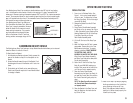
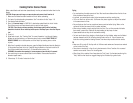
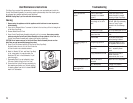
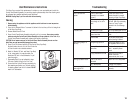
Your Westinghouse Deep Fryer features a
Cool Zone below the Heater Coils. When the
Deep Fryer is properly assembled, the area
below the Heater Coils remains at a much
lower cooking temperature. This prevents
any food pieces and crumbs which have
fallen to the bottom of the Oil Tank from
burning and also encourages longer oil life.
ASSEMBLING BASKET HANDLE
The Westinghouse Deep Fryer features a unique Basket Handle which allows you to raise and
lower the Basket (in and out of the oil).
To Attach Handle to Basket:
1. Hold Handle over Basket as shown. Gently squeeze the
arms of the Handle so they fit into the eyelets on the
Basket.
2. Rotate the Handle toward the end of the Basket. Push
Handle against the end of the Basket until it locks into
place.
3. Slide plastic part of Handle out on arms before use.
Plastic part of\Handle may be slid in and Handle folded
for storage in Basket.
Before First Use
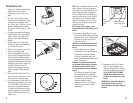
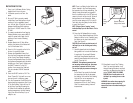
1. Press in on Lid Release Button. See
Figure 1. Lid is spring-loaded and will
rise on its own. To remove the Lid from
the Deep Fryer Body, lift the Lid straight
up and off the Body.
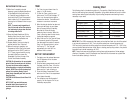
2. Remove the Basket from the Oil Tank.
See Figure 2.
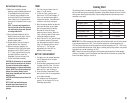
3. Grasp Control Panel/Heater Assembly
and firmly pull up to remove. See Figure
3. Both the plastic Control Panel and the
Heating Element will lift off of the Deep
Fryer Body. Carefully set Control
Panel/Heater Assembly aside.
4. Lift the Oil Tank out of the Deep Fryer
Body.
5. Wash Lid, Basket, and Oil Tank in warm,
soapy water. Please refer to the "User
Maintenance Instructions" for proper
cleaning guidelines. DO NOT IMMERSE
THE CONTROL PANEL/HEATER
ASSEMBLY IN WATER OR OTHER LIQUID.
Wipe Control Panel/Heater Assembly
and Deep Fryer Body with a damp cloth.
Dry all parts thoroughly.
6. Return the Oil Tank to the Deep Fryer
Body. Be sure MIN/MAX markings on
inside of Tank are at the left side of the
unit. Be sure Tank is seated properly.
7. Place the Control Panel/Heater
Assembly onto the Deep Fryer Body. As
you seat the Control Panel into position,
the Control Panel will gently snap into
place.
NOTE: The Deep Fryer will not operate if
the Control Panel/Heater Assembly is
not properly seated.
8. Place the Basket in the Deep Fryer and
hang the Basket on the hook near the
top of the Oil Tank.
9. Place Lid on Deep Fryer Body by aligning
the hinge extensions on the Lid with the
corner openings at the rear of Fryer
Body. Push down and rotate forward to
close the Lid. When closed properly, the
Lid will lock into place.
OPERATING INSTRUCTIONS
3
7
5
3
5
5
3
4
0
3
2
0
3
0
0
2
8
5
Figure 1
375
3
55
340
320
30
0
285
Figure 2
3
75
3
55
3
40
32
0
30
0
2
85
Figure 3
COOL ZONE
BASKET
HEATER COILS


