


Page 8 Page 9
SET UP & USE
3. Rotate the temperature knob
clockwise to “BROIL” position
4. The timer knob is in OFF position.
a) For short time broiling, rotate
the timer knob clockwise (up to
15 minutes), when the cycle is
nished, the bell will ring and the
power is automatically turned off.
b) For longer time broiling, rotate
the time knob counterclockwise
from the OFF position to “STAY
ON” setting. The cooking will
continue until the timer knob
is manually turned to “OFF”
position and the bell will ring.
NOTE: · Always monitor the food at this
setting to prevent overcooking. Turn
the food over during the process
or add the avoring as necessary.
Always use oven mitts to prevent the
risk of scalding.
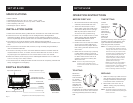
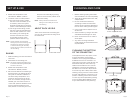
There are 2 rack levels. The baking pan
or oven rack can be slid into the groove
for either level.
1. Slide the baking pan into the bottom
rack level.
2. Place food on the baking pan.
NOTE: · We always suggest preheating oven
5 minutes at this setting before place
the food in the oven.
3. Rotate the temperature knob
clockwise to “BAKE” position.
4. Set the time based on the food type
and thickness. The heating element
will cycle on and off to maintain a
constant cavity temperature. The
maximum time that can be set by
timer is 15 minutes, if longer time is
needed, you must set the timer to
“STAY ON” position. Rotate the time
knob counterclockwise from the
OFF position. In this case you must
ABOUT RACK LEVELS
BAKING
stop the oven manually by turning
the timer knob to OFF position once
the food is ready.
NOTE: · Always monitor the food at this
setting to ensure that you are not
overcooking.
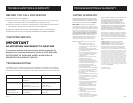
This appliance has a drop open crumb
tray at the bottom of the baking
chamber. First unplug this appliance
and allow the oven to cool down. To
clean out the crumbs, simply tilt the unit
backwards and push the crumb tray
slide knob towards the rear. This will
release the crumb tray and allow it to
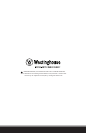
tilt down on the counter. Wipe interior
of crumb tray with a damp cloth. After
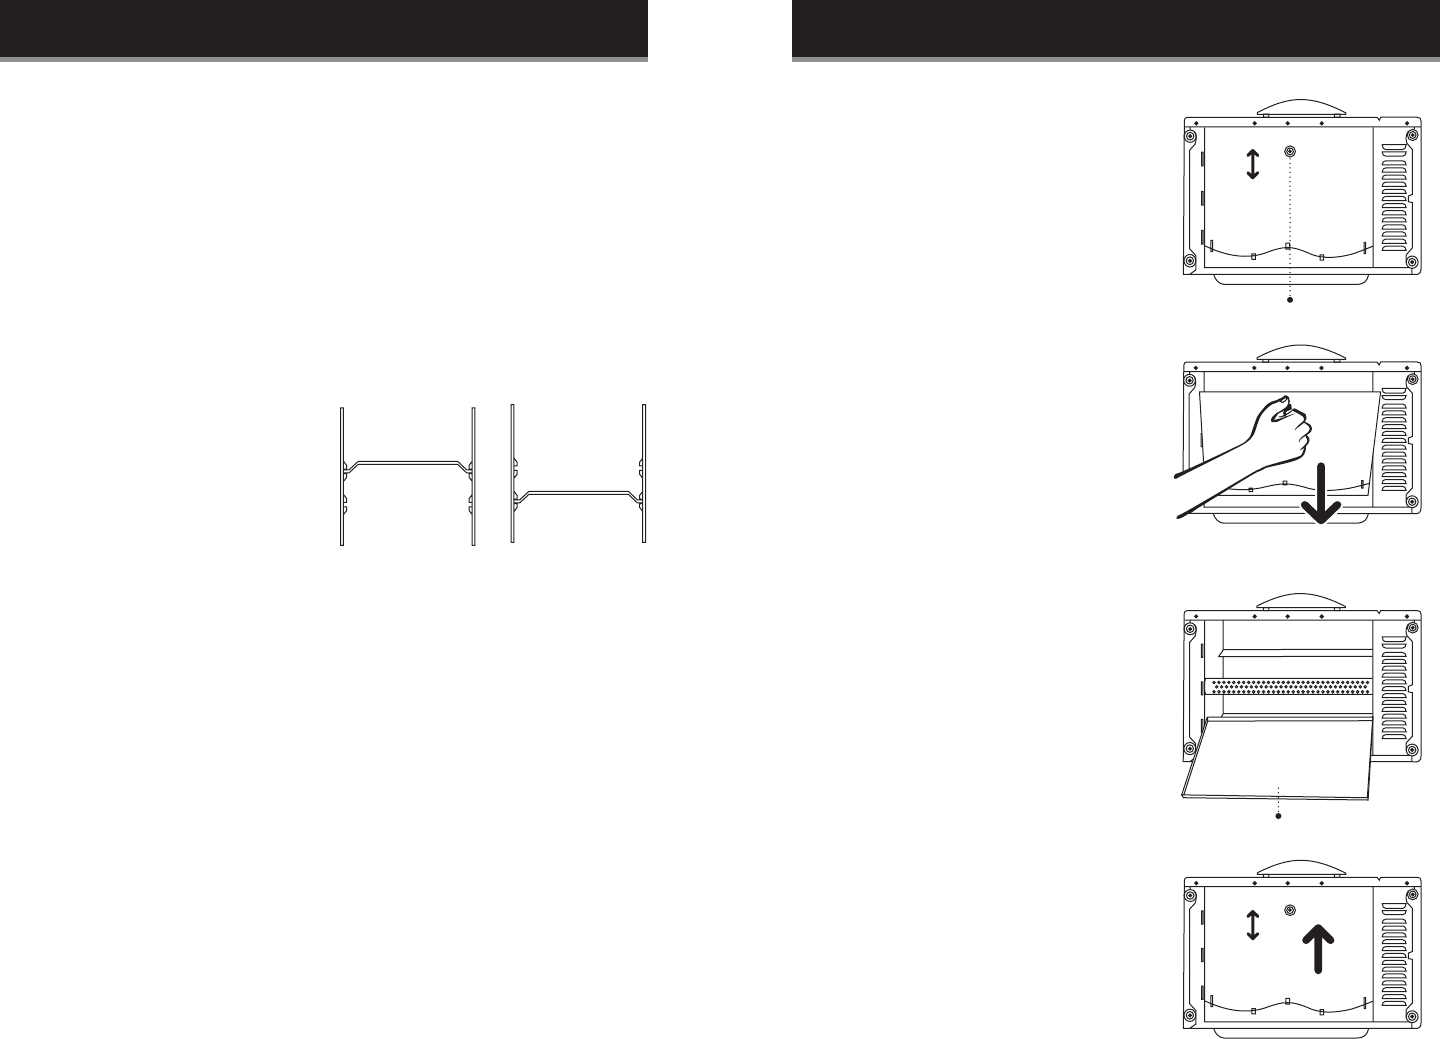
cleaning, simply push the knob towards
the rear and place the crumb tray in its
position. Washing of the interior of the
crumb tray is accomplished by placing
unit on its back side and allow crumb
tray to fall forward for easy cleaning.
CLEANING THE BOTTOM
OF THE CRUMB TRAY
CLEANING AND CARE
1. Before cleaning unplug the toaster
oven and allow it to cool completely.
2. Wash all the attachments with mild,
soaped water.
3. Do not use abrasive cleansers,
scrubbing brushes and chemical
cleaner as this will cause damage to
the non-stick coating of baking pan.
4. Using a wet cloth to wipe the inner
of the oven.
5. Clean the door by using a wet cloth
saturated with detergent or soap.
6. Never immerse the unit in water or
other liquid.
7. Any other servicing should be
performed by an authorized service
representative.
1.
2.
3.
4.
Close
Open
To
Close
To
Open
Crumb Tray Slide Knob
Crumb Tray
Upper Rack Level Lower Rack Level
Close
Open