Page 6 Page 7
SET UP & USE SET UP & USE
CONTROL PANEL
INSTALLATION GUIDE
1. Carefully unpack the toaster oven.
2. Remove all labels and tags from the products.
3. To remove any dust that may accumulated during packaging, wash the
rack, drip/baking pan and crumb tray in warm, soapy water with a clean,
soft cloth or sponge or in the dish washer.
4. Ensure each piece is thoroughly dried before use. Wipe the exterior of the
toaster oven with a clean, damp cloth. Allow to dry thoroughly. Do not use
harsh detergents or abrasive cleansers on any part of the toaster oven.
NOTE: · Do not immerse the toaster oven, cord or plug housing in water or any
other liquid.
MIN
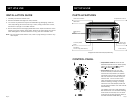
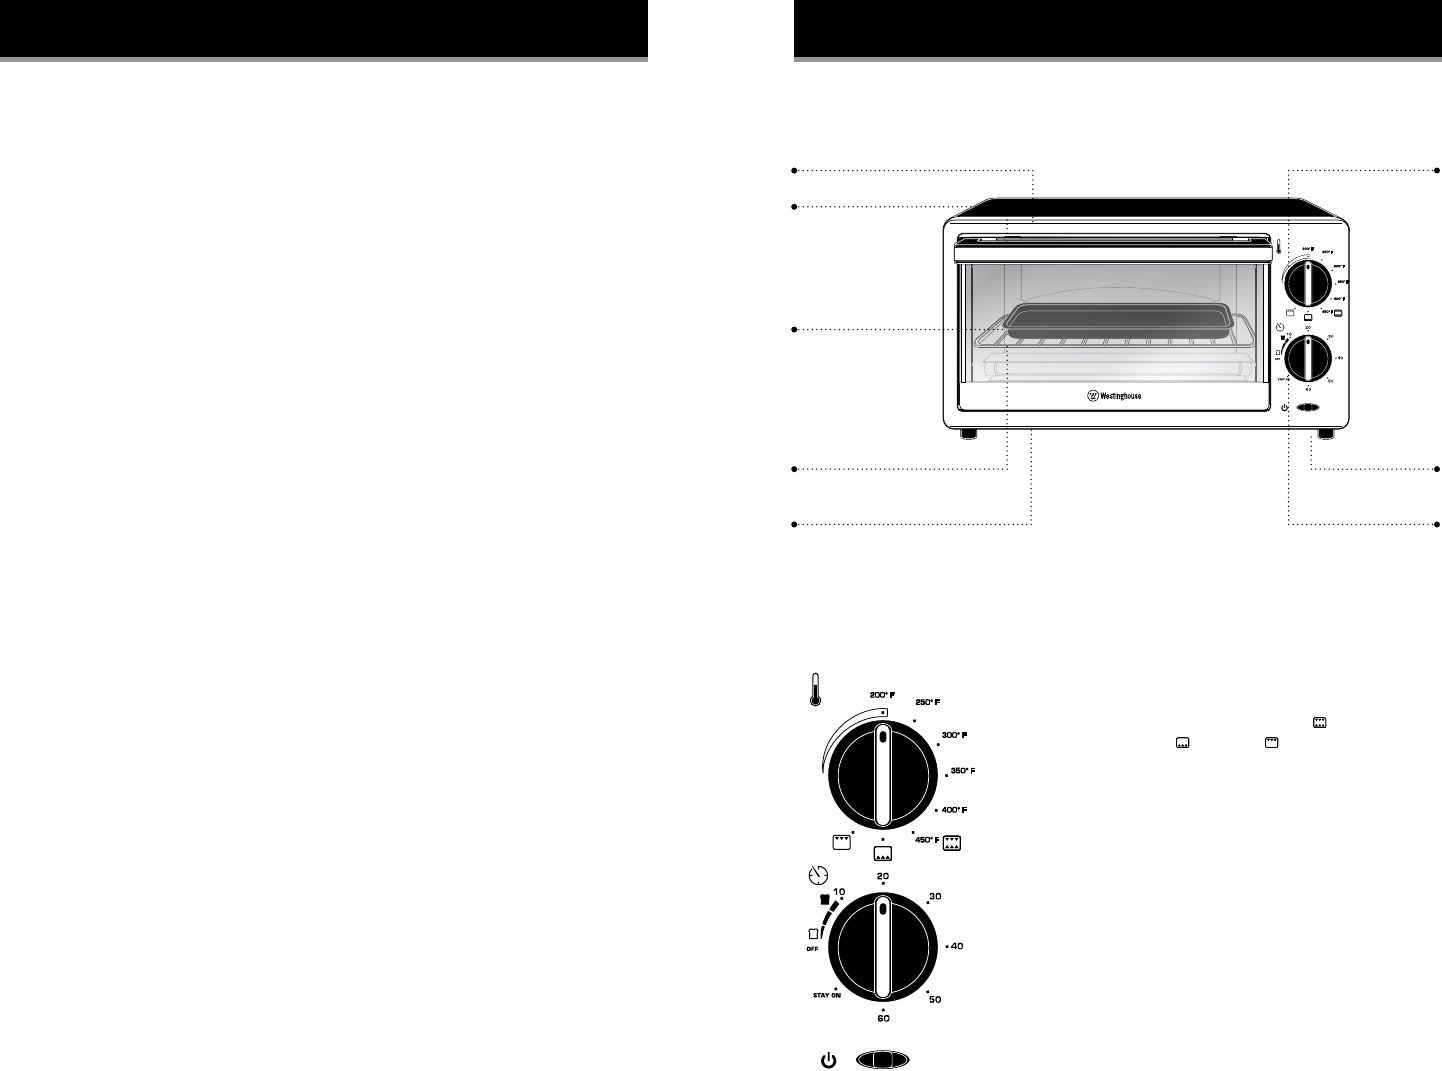
PARTS & FEATURES
Cool Touch Handle
Power-On
Indicator Light
Time Control
Temperature Control
Glass Door
Baking/Drip
Pan
Pull Down
Crumb Tray (Not Shown)
Chrome-plated
Rack
Diagram for instructional purposes only.
MIN
• Temperature Control: Use to set the
desired temperature from 200°f (Keep
Warm) to 450°f (Toast as well as
Bake and Broil functions).
• Time Control: When you turn this
knob to the left (counterclockwise)
to the STAY ON position, the toaster
will remain ON until it is manually shut
off. You will know it is OFF when you
hear the bell. Turn the knob to the
right (clockwise) to set the required
time for toasting, broiling, or baking.
When the time has elasped, a bell will
sound and the toaster oven will shut off
automatically.
The toaster oven has a fully automatic
60-minute timer. For accurate toasting
times under 10 minutes, turn the timer
to at least 10 minutes and then back to
the desired toast shade setting.


