Attaching the optional ice maker to a water supply
Read all directions carefully before you begin.
Electrical Shock Hazard
Unplug the refrigerator before installing
ice maker.
Failure to do so can result in death or
electrical shock.
IMPORTANT:
l Use copper tubing only and check for leaks.
l Install ice maker tubing in areas where temperatures
are above freezing.
Tools required:
l Standard screwdriver
l 7/rs-inch and X-inch open-end wrenches or
two adjustable wrenches
l X-inch nut driver
l X-inch drill bit
l Hand drill or electric drill (properly grounded)
NOTE: Your appliance dealer has a kit available with
a %-inch saddle type shutoff valve, a union, and
copper tubing. Before purchasing, make sure a saddle
type valve complies with your local plumbing codes.
Do not use piercing type or %-inch saddle valves
which reduce water flow and clog more easily.
Cold water supply
The ice maker water valve contains a flow washer
which is used as a water pressure regulator. The ice
maker needs to be connected to a cold water line with
water pressure limitations of 20-l 20 psi. If a problem
occurs, call your utility company.
IMPORTANT:
l It may take up to 24 hours for your ice maker to
begin producing ice.
l If operating the refrigerator before installing the
water connection, turn ice maker to the OFF position
to prevent operation without water.
l All installations must be in accordance with local
plumbing code requirements.
Installation is not warranted by refrigerator
or ice maker manufacturer.
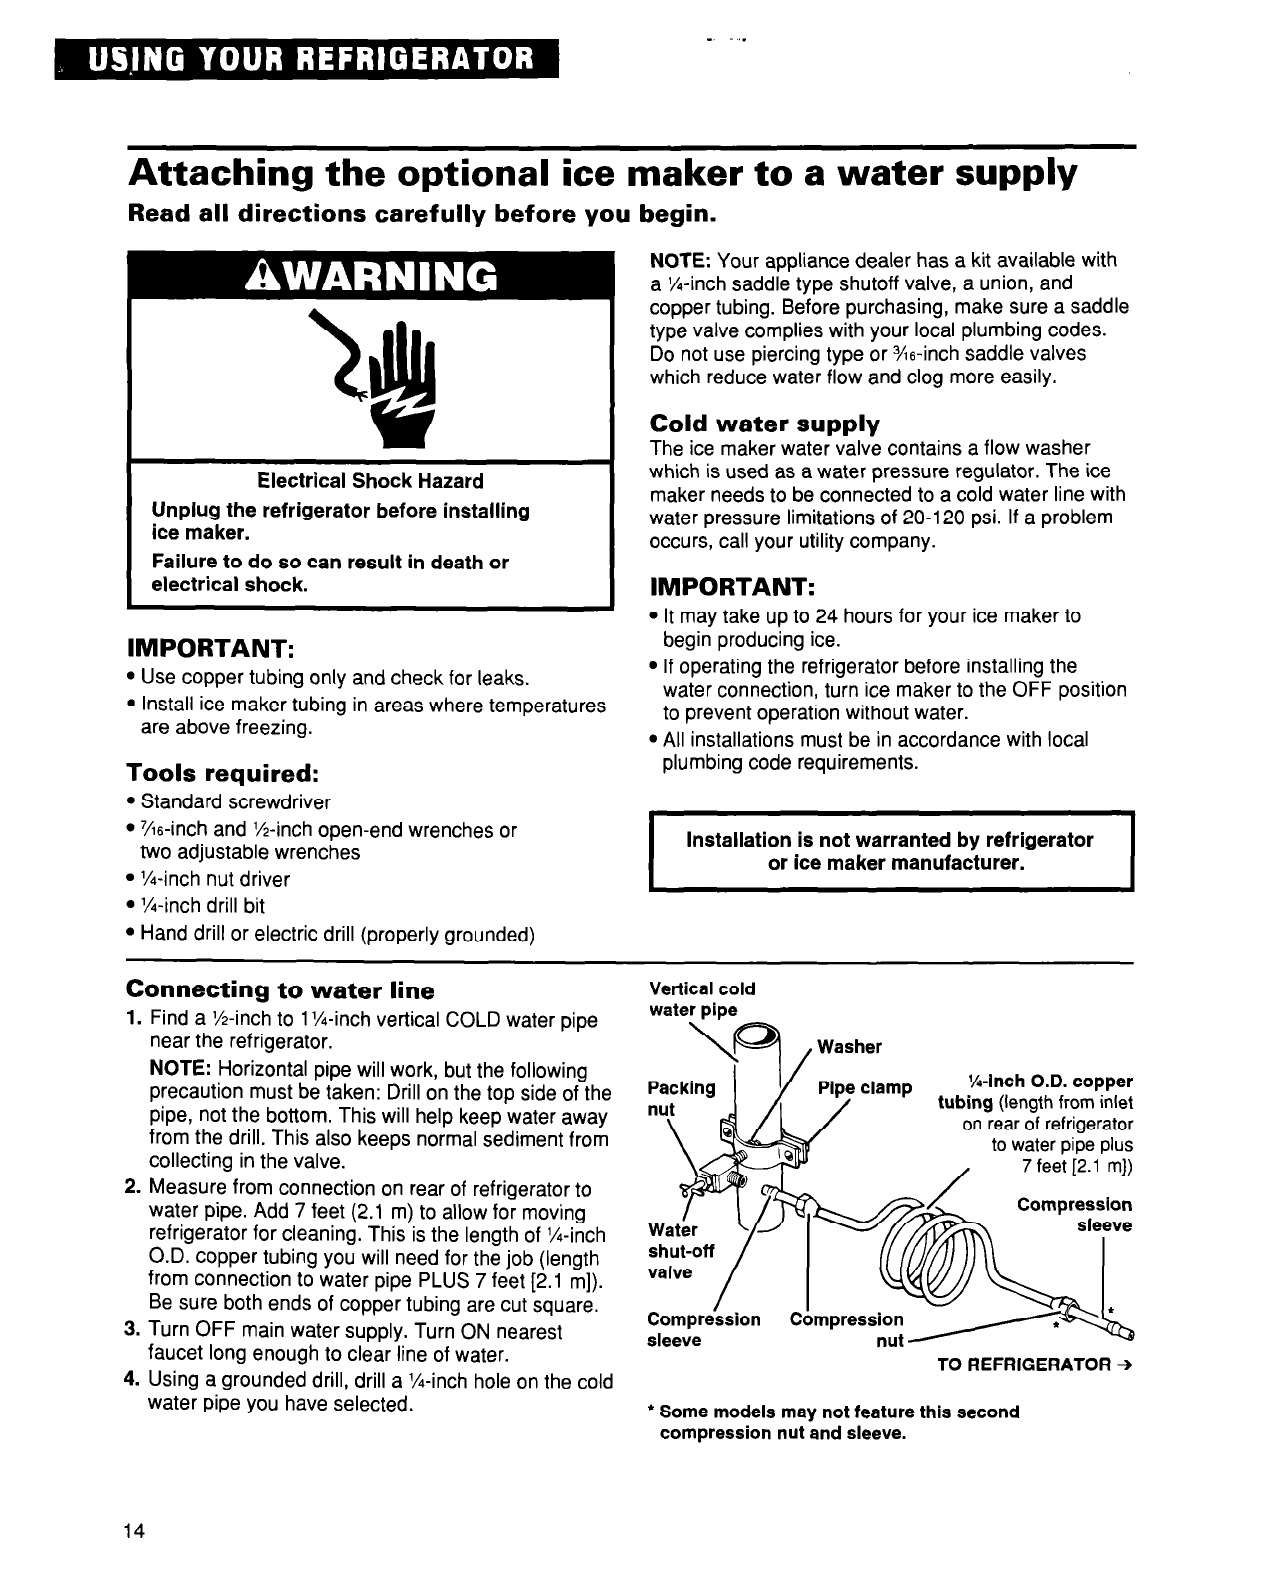
Connecting to water line
1.
Find a %-inch to 1 %-inch vertical COLD water pipe
near the refrigerator.
NOTE: Horizontal pipe will work, but the following
precaution must be taken: Drill on the top side of the
pipe, not the bottom. This will help keep water away
from the drill. This also keeps normal sediment from
collecting in the valve.
2. Measure from connection on rear of refrigerator to
water pipe. Add 7 feet (2.1 m) to allow for moving
refrigerator for cleaning. This is the length of X-inch
O.D. copper tubing you will need for the job (length
from connection to water pipe PLUS 7 feet [2.1 ml).
Be sure both ends of copper tubing are cut square.
3. Turn OFF main water supply. Turn ON nearest
faucet long enough to clear line of water.
4. Using a grounded drill, drill a %-inch hole on the cold
water pipe you have selected.
Vertical cold
water
pipe
/
Washer
%-Inch O.D. copper
tubing (length from inlet
on rear of refrigerator
sleeve
TO REFRIGERATOR +
l
Some models may not feature this second
compression nut and sleeve.
14


