23
■ Are the controls set correctly for the surrounding
conditions?
Refer to the “Setting the Controls” section.
There is interior moisture build-up
■ Are the air vents blocked in the refrigerator?
Remove any objects from in front of the air vents. Refer to the
“Ensuring Proper Air Circulation” section for the location of air
vents.
■ Are the door(s) opened often?
To avoid humidity build-up, try to get everything you need out
of the refrigerator at once, keep food organized so it is easy
to find, and close the door as soon as the food is removed.
(When the door is opened, humidity from the room air enters
the refrigerator. The more often the door is opened, the faster
humidity builds up, especially when the room itself is very
humid.)
■ Is the room humid?
It is normal for moisture to build up inside the refrigerator
when the room air is humid.
■ Is the food packaged correctly?
Check that all food is securely wrapped. Wipe off damp food
containers before placing in the refrigerator.
■ Are the controls set correctly for the surrounding
conditions?
Refer to the “Setting the Controls” section.
■ Was a self-defrost cycle completed?
It is normal for droplets to form on the back wall after the
refrigerator self-defrosts.
The doors will not close completely
■ Are food packages blocking the door open?
Rearrange containers so that they fit more tightly and take up
less space.
■ Is the ice bin or ice bucket out of position?
For models with an interior ice bin, push the ice bin in all the
way. If the ice bin does not go in all the way, it may not be put
in straight. Pull it out and try again. For models with an ice
bucket, the bucket should sit level on the freezer door. To
remove the bucket, press the release button on the right side
of the bucket and lift straight up. Replace the bucket in the
door making sure it is properly aligned and snapped securely
into place. Refer to the “Ice Maker and Storage Bin/Bucket”
section.
■ Are the pans, shelves, bins, or baskets out of position?
Put the crisper cover and all pans, shelves, bins, and baskets
back into their correct positions. See the “Crisper and Crisper
Cover” section for more information.
■ Are the gaskets sticking?
Clean gaskets according to the directions in the “Cleaning
Your Refrigerator” section.
■ Does the refrigerator wobble or seem unstable?
Level the refrigerator. Refer to the “Door Closing” or “Leveling
Your Refrigerator” section, depending on your model.
■ Were the doors removed during product installation and
not properly replaced?
Remove and replace the doors according to the “Removing
the Doors” section on some models, or call a qualified service
technician.
The doors are difficult to open
■ Are the gaskets dirty or sticky?
Clean gaskets according to the directions in the “Cleaning
Your Refrigerator” section.
Water flow from the dispenser decreases noticeably
■ Is there a water filter installed on the refrigerator? The
filter may be full or incorrectly installed. Depending on your
model, remove the water filter cartridge (see the “Base Grille
Water Filtration and Monitoring System or Interior Water
Filtration System” section.) Operate the dispenser. If the
water flow increases noticeably, your filter is full and needs to
be replaced.
ASSISTANCE OR SERVICE
Before calling for assistance or service, please check
“Troubleshooting.” It may save you the cost of a service call. If
you still need help, follow the instructions below.
When calling, please know the purchase date and the complete
model and serial number of your appliance. This information will
help us to better respond to your request.
If you need replacement parts
If you need to order replacement parts, contact the dealer from
whom you purchased the unit or a Whirlpool designated service
company.
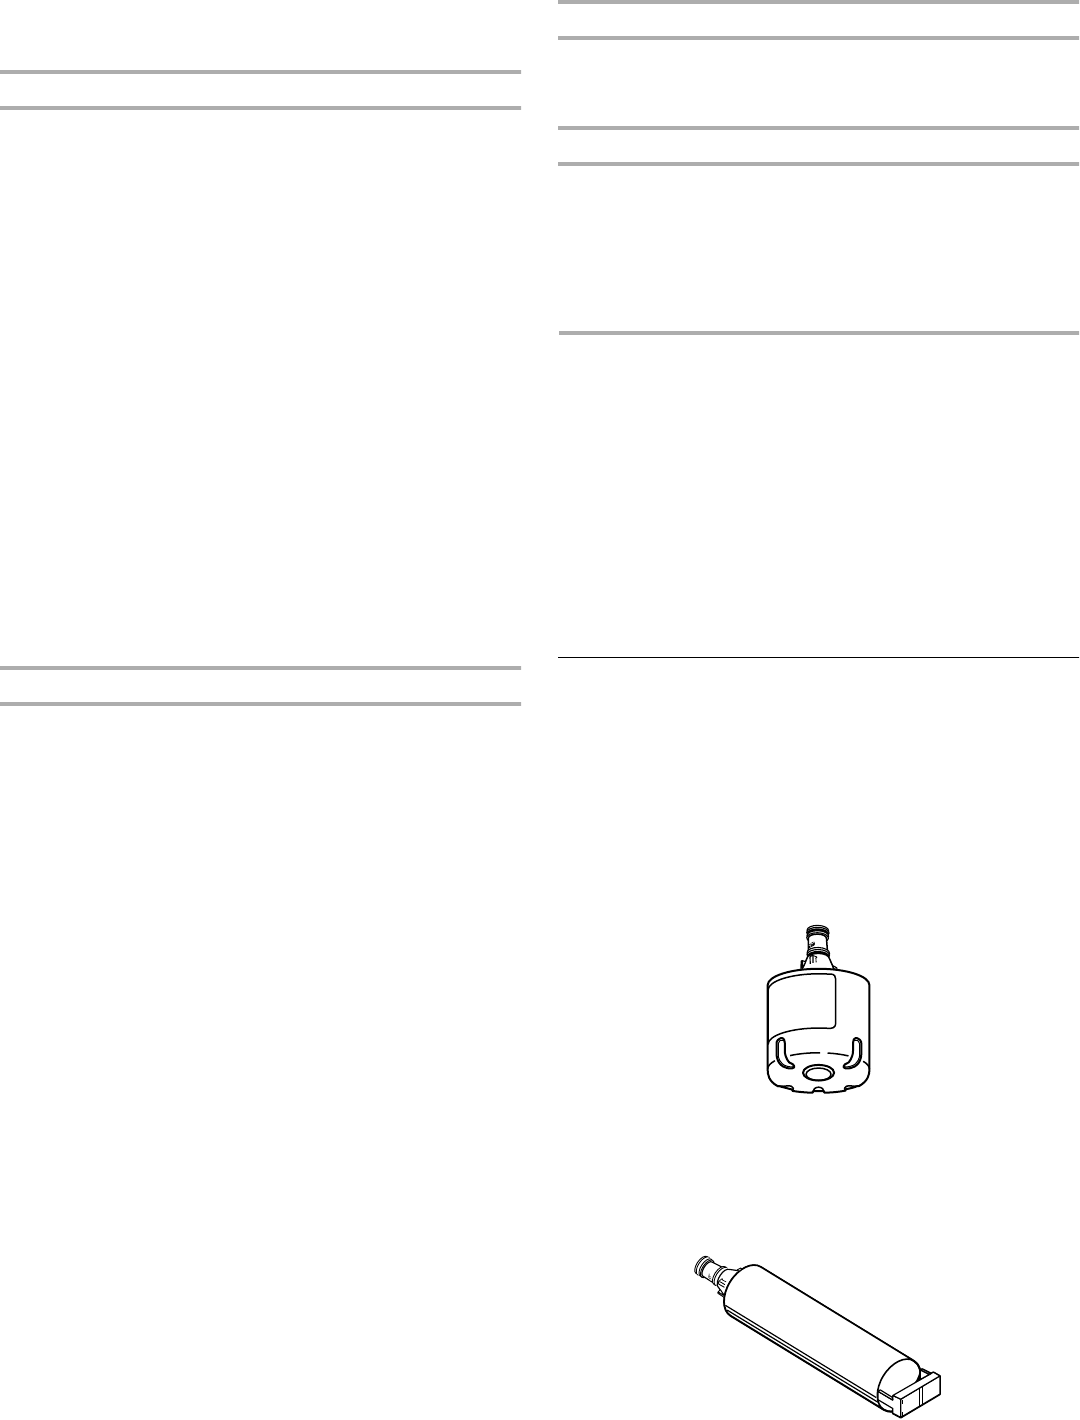
Accessories
Replacement filters
To order replacement filters, contact your authorized Whirlpool
dealer and ask for the appropriate part number listed below.
Interior water filter cartridge:
Standard Cartridge:
Order Part #8171413 (NL200)
Cyst Cartridge:
Order Part #8171414 (NLC200)
Base grille water filter cartridges:
Standard Cartridge:
Order Part #4392857 (NL300 and L500)
Cyst Cartridge:
Order Part #4392922 (NLC250 and LC400)


