


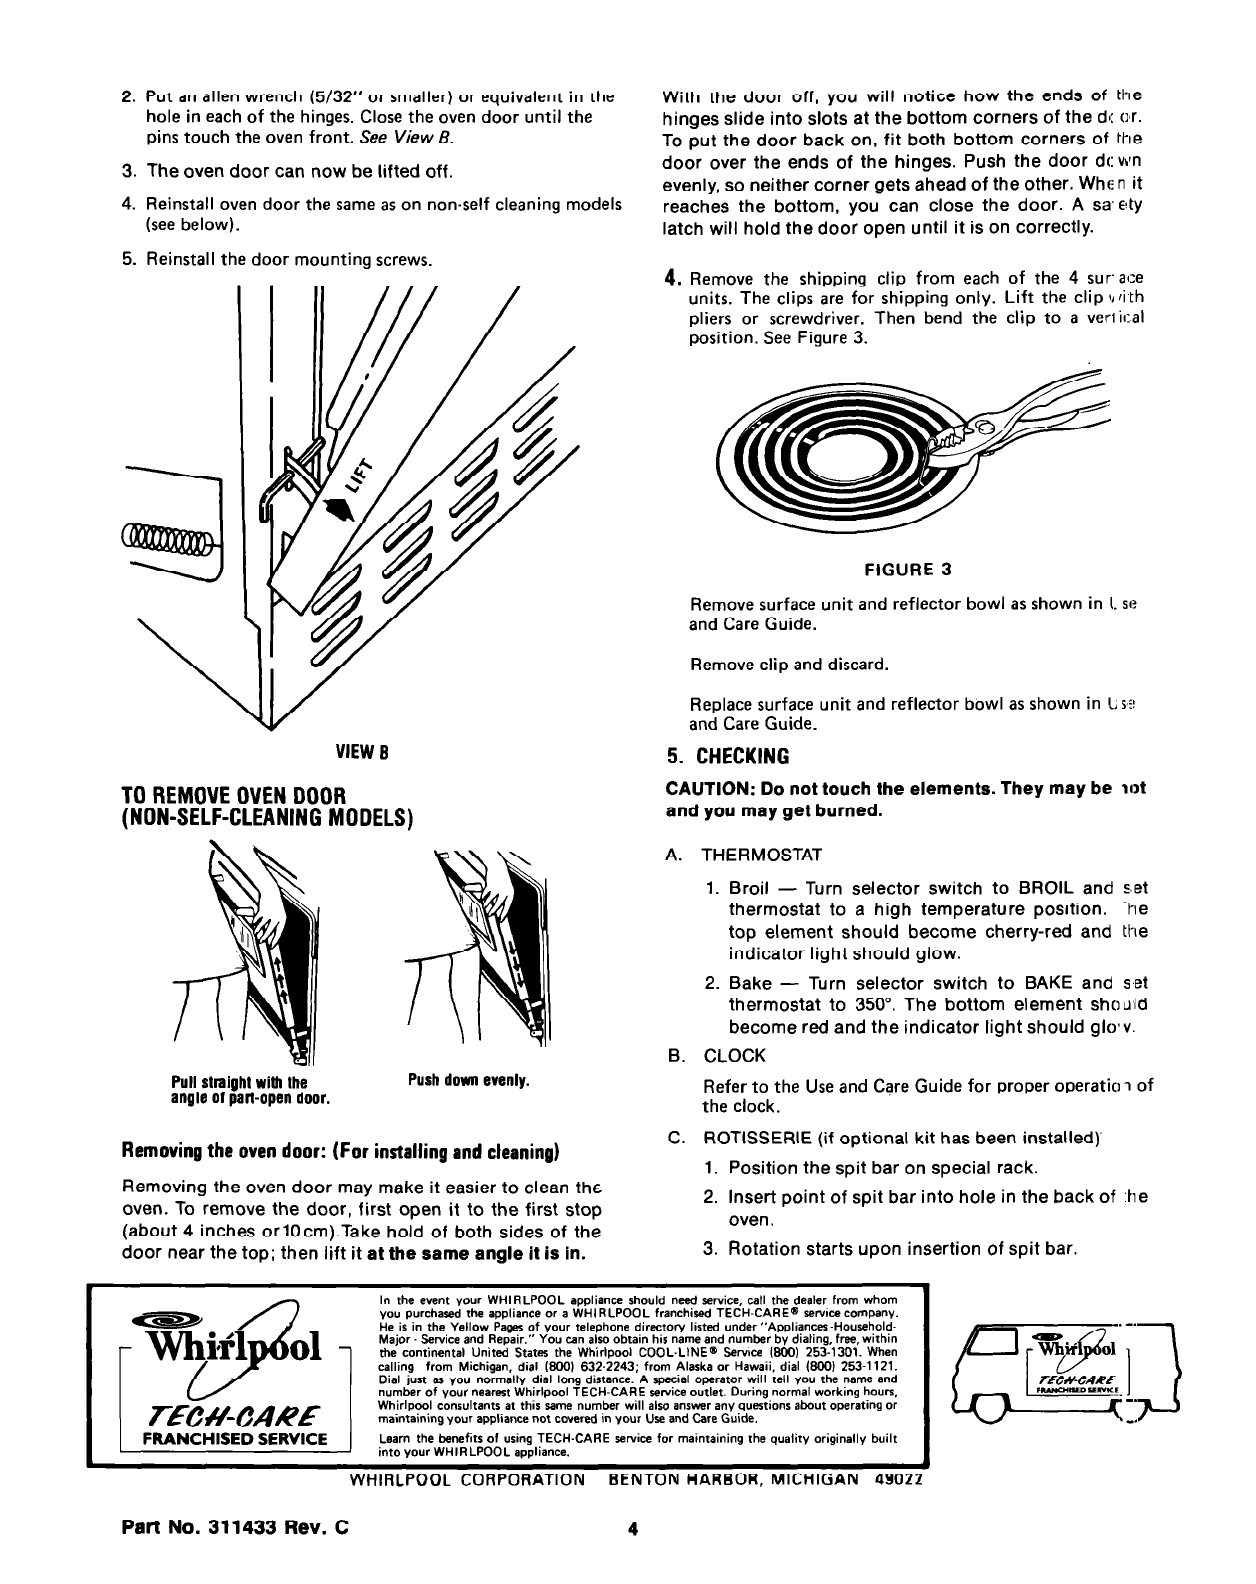
2. Put an allen wrench (5/32” or smaller) or equivalent in the
hole in each of the hinges. Close the oven door until the
pins touch the oven front. See View B.
3. The oven door can now be lifted off.
4. Reinstall oven door the same as on non-self cleaning models
(see below).
5. Reinstall the door mounting screws.
VIEW B
Replace surface unit and reflector bowl as shown in I, s’i!
and Care Guide.
5. CHECKING
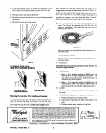
TO REMOVE OVEN DOOR
CAUTION: Do not touch the elements. They may be lot
(NON-SELF-CLEANING MODELS)
and you may get burned.
Pull straight with the
angle of part-open door.
Push down evenly.
Removing
the oven door:
(For
installing
and
cleaning)
Removing the oven door may make it easier to clean the
oven. To remove the door, first open it to the first stop
(about 4 inches orlOcm).Take hold of both sides of the
door near the top; then lift it at the same angle it is in.
With the door off, you will notice how the ends of the
hinges slide into slots at the bottom corners of the da: cr.
To put the door back on, fit both bottom corners of the
door over the ends of the hinges. Push the door dcwn
evenly, so neither corner gets ahead of the other. When it
reaches the bottom, you can close the door. A sa’ety
latch will hold the door open until it is on correctly.
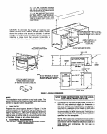
4. Remove the shipping clip from each of the 4 sur‘ace
units. The clips are for shipping only. Lift the clip II fi th
pliers or screwdriver. Then bend the clip to a verlical
position. See Figure 3.
FIGURE 3
Remove surface unit and reflector bowl as shown in I. se
and Care Guide.
Remove clip and discard.
A. THERMOSTAT
1. Broil - Turn selector switch to BROIL and set
thermostat to a high temperature position. ‘-he
top element should become cherry-red and the
indicator light should glow.
2. Bake - Turn selector switch to BAKE and set
thermostat to 350”. The bottom element shouid
become red and the indicator light should gio!v.
B. CLOCK
Refer to the Use and Care Guide for proper operatic 7 of
the clock.
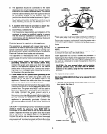
C. ROTISSERIE (if optional kit has been installed)’
1. Position the spit bar on special rack.
2. Insert point of spit bar into hole in the back of he
oven.
3. Rotation starts upon insertion of spit bar.
7EwvARE
FRANCHISED SERVICE
In the event your WHIRLPOOL appliance should need service, call the dealer from whom
YOU purchased the appliance or a WHIRLPOOL franchised TECH-CARE@ serwce company.
t& is. in the Yellow &es of your telephone directory listed under “Appliancer-Household-
Major. Service and Repair.” You can also obtain his name and number by dialing, free, within
the continental United States the Whirlpool COOL-LtNEe Serwce 1800) 253.1301. When
calling from Michigan, dial l600) 632.2243; from Alaska or Hawaii, dial @301 253-l 121.
Dial just as you normally dial long distance. A special operator will tell you the name and
number of your nearest Whirlpool TECH-CARE service outlet. During normal working hours.
Whirlpool consultants at this same number will also answer any questions about operating or
maintaining your appliance not covered in vow Use and Care Guide.
Learn the benefits of using TECH-CARE service for maintaining the quality originally built
into your WHIRLPOOL appliance.
WHIRLPOOL CORPORATION BENTON HARBOR, MICHIGAN 4902
Part No. 311433 Rev. C