


2
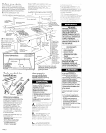
Remove cooktop burner grates
. and caps oackaae from
shipping box. Remove p?essure
regulator ond hardware package
from side of carton.
Property Damage
Lift entire cookiop up from cutout
when repositioning cooktop in
counterlop opening.
Failure to do so could scratch
countertop.
lnse: the cooktop into the countertop
cutout. Center the cooktop rn the
cutout. Check that the front of the
cookiop is parallel to the front edge
of the countertop Check that all
required clearances are met If
cooktop is not properly posltioned,
lift the entire cooktop out of opening
to moke adjustments so that foam
sealrng strrp can seal properly
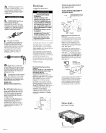
4.
instoll the pressure regulator wth the
arrow on the regulator pointing up
toward the unit and in position
where you can reach ihe access
cop.
Fire Hazard
Do Not make connection too tight
The regulator is die cost.
Overtightening may crack regulator
resulting in a gas leak and possible
fire or explosion.
5
Assimble the flexrble connector from
the Qas supply pipe to the pressure
regulator in this order manual shuioff
valve. 112 nrpple. l/2” adapter,
flexible connector, l/2’ adapter
and l/2” nipple
All connections must be wrench
lightened.
6.
Use pope-Joint compound made for
use wrth NATURAL and L P Qas to seal
all gas connections If flexible
connectors are used, be certarn
connecton are not kinked
7
Open the shutoff valve in the
n
gas supply line. Walt 0 few
minutes for the gas to move
through the QOS line
Fire Hazard
Do Not use an open flame to test for
leaks from gas connections.
Checking for leaks with o flame
may result in 0 fire, explosion or
personal injury.
8
Use o brush and liquid
. detergent to test all gas
connectrons for leaks Bubbles
around the connectrons WIII indicate
o leak. If a leak appears, shut off gas
valve controls and adlust connectors
Then check connectlons ogarn
NEVER TEST FOR GAS LEAKS WITH A
MATCH OR OTHER OPEN FLAME.
Clean oil the detergent solutron from
cooktop.
grounded outlet
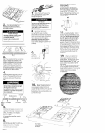
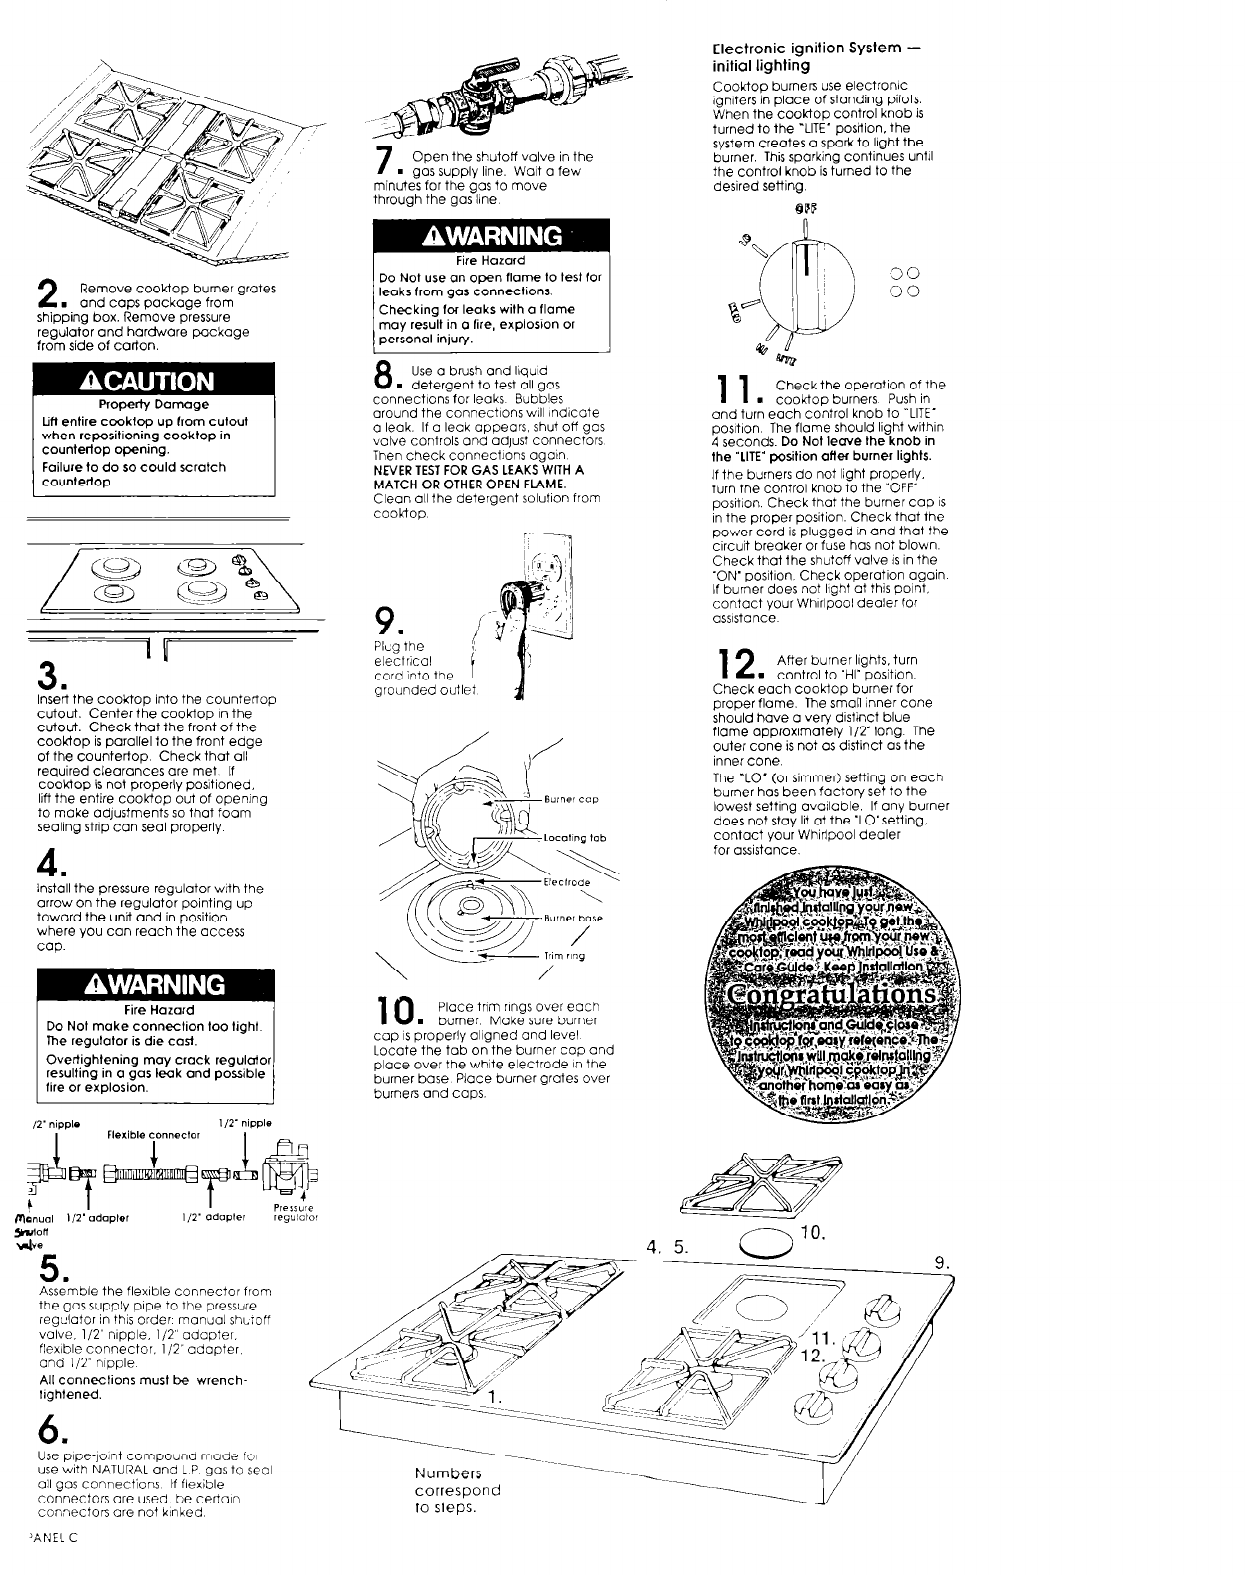
10
Place trim rings over each
. burner Make sure burner
cap IS properly OlIQned and level
Locate the tab on the burner cap and
place over the white electrode rn the
burner base Place burner grates over
burner? and cops.
Electronic ignition System -
initial lighting
Cooktop burners use eleCtrOniC
ignrters 1-1 place of StOndinQ pilots.
When the cooktop control knob is
turned to the ‘LITE’ posrtion. the
system creates a spark to lrght the
burner. This sparking COniinUeS until
the control knob is turned to the
desired setting.
11
Check the operation of the
. cooktop burners Push in
and turn each control knob lo “NE’
posItron The flame should light within
4 seconds. Do Not leave the knob in
the IITE’ position after burner lights.
If the burners do not light property.
turn the control knob to the “OFF”
positIon. Check that the burner cop is
In the proper position. Check that the
power cord is plugged In and that the
circuit breaker or fuse has not blown.
Check that the shutoff valve is in the
‘ON’ positron. Check
operotlon again
If burner does not IkQht at this point.
contact your Whrrlpool deoler for
assrstance
12
After burner lights. turn
- control to ‘HI” position.
Check each
cooktop
burner for
proper flame. The small inner cone
should have o very drstinct blue
flame opprodmotety l/Z’ long. The
outer cone is not as distinct OS the
inner cone.
The ‘LO’ (or simmer) sening on each
burner has been factory set to the
lowest settrng ovalIable. If any burner
does not stay lit at the ‘LO’setting.
contact your Whirlpool dealer
for assistance.
Numbers
correspond
to sleps.
‘ANEL C