


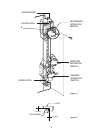
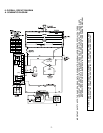


2. PRECAUTIONS ON INSTALLATION
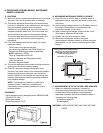
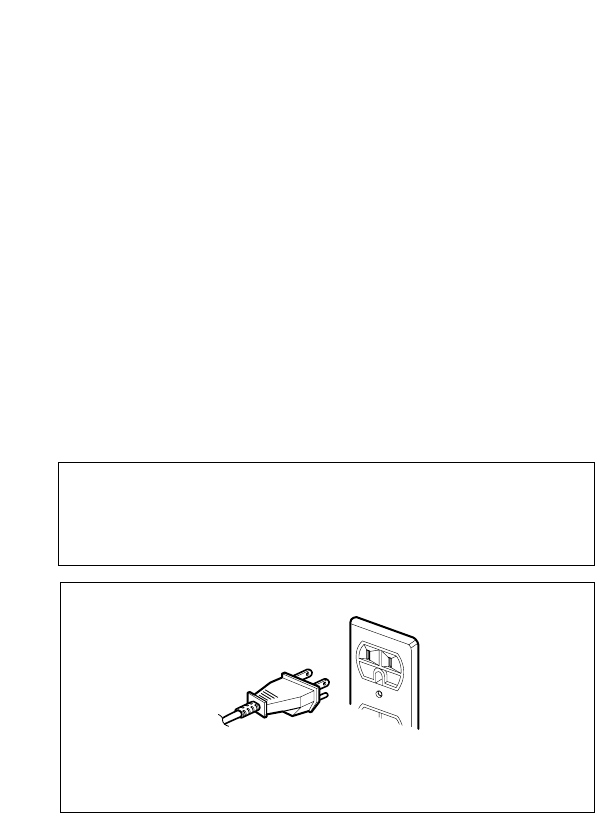
(Figure 2)
A. Plug the power supply cord into a 120 V AC, 60 Hz,
single-phase power source with a capacity of at least 20
amperes.
B. Since the unit weights about 36.5 lbs, be sure to place it
on a sturdy and flat surface.
C. Avoid placing the unit in a location where there is direct
heat or splashing water.
D. Place the unit as far away as possible from TV, radio,
etc. to prevent interference.
CAUTION
3. GENERAL PRECAUTIONS IN USE
A. Never operate the unit when it is empty. Operating the
oven with no load may shorten the life of the magnetron.
Whenever cooking dry foods (dried fish, bread, etc.) or a
small amount of food, be sure to put a glass of water
into the cooking compartment. The turntable tray may
become hot after operating, be careful when touching it.
B. Aluminum foil should be avoided because it will disrupt
cooking and may cause arcing. However, small pieces
may be used to cover some parts of food to slow the
cooking. Any aluminum foil used should never be closer
than 2.5 cm to any side wall of the oven.
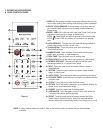
4. TRIAL OPERATION
After installation, the following sequences and results
should be checked carefully.
A. Put a container filled with water (about 1 liter) into the
oven, and close the door tightly.
B. Touch the STOP/CLEAR and the COOK TIME keys.
C. Set cooking time for 10 minutes by touching “1”
and then “0” three times. “1000” appears in the
display window.
D. Touch the START key.
Make sure the cavity light comes on. The unit will begin
cooking and the display window will show the time
counting down by seconds.
E. After about 5 minutes, make sure the primary interlock
switch, the secondary interlock switch and the interlock
monitor and oven lamp switch operate properly by
opening and closing the door several times. Touch the
START key each time the door is closed.
F. Continue operating the unit. Four long beep sound
signal is heard when the time is up. The unit will shut off
automatically.
G. Confirm the water is hot.
H. Finally, measure the output power according to
“POWER OUTPUT MEASUREMENT” on page 12.
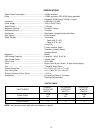
5. FEATURES AND SPECIFICATIONS
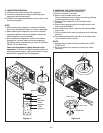
A. The safety systems incorporated in this model are:
(1) Primary interlock switch
(2) Secondary interlock switch
(3) Interlock monitor switch
(4) Choke system
(5) Thermostat
(Note: This thermostat located on the oven cavity will
open and stop the unit from operation only if a high
temperature is reached, such as, a fire created by
overcooking food.)
B. Any one of 10 power output levels ranging 120W to
1200W can be selected by the touch control and
electronic computer system.
C. Cooking time can be displayed on the digital readout.
D. Three different cooking stages can be set. The oven
remembers three cooking stages and changes from one
cooking stage to another. This is made possible with the
memory function of the microprocessor.
-5-
This unit is equipped with a 3-prong plug for your safety.
If the wall outlet is a grounded 3-hole type, the unit will
be grounded automatically.
Three-Pronged(Grounding)
Plug
Figure 2
Properly Polarized and
Grounded
Outlet