17
Oven Light
(on some models)
The oven light is a standard 40-watt appliance bulb. It will come
on when the oven door is open. It will not work during the Self-
Cleaning cycle (on some models). On some models, when the
oven door is closed, press OVEN LIGHT to turn it on or off.
Before replacing, make sure the oven and cooktop are cool and
the control knobs are off.
To Replace:
1. Unplug range or disconnect power.
2. Turn the glass bulb cover in the back of the oven
counterclockwise to remove.
3. Turn bulb counterclockwise to remove from socket.
4. Replace bulb and bulb cover by turning clockwise.
5. Plug in range or reconnect power.
Oven Door
For normal range use, it is not suggested to remove the oven
door. However, if removal is necessary, make sure the oven is off
and cool. Then, follow these instructions. The oven door is heavy.
Before Removing:
1. Use a putty knife or screwdriver and insert it at the bottom
corner of the door stop clip.
2. Pry door stop clip free and remove from front frame hinge
slot. Be certain not to scratch finish.
3. Repeat procedure for other door stop clip.
To Remove:
1. Open the oven door. Insert door removal pins, included with
your range, into both hinge hangers. Do not remove the pins
while the door is removed from the range.
2. Slowly close the door until it rests against the door removal
pins.
3. Grasp the door on the sides with your fingers on the front of
the door and your thumbs on the inside surface.
4. Pull door straight up, then toward you. Hinge hangers will
slide out of front frame hinge slot. Do not remove door
removal pins until the door is replaced on the range.
To Replace:
1. Grasp the door on the sides with your fingers on the front of
the door and your thumbs on the inside surface.
2. Hold oven door so that the top edge of each hinge hanger is
horizontal. Insert hinge hangers into the front frame hinge
slots.
3. Tilt top of door toward range. Slide hinge hangers down onto
front frame support pins. Make sure the hinge hangers are
fully seated and engaged on the support pins.
4. Insert the door stop clip with the angular surface at the top of
the frame hinge slot, then push in the bottom of the clip until
flanges are flush with the front frame.
5. Open the door completely and remove the door removal pins.
Save door removal pins for future use.
6. Close the door.
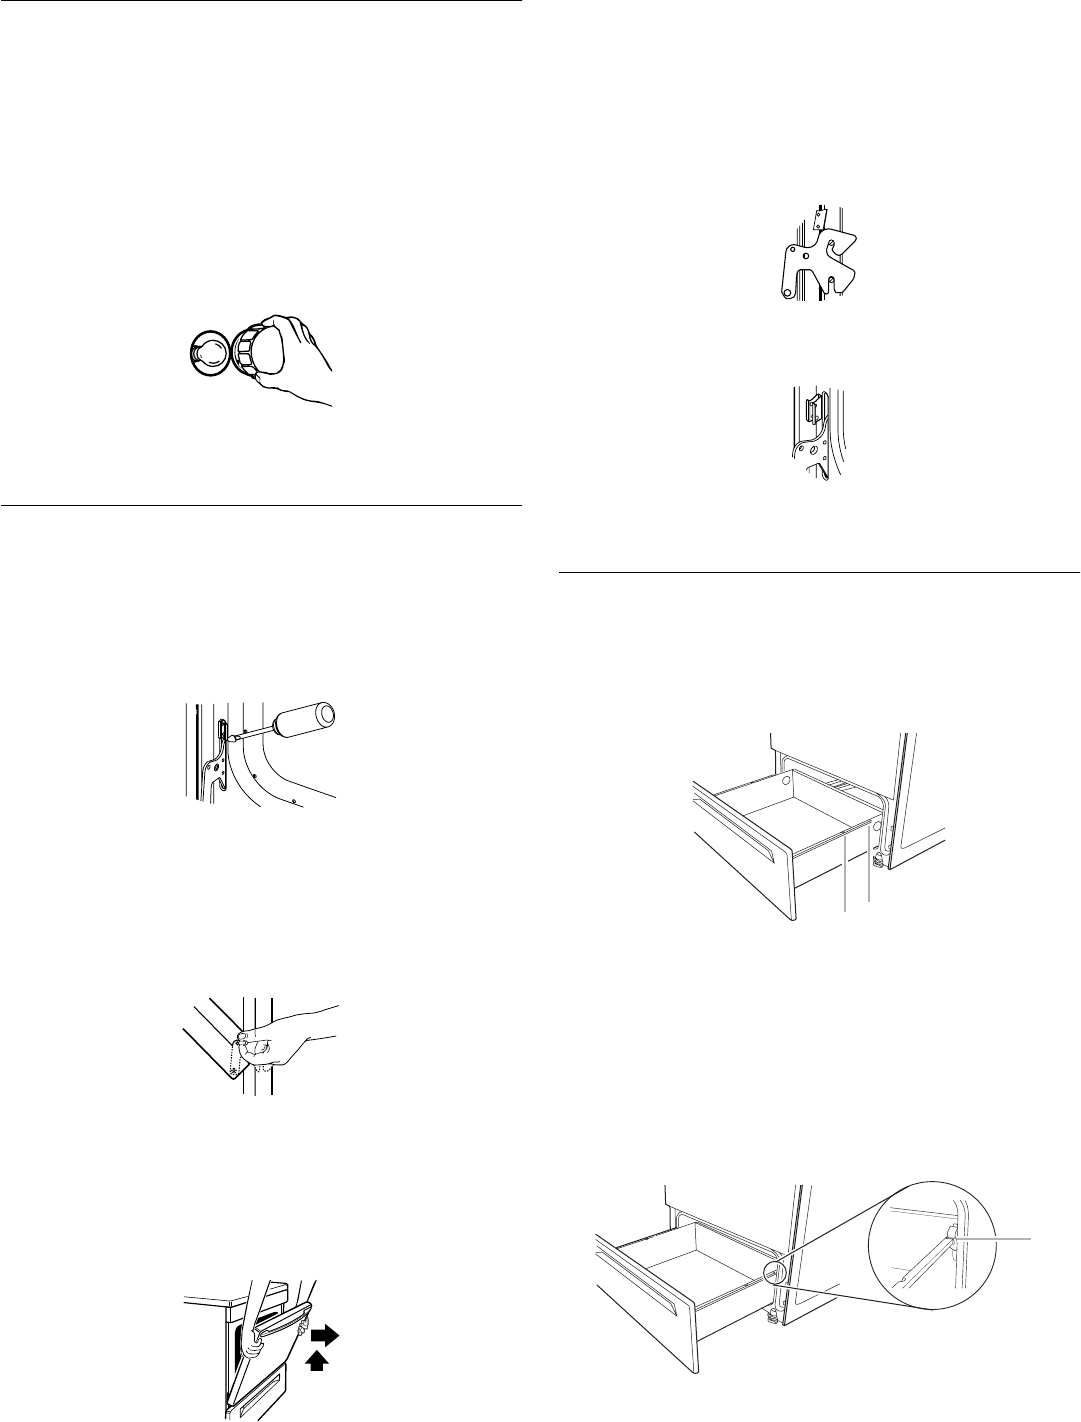
Storage Drawer
The storage drawer can be removed. Before removing, make sure
drawer is cool and empty.
To Remove:
1. Pull the storage drawer straight back past the drawer stop
notch and the end of the side rails.
2. Lift up the back of the drawer and pull the drawer out.
To Replace:
1. Lift up the back of the drawer and place it inside the range in
its fully forward position.
2. Lift up the front of the drawer to a level position.
3. Slowly push the drawer into the range until the drawer side
rails engage with the gap in the drawer glides.
A.Drawer stop notch
B.End of side rail
A. Engage drawer glide
A
B


