


INSTALLATION - 70CM
METHOD 1: WITHOUT HOUSING
UNIT(BETWEEN 2 BASE UNITS)
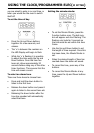
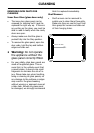
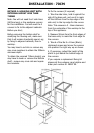
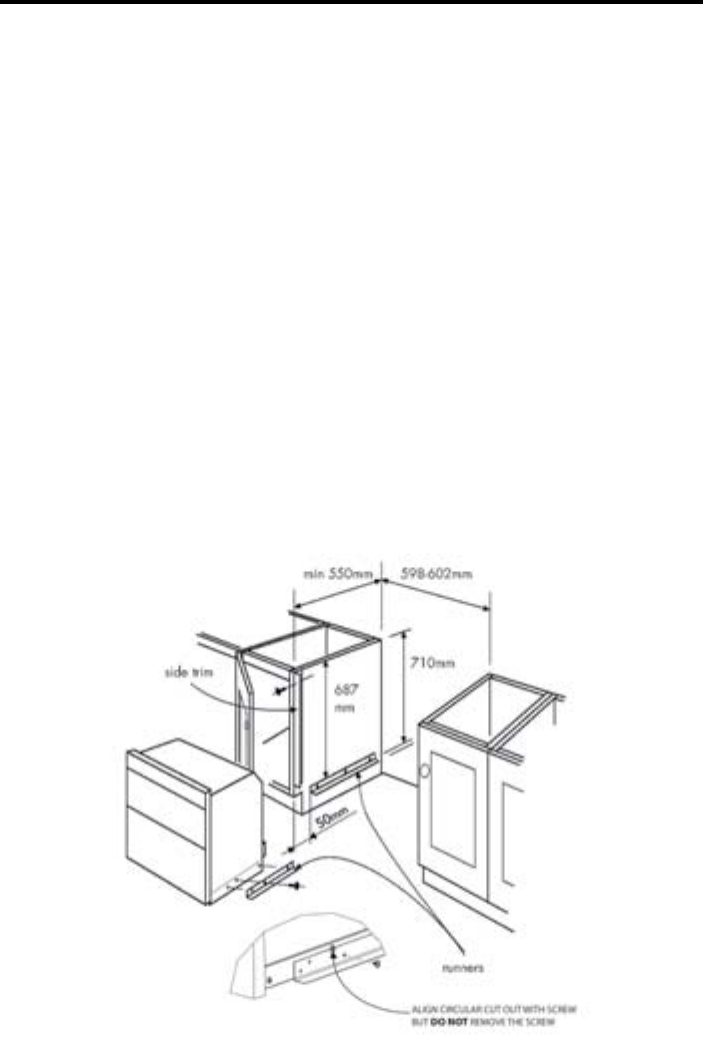
Before installing the appliance, check the
internal dimensions as shown.
The space for the appliance must be clear
of obstruction. You may have to cut into
or remove any rear cross members to
obtain the 550mm minimum depth.
The Fixing Kit
Shouldyouneedareplacementxingkit
please call the customer care helpline and
order part number: 01 28287 00.
Inthexingkityouwillnd2sidetrims
(687mm long) and 4 runners (420mm
long).Thexingscrewsareinapolythene
bag in the oven.
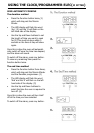
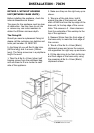
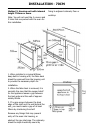
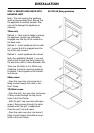
1. Take the 6 No 8 x 12mm (silver) self
tapping screws from the polythene bag,
andusethemtotonerunnertoeach
side of the appliance.
2. Make sure they are the right way up as
shown.
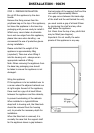
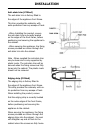
3. Take one of the side trims, hold it
against the side of the base unit, and
mark off 687mm from the top edge of the
base unit, to the top edge of the runner.
Note: This ensures a 5 - 8mm clearance
from the underside of the worktop to the
top of the appliance.
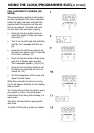
4. Measure 50mm from the front edge of
the base units, to mark the front edge of
the runners.
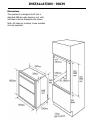
5. Take 6 of the No 8 x 12mm (Black)
chipboard screws and screw the runners
into opposition the right way up as shown.
6.Fitthesidetrimstobeushtothetop
and front edges of the base units, using
the remaining 6 No 8 x 12mm (Black)
chipboard screws.