Using Your Range
Continued
Cookware
Pans should be the same size or
larger than the surface unit to prevent
boil-overs and hot handles.
Use only flat-bottomed utensils.
Flat bottoms allow maximum contact
between the pans and surface units for
fast, even cooking. Pans with uneven
bottoms or with raised patterns on the
bottoms are not suitable. Do not use
trivets, woks with skirts, or can-
ners with concave or ridged
bottoms.
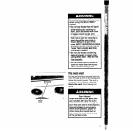
To check your cookware for flatness,
place a straight-edge across the bottom
of each piece. Move the straight-edge
around. If light shows anywhere
between the pan and the straight-edge,
the pan is not flat. Do not use it.
See the Cooking Guide for additional
cookware information.
Solid elements stay hot for a long
time. Do not use the HI setting for
long periods of time or leave pans
on hot elements when cooking is
done. Burned food and damage to
the cookware could result.
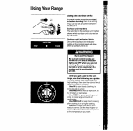
Solid element surface units
Before placing a pan on solid element
surface units for the first time, heat on
HI setting for five minutes. The surface
units will grve off smoke as the protec-
tive coating, applied at the factory,
finishes bonding to the surface.
Solid element surface units are made
of heavy cast-iron to provide even cook-
ing. Each surface unit has a built-in pro-
tective limiter as a safety feature. The
limiter senses uneven cooking temper-
atures and automatically reduces the
heat level. The limiter will sense uneven
heat when a pan boils dry or when a
pan is removed and the surface unit is
left on. The heat level may also be
reduced automatically if the bottom of
the pan is not flat or if the pan is too
large or too small for the element. This
will result in longer cooking times.
Solid elements hold heat longer than
conventional surface units. For best
cooking results, use a high setting for
only a very short period of time. Then
use a lower setting to complete the
cooking. You may want to turn the solid
element surface unit OFF a few min-
utes before you finish cooking.
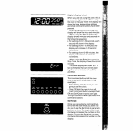
The electronic oven controls
There are three parts in the oven control
section:
-The digital display.
-The command buttons.
-The Set Knob.
Instructions for each oven control are
covered on the followrng pages. Read
them carefully.
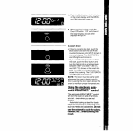
When you first plug in the range, the
display will show four flashing 8’s. If,
after you set the clock (page 8) the dis-
play again shows four flashing 8’s; your
electricity was off for a while. Reset
the clock.
6


