


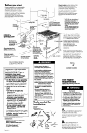
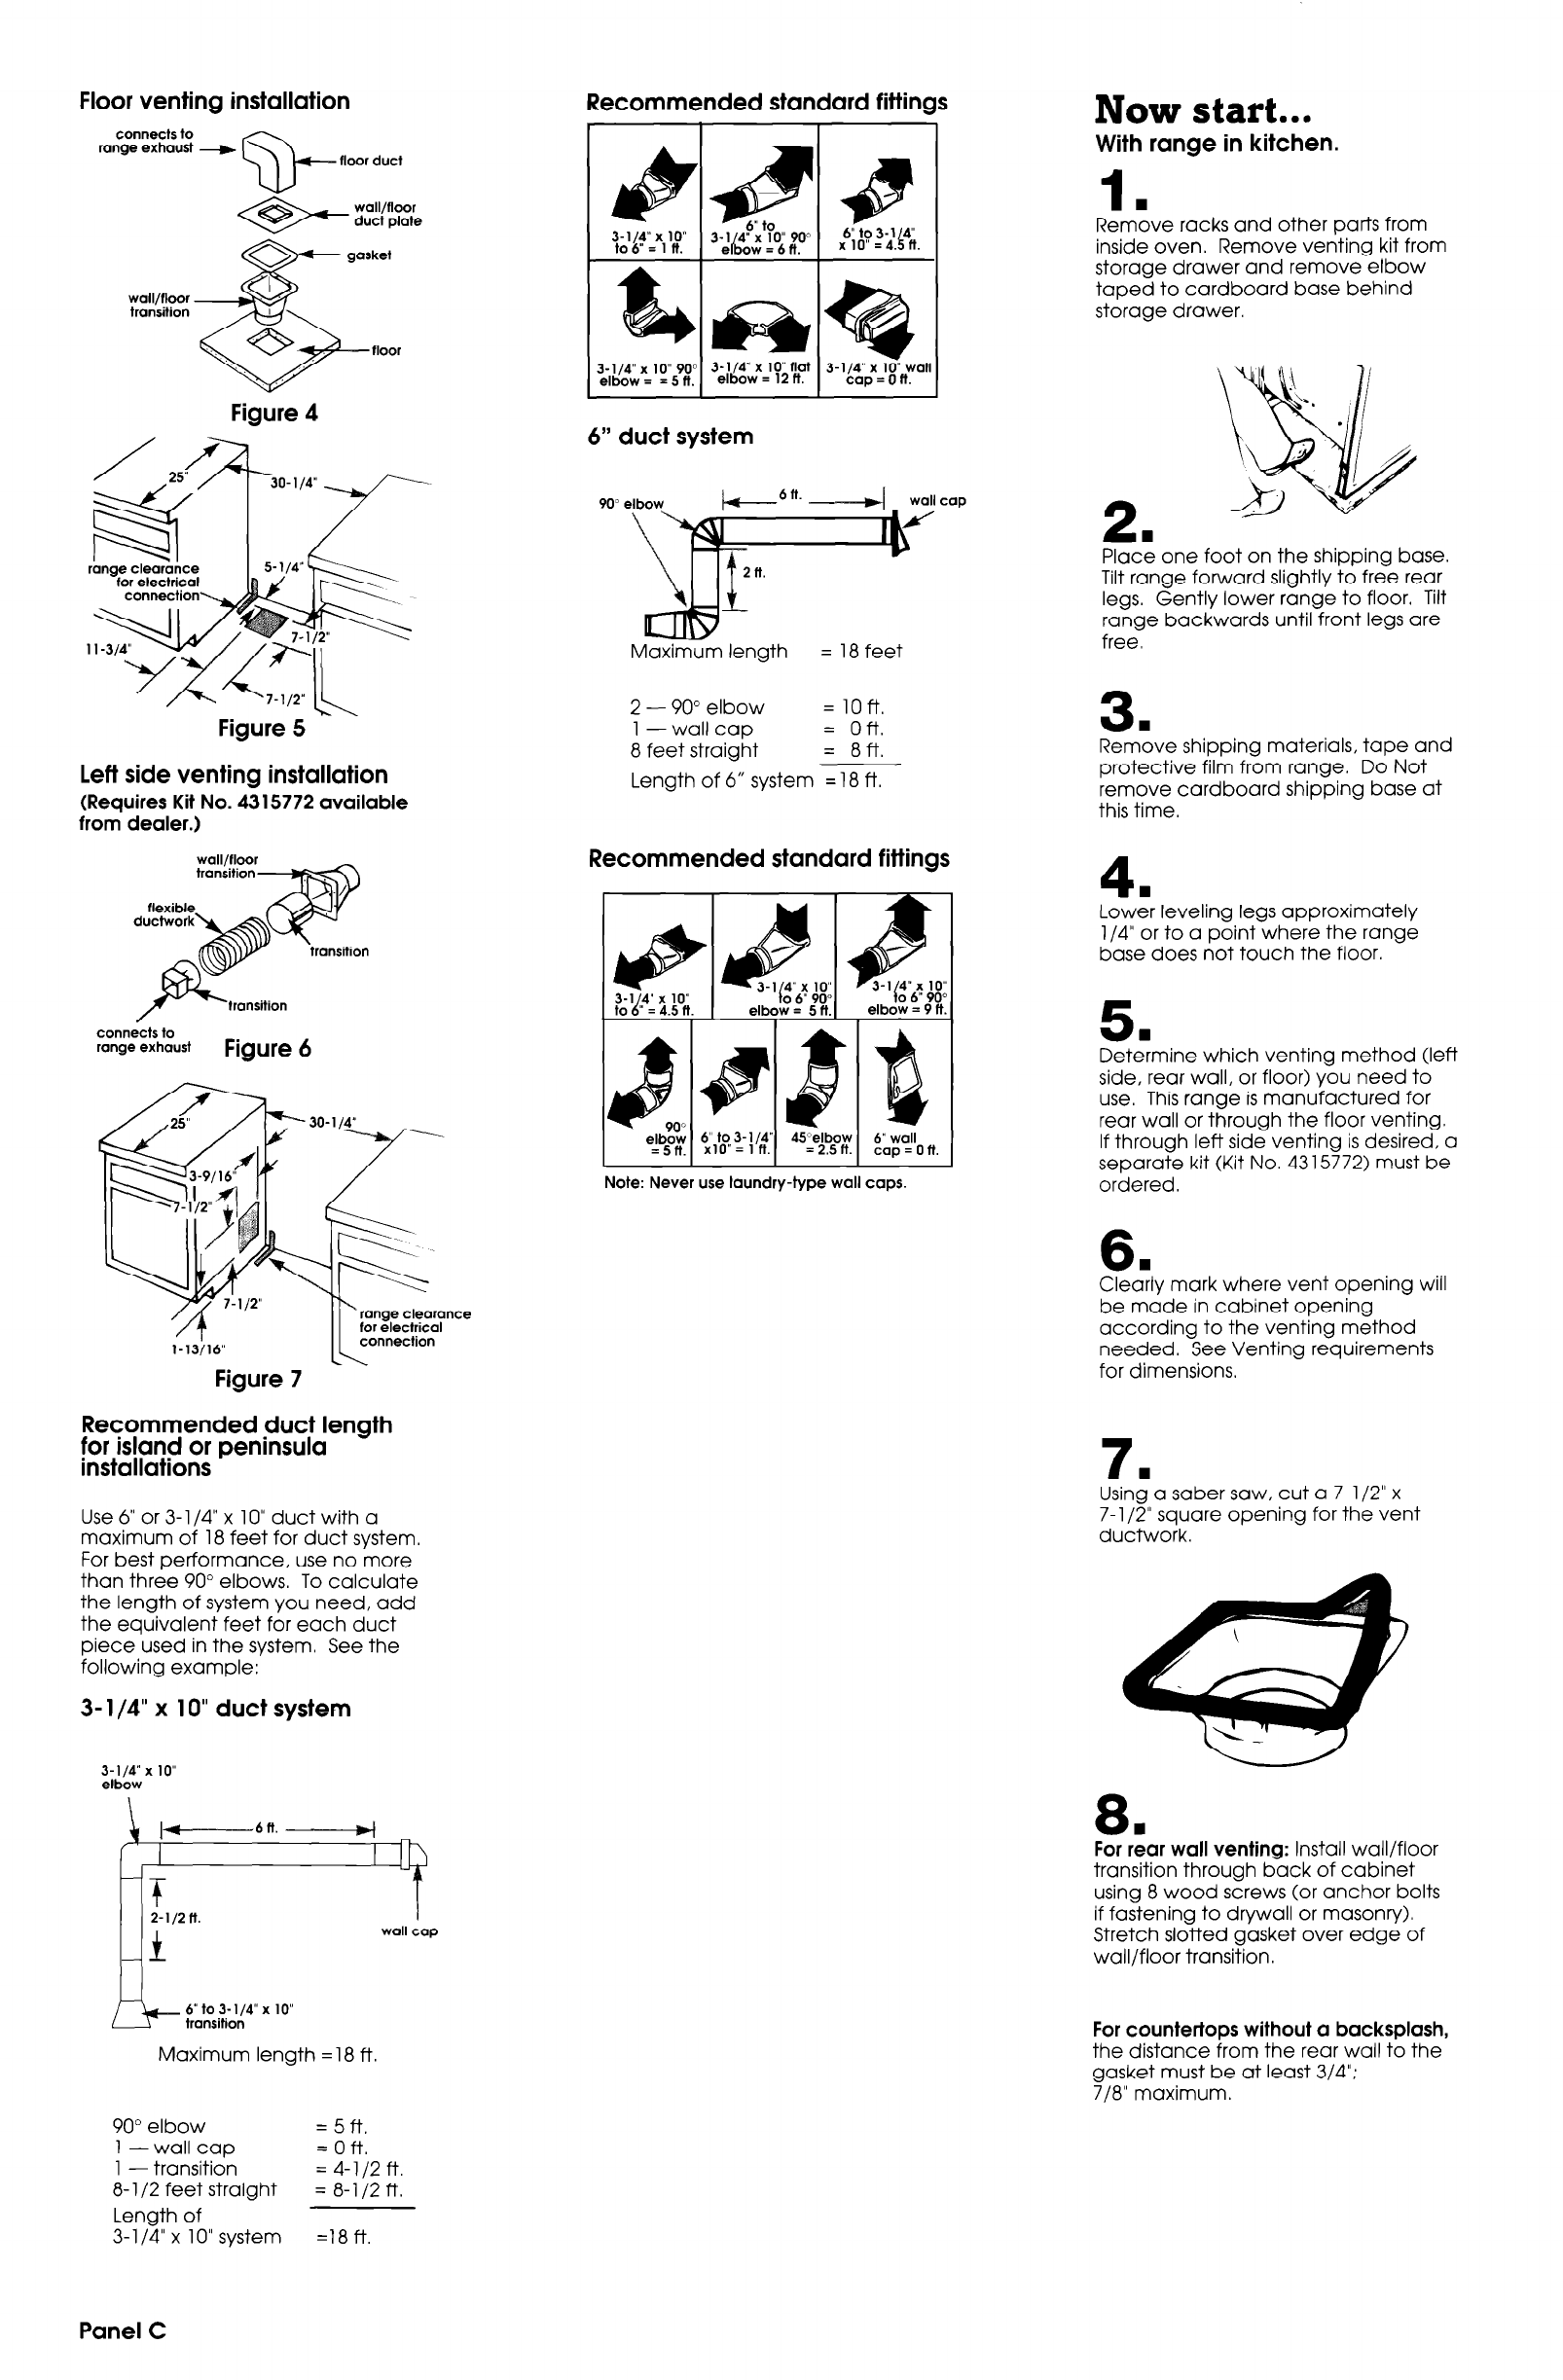
Floor venting installation
Recommended standard fittings
connects to
range exhaust +
Q-
floor duct
wall/floor
transition
Figure 4
Figure 5
Left side venting installation
(Requires Kit No. 43 15772 available
from dealer.)
connects to
range exhaust
Figure 6
nce
Figure 7
Recommended duct length
for island or peninsula
installations
Use 6” or 3-l /4” x 10” duct with a
maximum of 18 feet for duct system.
For best performance, use no more
than three 90” elbows. To calculate
the length of system you need, add
the equivalent feet for each duct
piece used in the system, See the
following example:
3- l/4” x 10” duct system
3-l/4” x 10”
elbow
ET+- transition
6” to 3-l/4” x 10”
Maximum length = 18 ft.
3-l/4” x 10” 900 3-l/4” x 10” flat
3-l/4” x 10” wall
elbow= =5R.
elbow = 12 ft.
cap=Oft.
I
I
I
I
6” duct system
90” e
cap
Maximum length = 18 feet
2-9O”elbow = loft.
1 -wall cap
= Oft.
8 feet straight
= 8ft.
Length of 6” system = 18 ft.
Recommended standard fittings
I
I I
I
Note: Never use laundry-type wall caps.
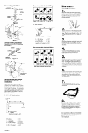
Now start...
With range in kitchen.
1.
Remove racks and other parts from
inside oven. Remove venting kit from
storage drawer and remove elbow
taped to cardboard base behind
storage drawer.
2.
Place one foot on the shipping base.
Tilt range forward slightly to free rear
legs. Gently lower range to floor. Tilt
range backwards until front legs are
free.
3.
Remove shipping materials, tape and
protective film from range. Do Not
remove cardboard shipping base at
this time.
4.
Lower leveling legs approximately
l/4” or to a point where the range
base does not touch the floor.
5
Det:mine which venting method (left
side, rear wall, or floor) you need to
use. This range is manufactured for
rear wall or through the floor venting.
If through left side venting is desired, a
separate kit (Kit No. 4315772) must be
ordered.
6.
Clearly mark where vent opening will
be made in cabinet opening
according to the venting method
needed. See Venting requirements
for dimensions.
7
Usin:a saber saw, cut a 7-l /2” x
7-l /2” square opening for the vent
ductwork.
8.
For rear wall venting: Install wall/floor
transition through back of cabinet
using 8 wood screws (or anchor bolts
if fastening to drywall or masonry).
Stretch slotted gasket over edge of
wall/floor transition.
For countertops without a backsplash,
the distance from the rear wall to the
gasket must be at least 3/4”;
7/8” maximum.
90” elbow = 5ft.
1 -wall cap = Oft.
1 - transition
= 4-l/2 ft.
8- l/2 feet straight = 8-l/2 ft.
Length of
3- l/4” x 10” system =18 ft.
Panel C