


14
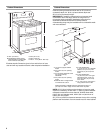
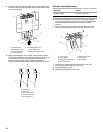
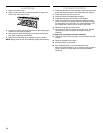
Level Range
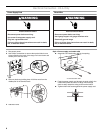
1. Place oven rack in oven.
2. Place level on oven rack and check levelness of range, first
side to side; then front to back.
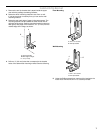
3. If range is not level, pull range forward until rear leveling leg is
removed from the anti-tip bracket.
4. Use wrench to adjust leveling legs up or down until range is
level. Push range back into position.
5. Check that rear leveling leg is engaged in anti-tip bracket.
NOTE: Range must be level for satisfactory baking performance.
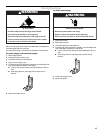
Complete Installation
1. Check that all parts are now installed. If there is an extra part,
go back through the steps to see which step was skipped.
2. Check that you have all of your tools.
3. Dispose of/recycle all packaging materials.
4. Check that the range is level. See “Level Range.”
5. Use a mild solution of liquid household cleaner and warm
water to remove waxy residue caused by shipping material.
Dry thoroughly with a soft cloth. For more information, read
the “Range Care” section of the Use and Care Guide.
6. Read the range Use and Care Guide.
7. Turn power on. Turn on surface burners and oven. See the
Use and Care Guide for specific instruction on range
operation.
If range does not operate, check the following:
■ Household fuse is intact and tight; or circuit breaker has not
tripped.
■ Range is plugged into an outlet.
■ Electrical supply is connected.
■ See “Troubleshooting” in the Use and Care Guide.
When the range has been on for 5 minutes, check for heat. If
range is cold, turn off the range and contact a qualified
technician.