


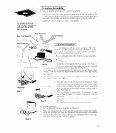
Step 1
Step 2
/’
Step 3
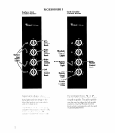
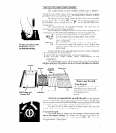
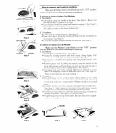
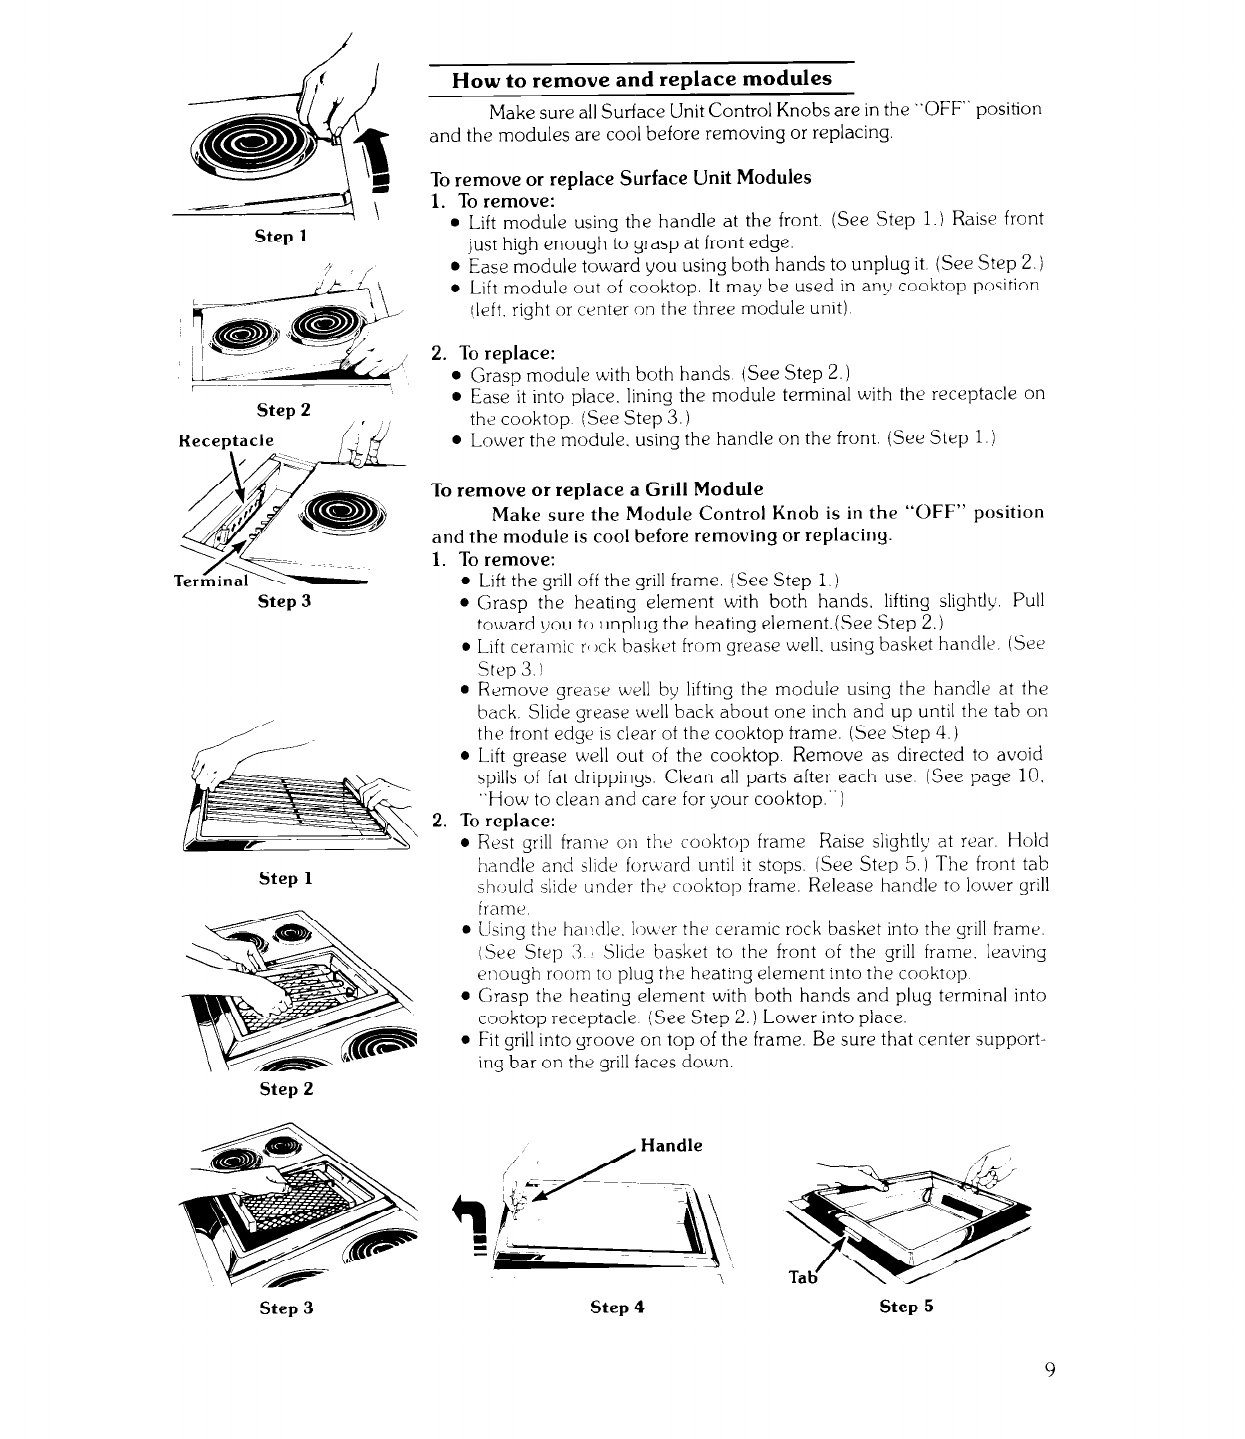
How to remove and replace modules
Make sure all Surface Unit Control Knobs are in the “OFF”
position
and the modules are cool before removing or replacing.
To remove or replace Surface Unit Modules
1. To remove:
l
Lift module using the handle at the front. (See Step 1.) Raise front
just high enough to grasp at front edge.
l
Ease module toward you using both hands to unplug it. (See Step 2.)
l
Lift module out of cooktop. It may be used in any cooktop position
(left. right or center on the three module unrt)
2. To replace:
l
Grasp module with both hands (See Step 2. )
* Ease it into place, lining the module terminal with the receptacle on
the cooktop (See Step 3.)
l
Lower the module. using the handle on the front. (See Step 1.)
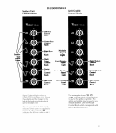
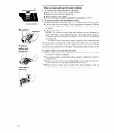
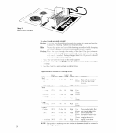
To remove or replace a Grill Module
Make
sure the Module Control Knob is in the “OFF” position
and the module is cool before removing or replacing.
1. To remove:
l
Ljft the grill off the grill frame. (See Step 1.)
0 Grasp the heating element with both hands, lifting slightly. Pull
toward you to unplug the heating element.(See Step 2.)
l
Lrft ceramic rc Irk basket from grease well. using basket handle. (See
Step 3.1
Remove grease well by lifting the module using the handle at the
back. Slide grease well back about one inch and up until the tab on
the front edge is clear of the cooktop frame. (See Step 4.)
Lift grease well out of the cooktop. Remove as directed to avoid
spills of fat drippings. Clean all parts after each use. (See page 10.
“How to clean and care for your cooktop.“)
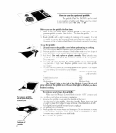
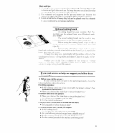
2. To replace: ,
l
Rest grill frame on rile cooktop frame Raise slightly at rear. Hold
h,3ndle and slide for\Lard until it stops. (See Step 5.) The front tab
~l~ould slide under the cooktop frame. Release handle to lower grill
Frame
Step 1
Step 2
l
Using the har!tile. lower the ceramic rock basket into the grill frame.
(See Step 13 Slide basket to the front of the grill frame, ieaving
enough room to plug the heating element into the cooktop
l
Grasp the heating element with both hands and plug terminal into
cooktop receptacle (See Step 2. ) Lower into place.
l
Fit grill into groove on top of the frame. Be sure that center support-
ing bar on the grill faces down.
Step 3
Step 4 Step 5