


9
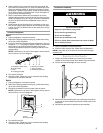
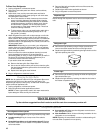
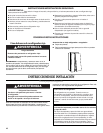
Removing and Replacing Ice Storage Bin
1. Hold the base of the storage bin with both hands and press
the release button to lift the storage bin up and out.
NOTE: It is not necessary to turn the ice maker OFF when
removing the storage bin. The ice maker will not produce ice
when the storage bin is removed.
2. Replace the storage bin in the door and push down to make
sure it is securely in place.
Water Filtration System
NOTE: Do not use with water that is microbiologically unsafe
or of unknown quality without adequate disinfection before
or after the system.
The Water Filter Status Light
The filter status light, located on the control panel above the ice
and water dispensers, indicates when to change the water filter.
The light will change from green to yellow. This means that it is
almost time to change the filter. It is recommended that you
replace the filter when the status light changes to red OR when
water flow to your water dispenser or ice maker decreases
noticeably.
After changing the water filter, reset the filter status light by
pressing and holding the RESET button for 3 seconds. The
indicator light will change from red to green when the system is
reset.
NOTE: It is possible to reset the filter status only when the
indicator light is red.
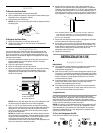
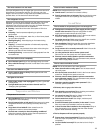
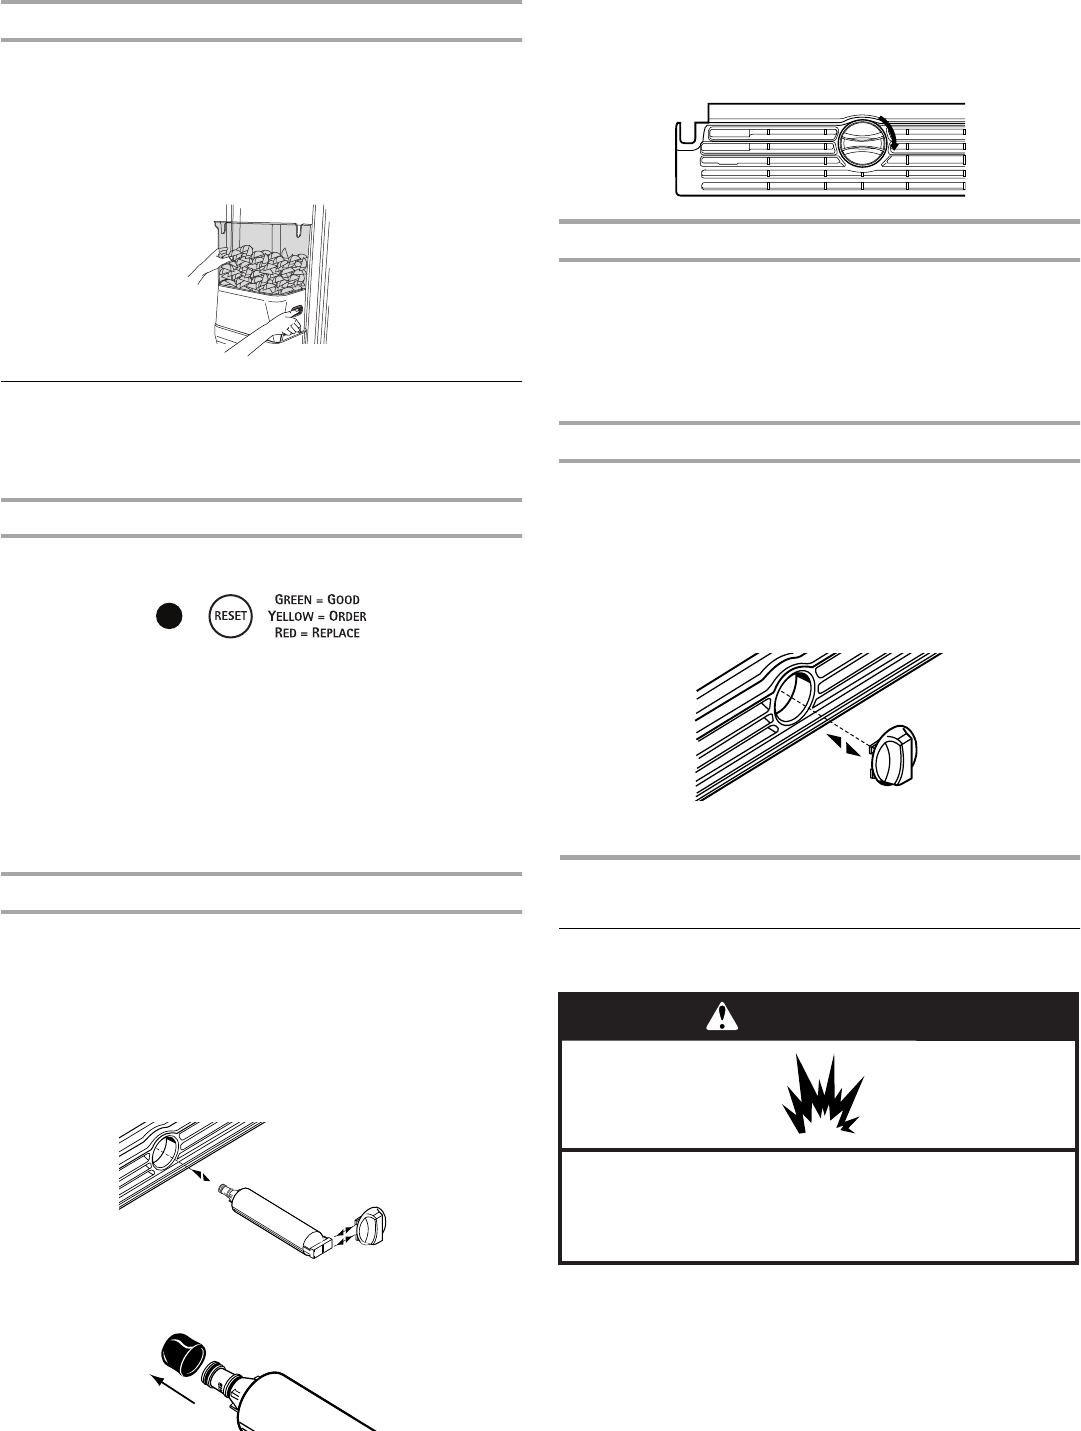
Replacing the Water Filter
1. Locate the water filter cap in the base grille. Rotate the cap
counterclockwise to a vertical position and pull the cap and
filter out through the base grille.
NOTE: There will be water in the filter. Some spilling may
occur.
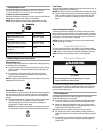
2. Remove the cap by sliding it off the end of the used water
filter. The cap will slide to the left or right.
IMPORTANT: Do not discard the cap. It is part of your
refrigerator. Keep the cap to use with the replacement filter.
3. Take the new water filter out of its packaging and remove
protective cover from o-rings.
4. Slide the cap onto the new filter. See illustration in Step 2.
5. With cap in the vertical position, push the new filter into the
base grille until it stops. Rotate the cap clockwise to a
horizontal position. Flush the water system. See “Flushing the
Water System After Replacing Filter.”
Flushing the Water System After Replacing Filter
Use a sturdy container to depress the water dispenser bar until
the water begins to flow. Flush the water system by dispensing
and discarding 2 to 3 gal. (8 to 12 L) of water. Cleaning the system
will take approximately 6 to 7 minutes and will help clear air from
the line. Additional flushing may be required in some households.
NOTE: As air is cleared from the system, water may spurt out of
the dispenser.
Using the Dispenser Without the Water Filter
You can use the dispenser without a water filter. Your water will
not be filtered.
1. Remove the water filter.
2. Slide the cap off the end of the filter. With the cap in the
vertical position, replace the cap into the base grille until it
stops.
IMPORTANT: Do not discard the cap. It is part of your
refrigerator. Keep the cap to use with the replacement filter.
3. Turn the cap clockwise to a horizontal position. The cap might
not be even with the base grille.
REFRIGERATOR CARE
Cleaning
Both the refrigerator and freezer sections defrost automatically.
However, clean both sections about once a month to prevent
odors from building up. Wipe up spills immediately.
IMPORTANT: Because air circulates between both sections, any
odors formed in one section will transfer to the other. You must
thoroughly clean both sections to eliminate odors. To prevent
odor transfer and drying out of food, wrap or cover foods tightly.
WARNING
Explosion Hazard
Use nonflammable cleaner.
Failure to do so can result in death, explosion, or fire.