


9
4. Use saber or keyhole saw to cut the circular vent opening.
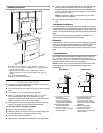
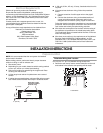
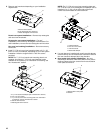
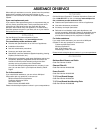
Style 3 - Cut Openings for 7" (17.8 cm) Round Vent
To make a circular vent openings on the underside of the
cabinet top and bottom:
1. Mark a centerline on the underside of the top of cabinet.
2. Mark a line 5" (12.7 cm) from the back wall on the underside
of the top and bottom of cabinet.
3. Use a compass or a circle template to draw a circle with a
diameter that is ¼" (0.64 cm) larger than the vent.
4. Use saber or keyhole saw to cut the circular vent opening.
Install Vent System
1. Install vent through the vent opening in upper cabinet or wall.
Complete venting system according to the selected venting
method. See “Venting Requirements” section.
2. Use caulking to seal exterior wall or roof opening around the
cap.
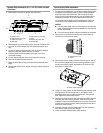
Install Range Hood
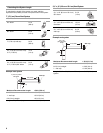
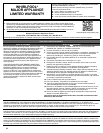
NOTE: Your model will have a 3¼" x 10" (8.3 x 25.4 cm)
rectangular vent damper on the inside of the range hood.
1. Remove the 3¼" x 10" (8.3 x 25.4 cm) rectangular vent
damper attached with 3.5 x 9.5 mm screws on the inside your
range hood. Use these screws to install the rectangular vent
damper.
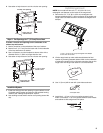
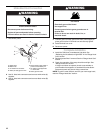
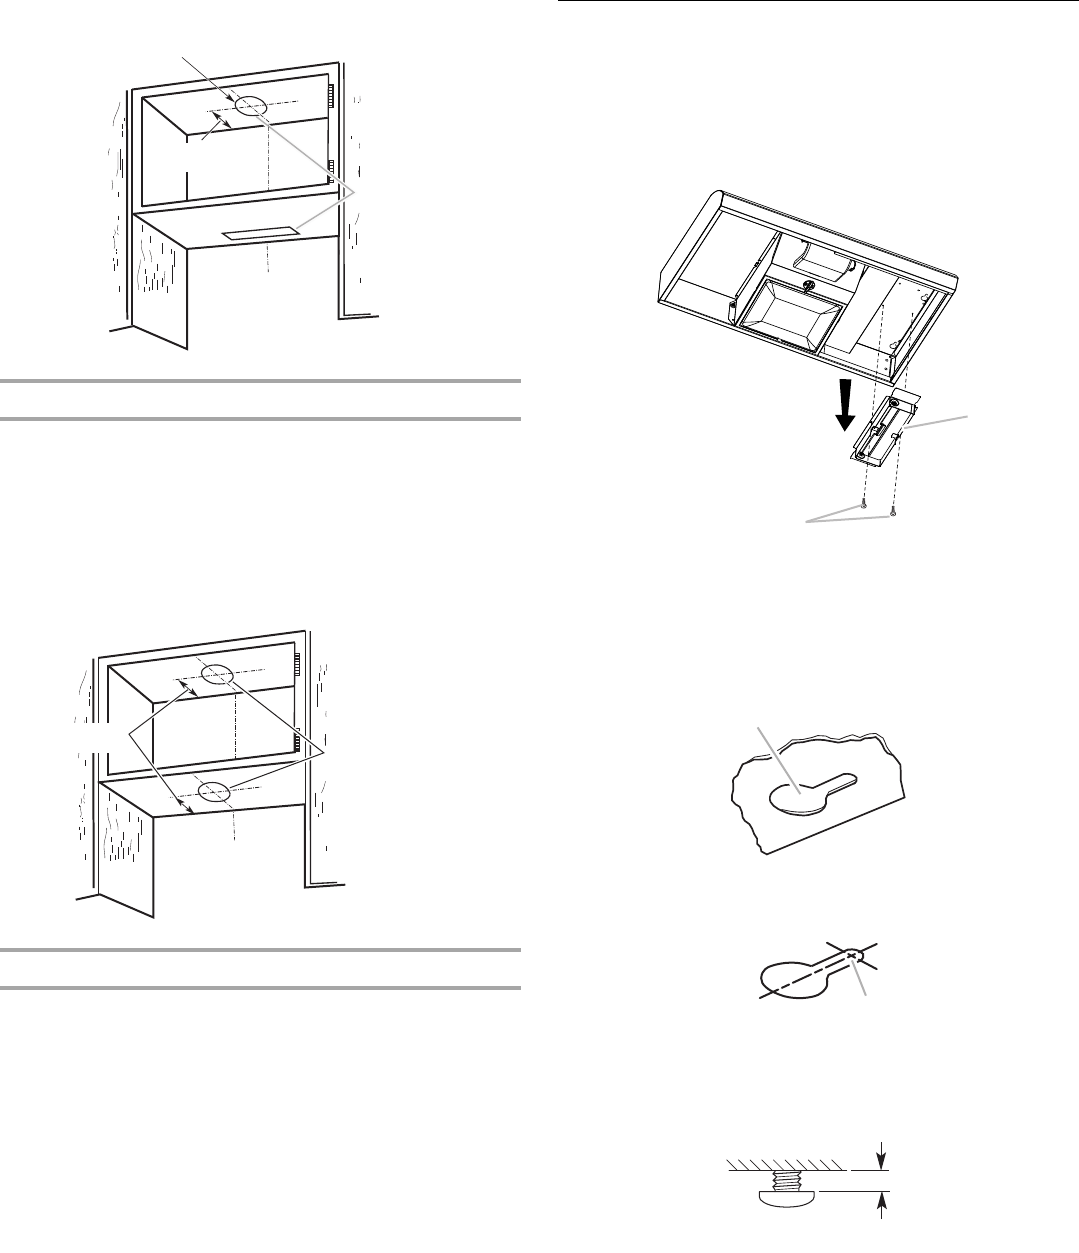
2. Lift the range hood up under cabinet and determine final
location by centering beneath cabinet. Mark on the underside
of cabinet the location of the 4 keyhole mounting slots on the
range hood. Set range hood aside on a covered surface.
3. Use ¹⁄₈" (3 mm) drill bit and drill 4 pilot holes as shown.
4. Install the 4 - 4.5 mm x 13 mm mounting screws in pilot
holes. Leave about ¹⁄₄" (6.4 mm) space between screw heads
and cabinet to slide range hood into place.
Circular vent opening
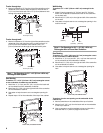
Cabinet
cutouts
*From wall, not
cabinet frame
*5"
(12.7 cm)
7 ¹/₄" (18.4 cm) diam.
c
abinet cutouts
*From wall, not
cabinet frame
*5"
(12.7 cm)
A. 3
¹⁄₄
" x 10" (8.3 x 25.4 cm) rectangular vent damper
B. 3.5 x 9.5 mm screws
A. Keyhole slot
A. Drill pilot hole.
A
B
A
A
¹⁄₄"
(6.4 mm)