11
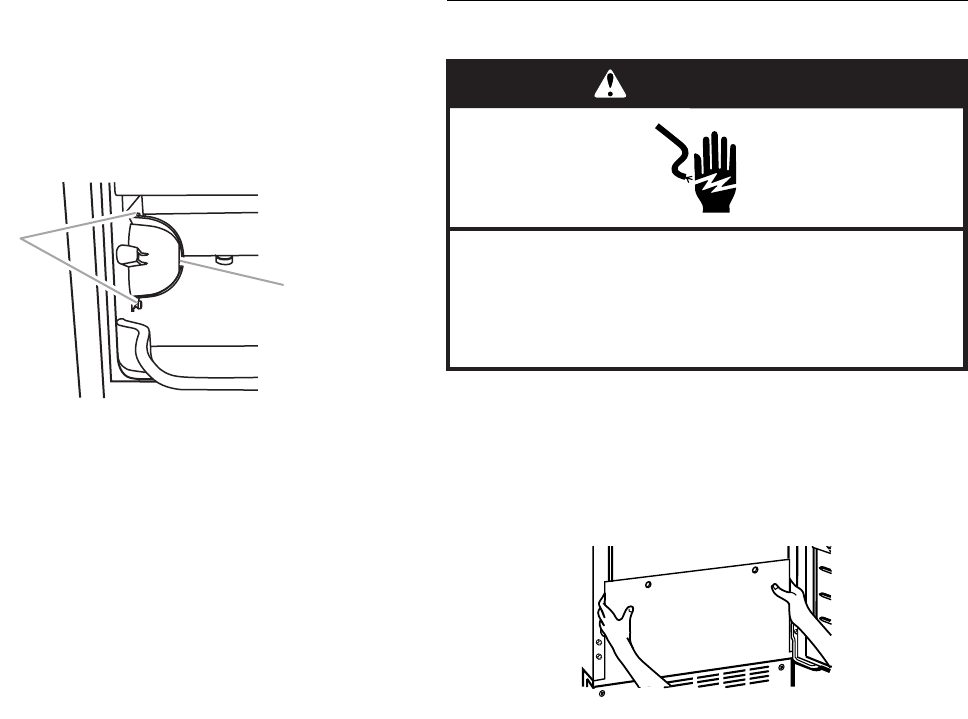
9. Remove, clean and replace the ice scoop and ice scoop
holder.
■ After removing the ice scoop, remove the holder by
removing the two thumb screws.
■ Wash the ice scoop holder along with the other interior
components using the following instructions.
■ Replace the ice scoop holder by replacing the thumb
screws.
10. Wash the interior components (cutter grid, exterior of hoses,
and water pan) and the storage bin, door gasket, ice scoop,
and ice scoop holder with mild soap or detergent and warm
water. Rinse in clean water. Then clean the same parts with a
solution of 1 tbs (15 mL) of household bleach in 1 gal. (3.8 L)
warm water. Rinse again thoroughly in clean water.
NOTE: Do not remove hoses. Do not wash plastic parts in
dishwasher. They cannot withstand temperatures above
145°F (63°C).
11. Replace water pan by pushing back on the bottom with one
hand while pushing up and back on the top. Secure the water
pan by replacing both screws.
12. Check the following:
■ Drain cap from the water pan is securely in place. If the
drain cap is loose, water will empty from the water pan,
and you will have either thin ice or no ice.
■ Hose from water pan is inserted into storage bin drain
opening.
13. Slide the cutter grid back into place and secure it by replacing
the right-hand screw and plastic spacer. Then tighten the left-
hand screw. Reconnect the cutter grid harness and the ice
level sensor harness.
14. Replace the plastic cutter grid cover and the two screws.
15. Gently wipe the control panel with a soft, clean dishcloth using
warm water and a mild liquid dish detergent.
16. Plug in ice maker or reconnect power.
17. After cleaning, make sure that all controls are set properly and
that no control indicators are flashing.
Vacation and Moving Care
To shut down the ice maker:
1. Unplug ice maker or disconnect power.
2. Remove all ice from storage bin.
3. Shut off the water supply.
4. Remove the two screws in the lower access panel and the two
screws from the base grille area of the front panel support.
Pull forward to remove the lower access panel.
5. Disconnect the inlet and outlet lines to water valve. Allow
these lines to drain and then reconnect to the valve.
6. Replace lower access panel and screws.
7. Drain water from water pan by removing the drain cap.
8. If the room temperature will drop below 32°F (0°C), water must
be removed from the drain line.
For ice makers with a drain pump installed:
■ Plug in ice maker or reconnect power.
■ Turn ice maker off and remove all remaining ice from ice
bin.
■ Pour 1 qt (0.95 L) of water into the ice bin near the drain
and let the ice maker stand for approximately 5 minutes.
This will allow the water in the bin to drain into the drain
pump so that the pump will remove the remaining water
from the ice bin and the drain pump.
■ Unplug ice maker or disconnect power.
9. Before using again, clean the ice maker and storage bin.
10. Plug into a grounded 3 prong outlet.
NOTE: All components of the ice maker are permanently
lubricated at the factory. They should not require any additional
oiling throughout the normal life of the machine.
A. Thumb screws
B. Ice scoop holder
A
WARNING
Electrical Shock Hazard
Disconnect power before servicing.
Replace all parts and panels before operating.
Failure to do so can result in death or electrical shock.


