


8
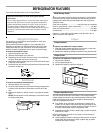
Refrigerator Door
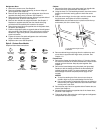
1. Remove the refrigerator door handle. Using a ¹⁄₈" hex key,
loosen the setscrew located on the side of the handle. Pull the
handle straight out from the door. Keep all parts together. See
Graphic 6.
2. Remove door hinge hole plug from refrigerator door. Move to
opposite side hinge hole, as shown. See Graphic 3.
3. Remove door handle hole plug and discard. See Graphic 7.
Replace on opposite side with the door handle hole plug
provided in the Reversibility Kit located in the crisper.
4. Remove door stop. Move to opposite side of refrigerator door,
as shown. See Graphic 4.
5. Reinstall refrigerator handle on opposite side of the
refrigerator door, as shown. See Graphic 6.
6. Tighten all screws. Set aside refrigerator door until bottom
hinge is installed on refrigerator.
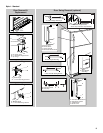
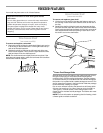
Replace Doors and Hinges
NOTE: Graphic may be reversed if door swing is reversed.
1. Replace the parts for the bottom hinge, as shown. Tighten
screws. Replace the refrigerator door.
NOTE: Provide additional support for the doors while the
hinges are being moved. Do not depend on the door magnets
to hold the doors in place while you are working.
2. Measure the distance from the bottom of the refrigerator door
to the floor. The distance should be approximately 3¹⁄₂"
(88 mm).
NOTE: If necessary, loosen the bottom hinge, without
removing the screws. Adjust the door to the correct height
and fully tighten the screws.
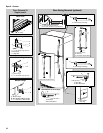
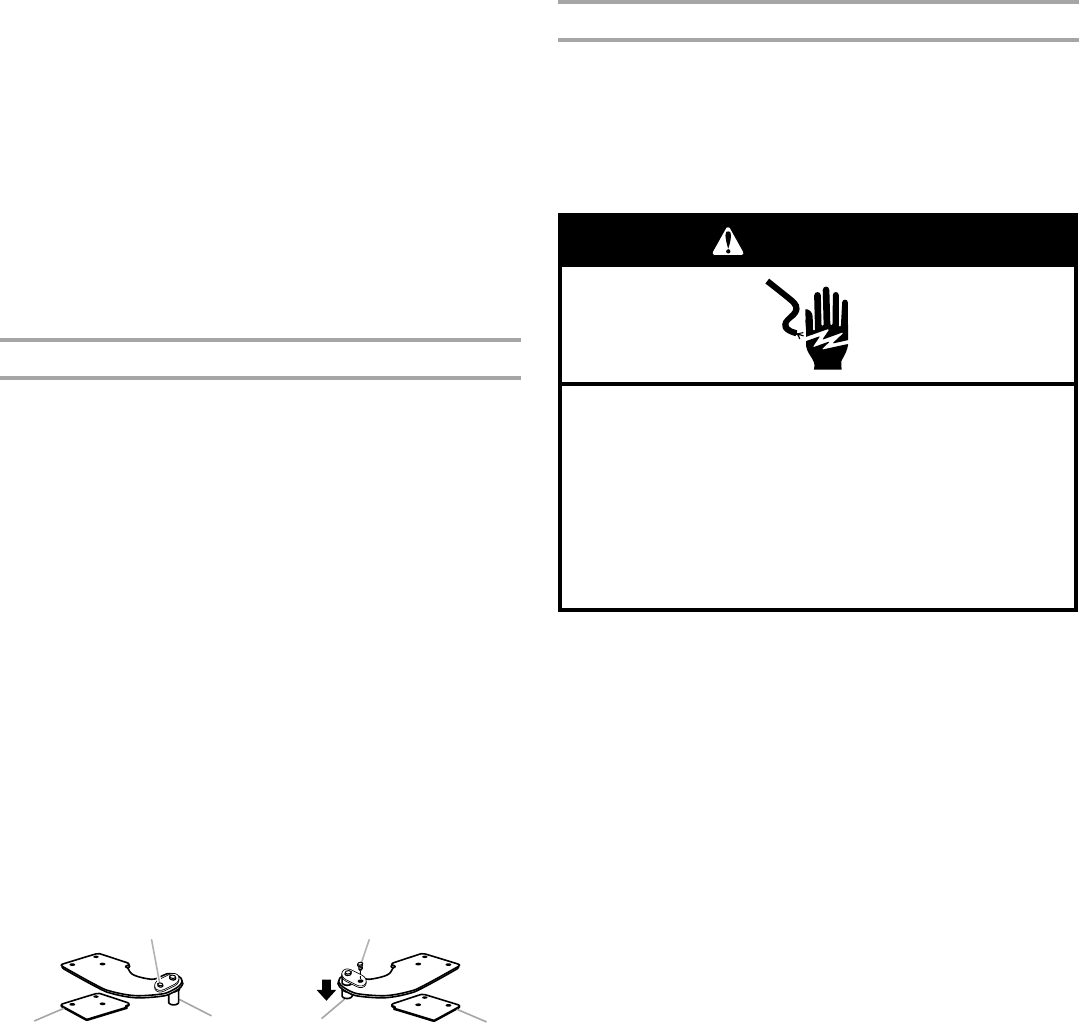
3. Assemble the parts for the center hinge, as shown, and then
tighten all screws. See Center Hinge graphic. Replace the
freezer door.
4. Assemble the parts for the top hinge, as shown. See Top
Hinge graphic. Do not tighten screws completely.
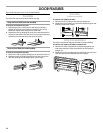
Contour Door Models Only:
■ Remove the screw attaching the hinge pin to the hinge.
Turn the hinge over so that it is pointing in the opposite
direction.
■ Place the plastic spacer beneath the hinge so that it will
be between the hinge and the cabinet, making sure the
holes are aligned.
■ Fasten the top hinge to the opposite side of the cabinet,
inserting the screws only halfway, so you will be able to
replace and align the freezer door later.
5. Line up the doors so that the bottom of the freezer door aligns
evenly with the top of the refrigerator door. Tighten all screws.
NOTE: The distance between the doors should be
approximately ⁵⁄₈" (16 mm).
Final Steps
1. Check all holes to make sure that hole plugs and screws are in
place. Reinstall top hinge cover. See Top Hinge graphic.
2. Remove the cover from the base grille. Move the cover to the
opposite side.
3. Align the clips on the base grille with the screws on the
bottom of the cabinet. Push the base grille toward the cabinet
until it is flush.
4. Plug into a grounded 3 prong outlet.
5. Reset the controls. See “Using the Control(s).”
6. Return all removable door parts to doors and food to
refrigerator.
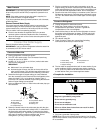
A.Plastic spacer
B. Hinge pin screw
C.Hinge pin
ACC
A
BB
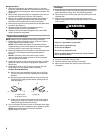
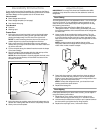
Electrical Shock Hazard
Plug into a grounded 3 prong outlet.
Do not remove ground prong.
Do not use an adapter.
Do not use an extension cord.
Failure to follow these instructions can result in death,
fire, or electrical shock.
WARNING