


12
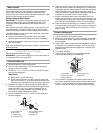
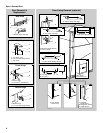
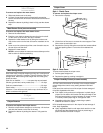
1. Remove the FreshFlow™ Produce Preserver pouches from
the packaging.
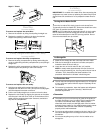
2. Lift up on the housing to remove it from the mounting tab.
3. Open the housing by pulling up and out on the back of the
top of the housing.
4. Place both pouches inside the housing, then snap the
housing back together.
5. Place the housing back on the mounting tab.
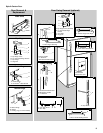
Installing the Status Indicator
The produce preserver comes with a status indicator, which
should be activated and installed at the same time the pouches
are installed.
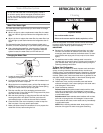
1. Place the indicator face-down on a firm, flat surface.
2. Apply pressure to the bubble on the back of the indicator until
the bubble pops, to activate the indicator.
3. Slide open the cap on the top of the produce preserver
housing.
4. Place the indicator in the top of the housing, facing outward.
5. Slide the cap closed, and check that the indicator is visible
through the rectangular hole in the cap.
NOTE: The cap will not easily close if the indicator’s bubble
has not been popped.
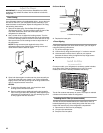
Replacing the Produce Preserver
The disposable pouches should be replaced every 6 months,
when the status indicator has completely changed from white to
red.
To order replacements, contact us. See “Accessories” for
information on ordering.
1. Remove the used pouches from the produce preserver
housing.
2. Remove the used status indicator.
3. Install the replacement pouches and status indicator using
the instructions in the previous sections.
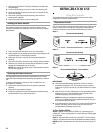
REFRIGERATOR USE
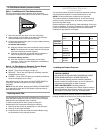
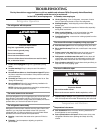
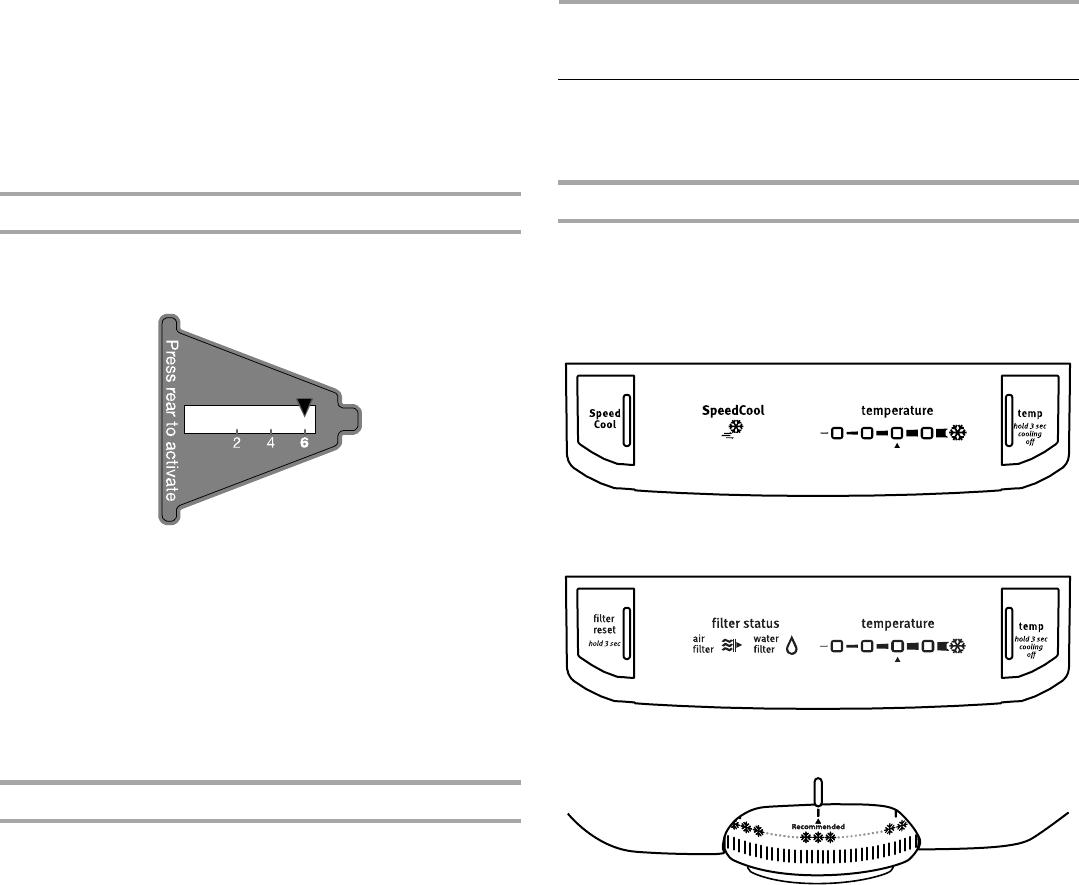
Using the Controls
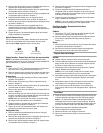
The temperature controls are located at the top front of the
refrigerator or freezer compartments.
Temperature Controls
For your convenience, the temperature controls are preset at the
factory. When you first install your refrigerator, make sure the
controls are still set to the recommended setting as shown.
Style 1
Recommended Setting
Style 2
Recommended Setting
Style 3
Recommended Setting “3 Snowflakes”
IMPORTANT:
■ The recommended setting should be correct for normal
household refrigerator use. The controls are set correctly
when milk or juice is as cold as you like and when ice cream
is firm.
■ Wait 24 hours for your refrigerator to cool completely before
adding food. If you add food before the refrigerator has
cooled completely, your food may spoil.
NOTE: Adjusting the refrigerator and freezer temperature
controls to a colder than recommended setting will not cool
the compartments any faster.
■ If the temperature is too warm or too cold in the refrigerator or
freezer, first check the air vents to be sure they are not
blocked before adjusting the controls.
To Turn Cooling Off/On:
Styles 1 and 2 - Press and hold TEMP for 3 seconds to turn
cooling off. To turn cooling back on, press and hold TEMP again
for 3 seconds.
Style 3 - Move the dial control to the word OFF. To turn cooling
back on, move the dial control to the desired temperature setting.
NOTE: Neither compartment will cool when the control is set to
OFF.
MONTHS
REPLACE