13
Adjusting Controls
If you need to adjust the temperature in either the refrigerator or
freezer compartment, use the settings listed in the chart below as
a guide.
Styles 1 and 2 - Electronic Controls
■ Press the TEMP button to toggle among the four LED lights
which indicate the temperature setting. Reading from left to
right, the LED in the first position is the least cold. The LEDs
indicate increasingly colder settings as you continue to the
right until all four LEDs are illuminated.
NOTE: For the first to fourth setting, only one LED of the four
LEDs will be lit. All four LEDs will be lit when you have
reached the coldest setting.
Style 3 - Dial Control
■ Move the dial to the desired number of snowflakes from
(1 least cold to 5 coldest).
NOTE: Except when starting the refrigerator, do not adjust the
control more than one setting at a time. Wait 24 hours between
adjustments for the temperature to stabilize.
Additional Features
SpeedCool (on some models)
The SpeedCool feature assists with periods of high refrigerator
use, full grocery loads or temporarily warm room temperatures.
■ Press SPEED COOL to set the freezer and refrigerator to the
lowest temperature settings. Press SPEED COOL again to
return to the selected temperature set point.
NOTE: The SpeedCool icon will be illuminated when
SpeedCool is selected. If you try to adjust the temperature
when SpeedCool is on, the SpeedCool icon will blink three
times and then turn off.
Filter Reset (on some models)
The Filter Reset control allows you to restart the filter status
tracking feature each time you replace the air filter or water filter.
■ Press and hold FILTER RESET for 3 seconds. The filter icons
will turn off. See “Install Air Filter” and “Water Filtration
System.”
REFRIGERATOR FEATURES
Your model may have some or all of these features.
Refrigerator Shelves
(Glass shelves on some models)
The shelves in your refrigerator are adjustable to match your
individual storage needs.
Storing similar food items together in your refrigerator and
adjusting the shelves to fit different heights of items will make it
easier to find the exact item you want. It will also reduce the
amount of time the refrigerator door is open, and save energy.
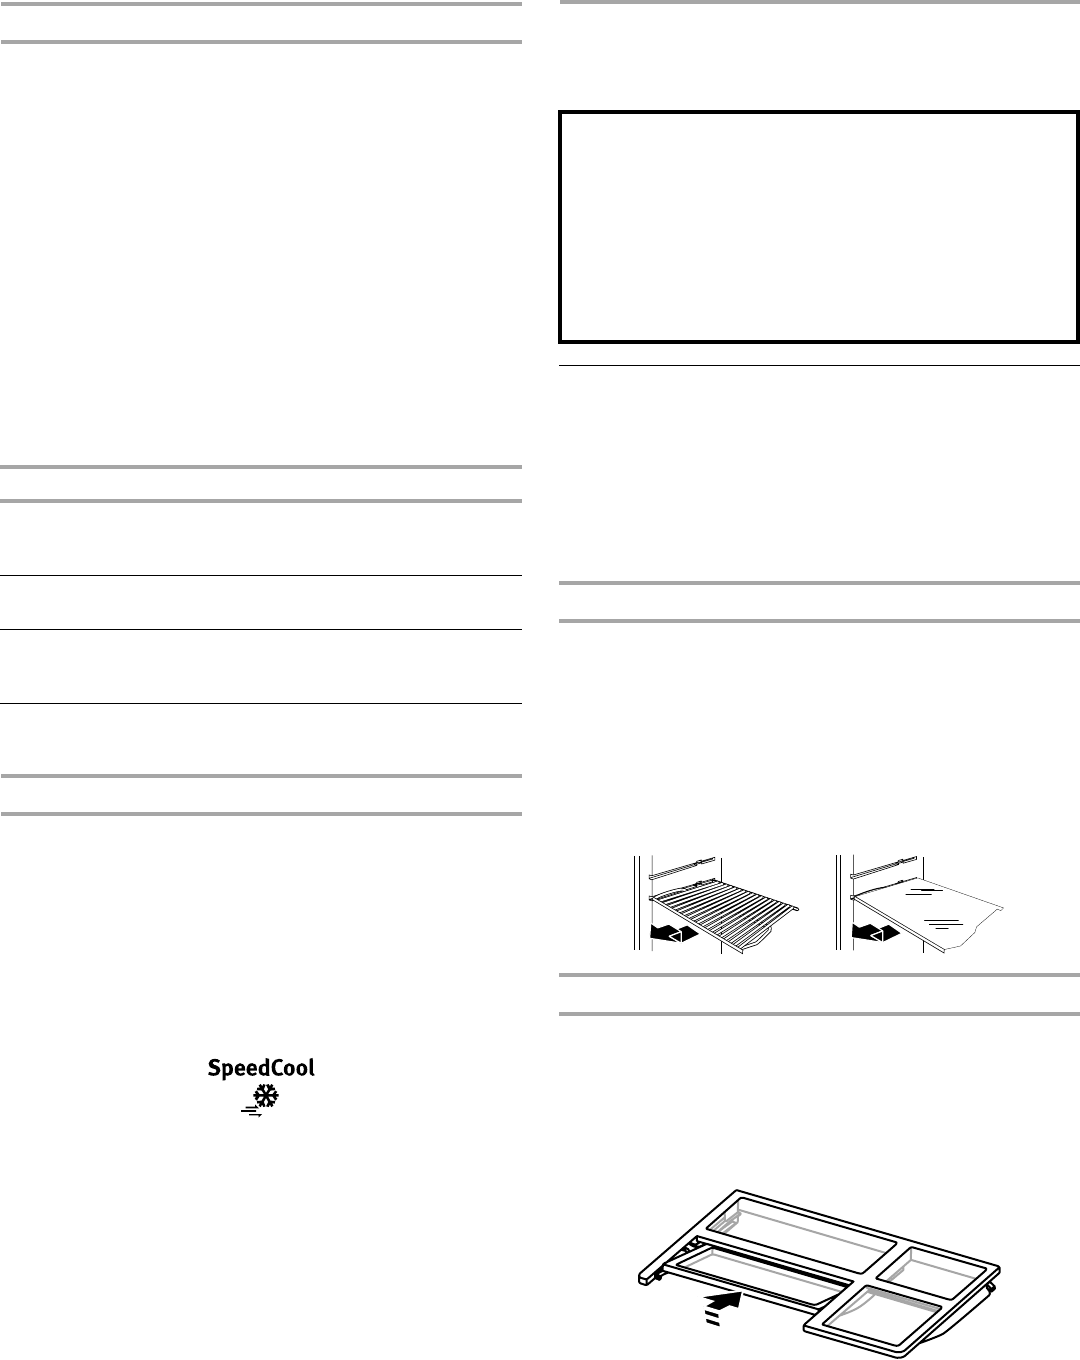
Shelves and Glass Shelves (on some models)
To remove and replace a shelf:
1. Remove items from the shelf.
2. Slide the shelf straight out to the stop.
3. Depending on your model, lift back or front of the shelf past
the stop. Slide shelf out the rest of the way.
4. Replace the shelf by sliding the back of the shelf into the
track in the wall of the cabinet.
5. Guide the front of the shelf into the shelf track. Be sure to
slide the shelf in all the way.
Fold Away Shelf (on some models)
To remove and replace a shelf:
1. To remove the entire shelf, tilt up the front of the shelf and
slide it out toward you.
2. To remove the front-half of the shelf, hold the front of the shelf
with one hand and press up in the center of the shelf. Then
push down and in on the shelf until it slides beneath the back
half of the shelf.
3. Replace the entire shelf by guiding it into the door liner and
pushing it inward until it stops. Then, tilt the front of the shelf
upward until the stopper is overcome and slide it in.
CONDITION/REASON: ADJUSTMENT:
REFRIGERATOR too warm REFRIGERATOR
Control one setting
higher
FREEZER too warm/too little ice FREEZER Control one
setting higher
REFRIGERATOR too cold REFRIGERATOR
Control one setting
lower
FREEZER too cold FREEZER Control one
setting lower
Important information to know about glass shelves
and covers:
Do not clean glass shelves or covers with warm water when
they are cold. Shelves and covers may break if exposed to
sudden temperature changes or impact, such as bumping.
Tempered glass is designed to shatter into many small,
pebble-size pieces. This is normal. Glass shelves and covers
are heavy. Use both hands when removing them to avoid
dropping.


