- 14 -
Installation
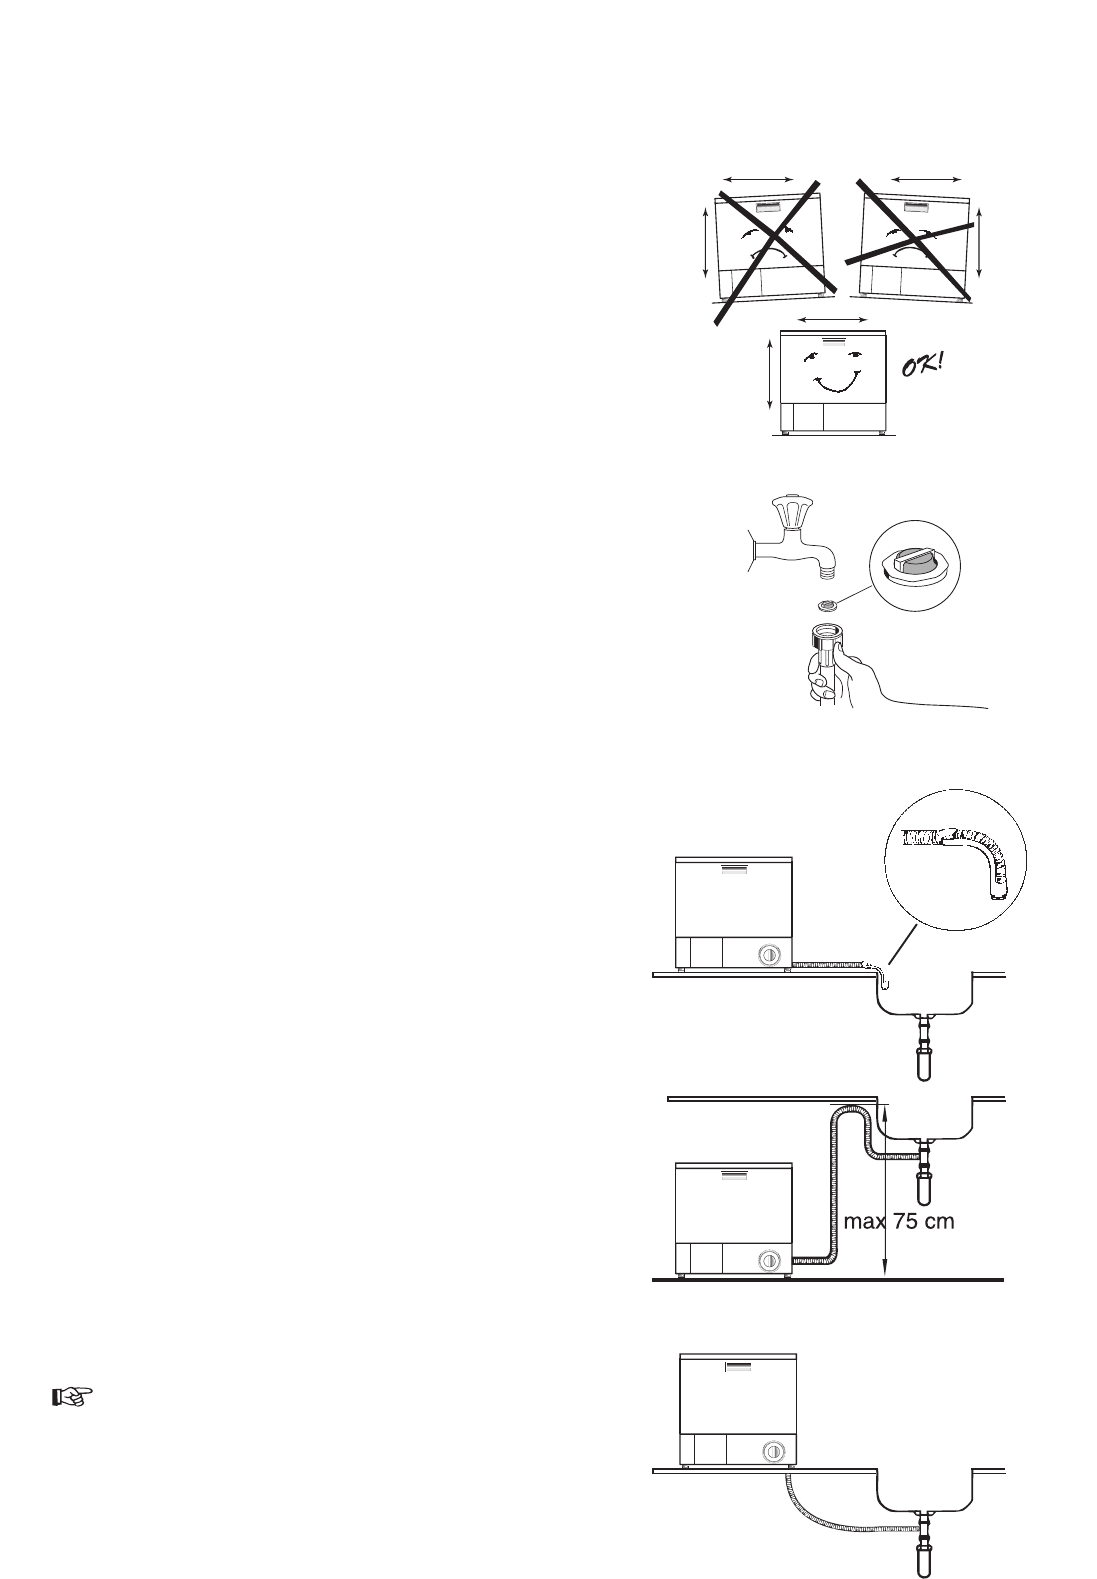
The dishwasher is intended for installation on a
kitchen sink or worktop. It is important to ensure
the dishwasher is level to avoid any difficulty
opening and closing the door. Its height can be
adjusted with the adjustable feet (8 mm each) in
each corner of the dishwasher.
Water inlet
The dishwasher should be permanently plumbed
into a separate cold water supply.
The water pressure must be within the limits given
in the technical specifications, as it will not function
correctly if pressure is outside these specifications.
Your local Water Authority will advise you on the
average mains pressure in your area. Where the
water is supplied from a cold water cistern you can
work out the pressure yourself by measuring the
vertical distance (or ‘Head’) between the machine’s
inlet hose and the outlet from the cold water storage
cistern; allowing .86 psi for every 2 feet under normal
conditions.
We would advise you to have a shut-off valve or
stopcock in the water supply pipe close to the dish-
washer and accessible for easy use. This should
be turned off when the appliance is not in use.
Insert the combination rubber washer/filter and
connect the inlet hose to a tap with a 3/4” pipe
thread.
The inlet hose must not be joined onto any form of
extension hose. If it is too short, the entire hose
must be replaced with a longer high-pressure hose,
specially designed for the purpose.
The end of the hose, which is connected to the dish-
washer can be turned in any direction. Loosen the
retaining nut, turn the hose, then retighten the nut.
Water drainage
Place the discharge hose over the sink as illustrated.
It must not at any point be higher up than 75 cm over
the surface which the dishwasher is standing on.
If it runs higher, operation of the dishwasher might
be impaired.
It is also important to ensure that the inside diameter
of the hose is not less than 13 mm at any point.
If the discharge hose is too long it can easily be cut
to the right length.
1. Cut the hose to a suitable length, using a
sharp knife.
2. Fit the elbow supplied onto the end of the
hose.


