


37
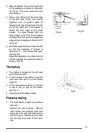
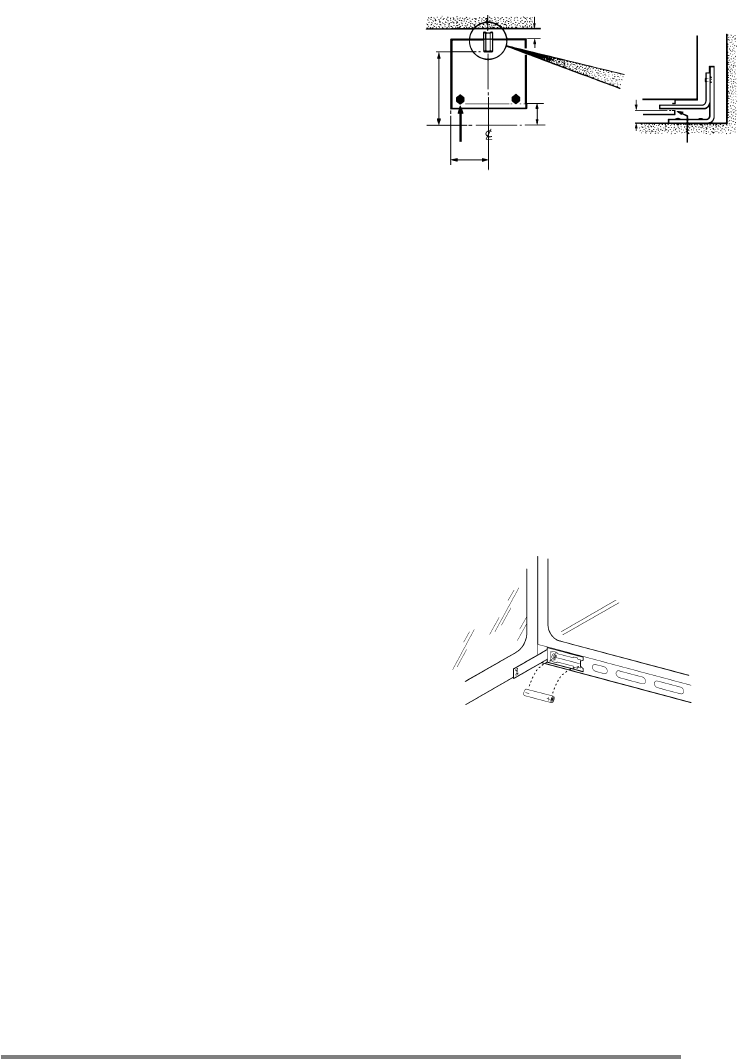
2. Mark off 250mm from the left hand side
of the appliance as shown in dimension
'A', Fig 3a. This is the centre line of the
fixing bracket.
3. Draw a line 100mm from the front edge
of the feet (see Fig.3a) and remove
appliance from its position. Mark off
dimension 'B' (see Fig.3a) back from this
line on the centre line of the bracket to
locate the front edge of the lower
bracket. Fix lower bracket (with two
fixing holes) to the floor then measure
the height from floor level to engagement
edge on back of appliance, dimension 'C'
of Fig. 3b.
4. Assemble upper bracket to lower bracket
so that the underside of bracket is
dimension 'C' + 3mm above floor level.
(See Fig. 3b)
Reposition appliance and check that top
bracket engages into appliance back as
shown in Fig. 3b.
The battery
1. The battery is located on the left hand
side of the front plinth.
2. To gain assess to the battery, open the
main oven door and lift up the battery
holder lid.
3. Fit the new battery ensuring (+) terminal
is next to the (+) sign on the battery.
See Fig. 4.
4. Close the lid of the battery holder.
Pressure testing
1. The oven injector is used as a pressure
test point.
Remove the oven furniture. Remove
oven burner box retaining clips (one
spring clip from each side) and remove
box front cover. Replace one clip back
into the right hand side of the burner
box.
487mm (B)
250mm
100mm
20mm
(A)
(C)
Fig.3a.
Fig.3b.
Fig.4.