15
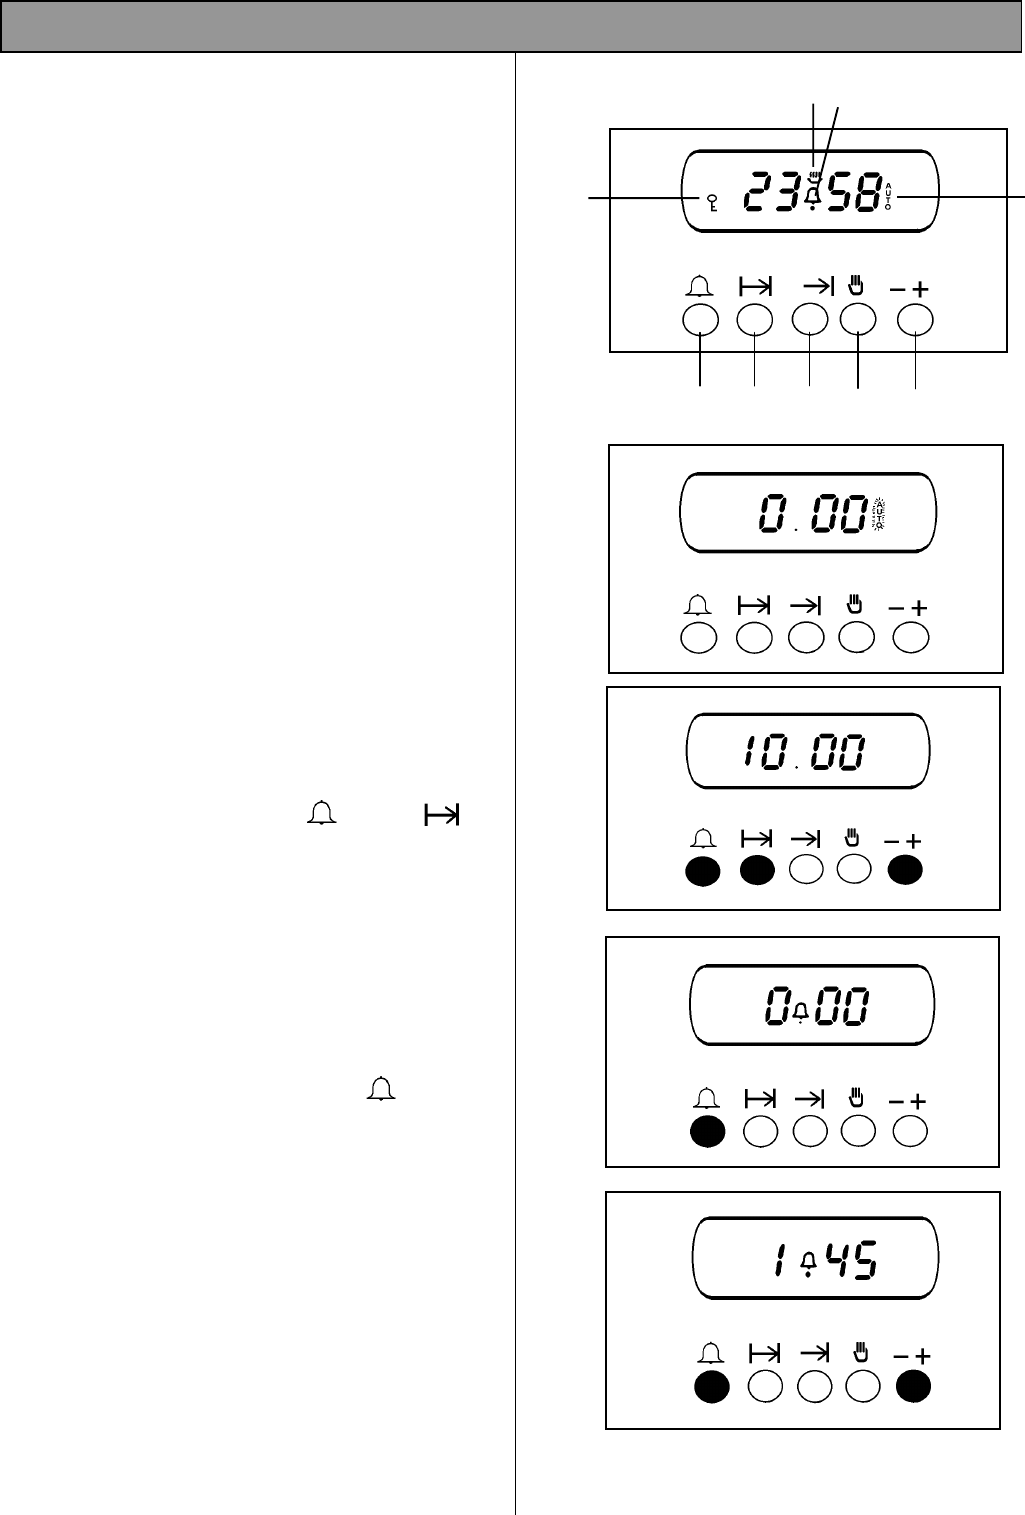
The Electronic Timer
KEY
A Minute Minder Button
B Cooking Hours Button
C Stop Time Button
D Manual Selector Button
E Decrease/Increase Control
F Key Symbol
G Cooking Symbol
H Bell Symbol
I Auto Symbol
NOTE:
The time of day must be set before the oven will
operate manually.
1. Set The Time Of Day
When the electricity supply is first switched ON, the
display will flash both 0.00 and AUTO as Fig.1.
Press the two buttons marked ( ) and ( ),
while holding them down turn the increase control
knob (-) (+) until the correct time on the 24 hour clock
is reached, e.g. 10.00am as Fig. 2. The AUTO
symbol will go out.
2. The Minute Minder
The minute minder gives an audible reminder at the
end of any period of cooking up to 23 hrs 59 mins. It
is not part of the automatic control.
To set, press the minute minder button ( ) and the
digital display will read 0.00 and the bell symbol will
glow as Fig. 3.
While holding the minute minder button down turn the
increase control (+) until the display indicates the
interval to be timed, e.g. 1 hr 45 mins as Fig. 4. If
necessary turn the decrease control (-) to achieve the
correct time interval.
NOTE: This must be completed within 4 seconds
of first pressing the minute minder button.
THE OVEN TIMER
B
C
D
E
A
F
G
H
I
Fig. 1
Fig. 2
Fig. 3
Fig. 4


