16
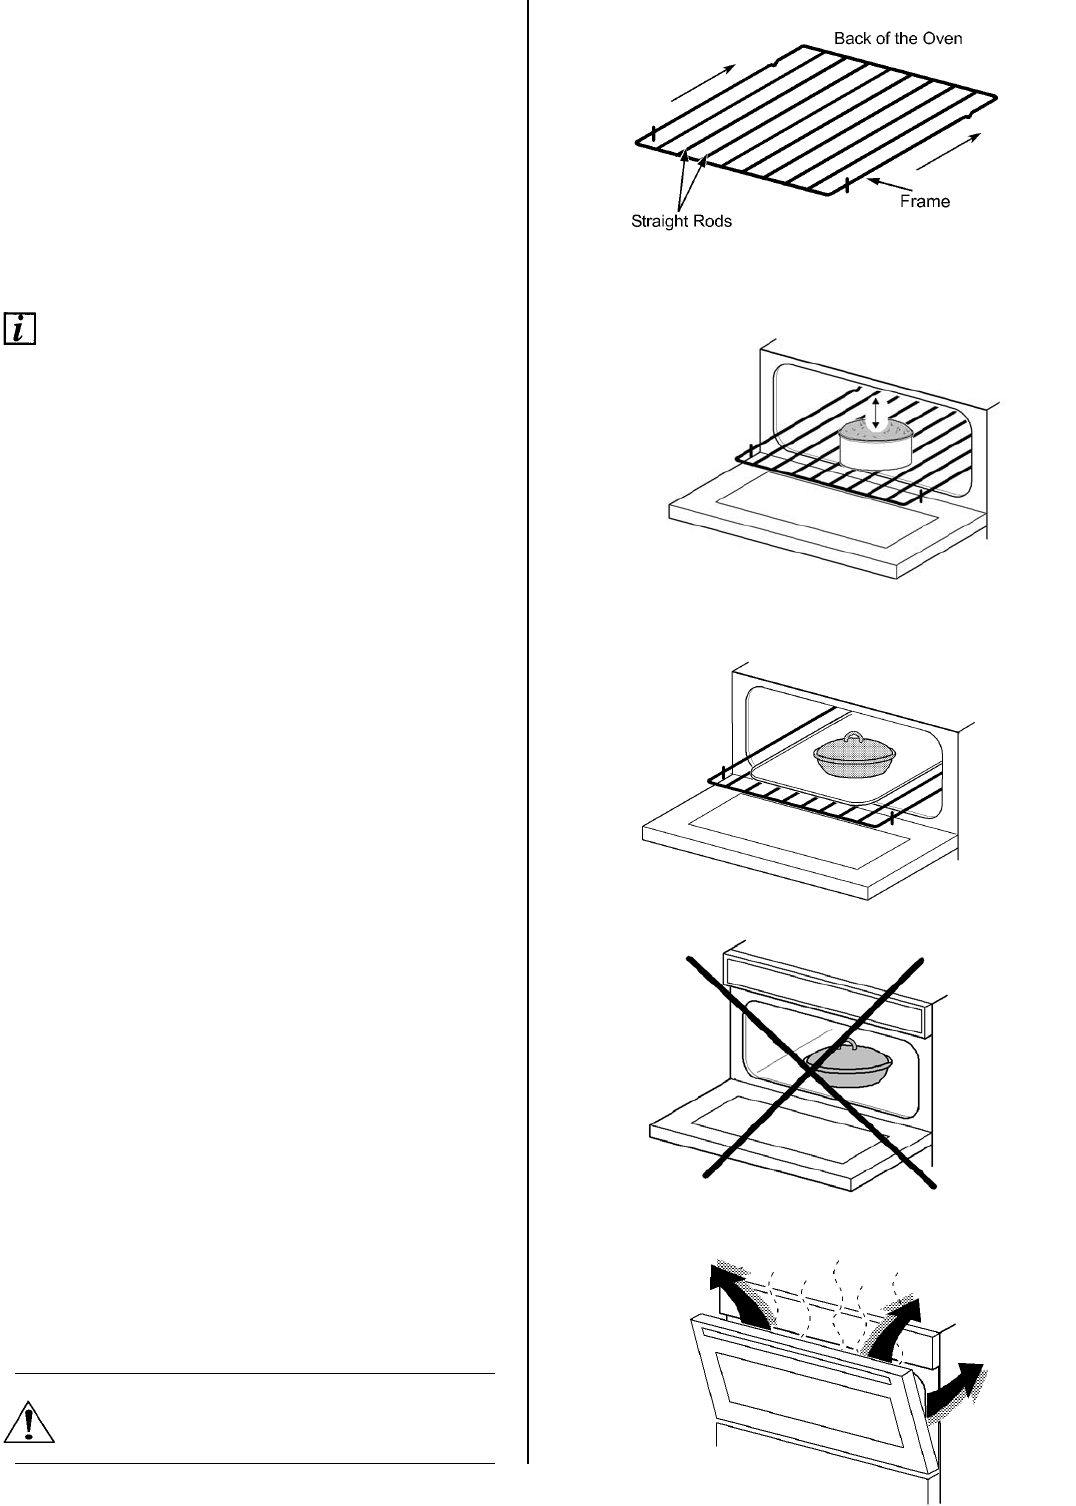
TO FIT THE TOP OVEN SHELF
The shelf should be fitted with the straight rods
uppermost on the frame and the forms towards the
back of the oven.
To remove a shelf slide the shelf towards you until
the shelf stop
is reached. Tilt shelf up at the front so
that the stops clear the side supports. Lift shelf clear.
To install a shelf, reverse the above steps.
Each
shelf position has an upper and lower support wire,
ensure the shelf is placed between these two support
wires.
HINTS AND TIPS
• Arrange the shelf in the required position before
switching the oven ON. Shelf positions are
counted from the bottom upwards.
• There should always be at least 2.5cm (1”)
between the top of the food and the element.
This gives best cooking results and allows room
for rise in yeast mixtures, Yorkshire puddings etc.
When cooking cakes, pastry, scones bread etc.,
place the tins or baking trays centrally on the
shelf.
• Ensure that food is placed centrally on the shelf
and there is sufficient room around the baking
tray/dish to allow for maximum circulation.
• Stand dishes on suitably sized baking trays on to
prevent spillage onto the oven base and to help
reduce cleaning.
• The material and finish of the baking tray and
dishes used will affect base browning.
Enamelware, dark, heavy or non-stick utensils
increase base browning. Shiny aluminium or
polished steel trays reflect the heat away and
give less base browning.
• Do not place baking trays directly on the oven
base as it interferes with the oven air circulation
and can lead to base burning; use the lower shelf
position.
• Because of the smaller cooking space and lower
temperatures, shorter cooking times are
sometimes required. Be guided by the
recommendations given in the cooking chart.
• For economy leave the door open for the shortest
possible time, particularly when placing food into
a pre-heated oven.
Do not place cookware and cooking pots
with rough bases e.g. cast iron on the oven
door as damage to the glass may occur.


