ADJUSTING ANGLE OF THE MASK IN THE DOWN POSITION
z If the lens is not properly aligned with the eyes in the down position the mask angle can be
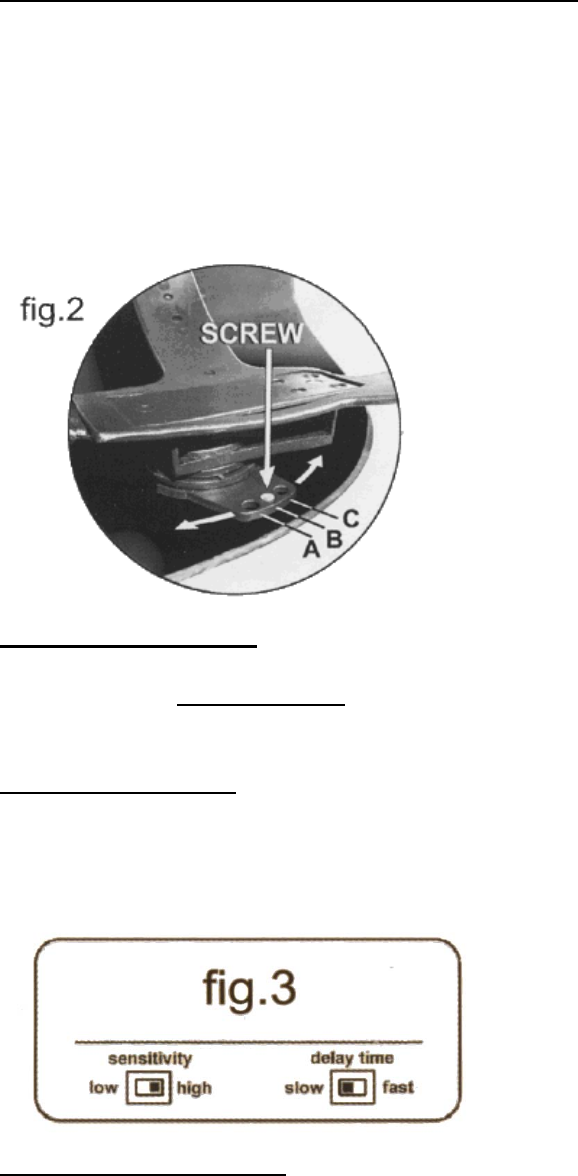
further adjusted into one of three preset positions using the tilt plate shown in fig.2. Behind
each pivot knob on the sides of the helmet there is a screw that passes through the side of
the mask and into one of the holes in the tilt plate (see A, B, C in fig.2). Partially loosen
each screw counter-clockwise so that it comes out of the tilt plate but remains in the side of
the mask. Rotate the headband assembly so that one of the alternative positions is aligned
with the end of the screw. Turn the screws clockwise again so that they pass through the
holes thus fixing the position of the tilt plate.
SELECTING SHADE LEVEL
z Select the shade level you require according to the welding process you will use by
referring to the shade guide table
below for settings. Turn the shade control knob on the
side of the helmet to the shade number required.
SELECTING DELAY TIME
z When welding ceases the viewing window automatically changes from dark to light but with
a pre-set delay to compensate for any bright after glow on the work piece. The delay
time/response can be set to "fast" (0.25 to 0.35 seconds) or "slow" (0.5 to 0.8 seconds) as
you require by using the microswitch on the back of the shade cartridge. (See fig.3)
ADJUSTING THE SENSITIVITY
z The sensitivity can be set to “high” or “low” using the microswitch on the back of the shade
cartridge. The “high” setting is the normal setting for everyday use. Where the operation of
the mask is disturbed by excess ambient light or another welding machine close by, use the
“low” setting. (See fig.3)


