z You are now ready to use your ATD auto-darkening welding helmet! The shading may be
adjusted during use by turning the potentiometer control.
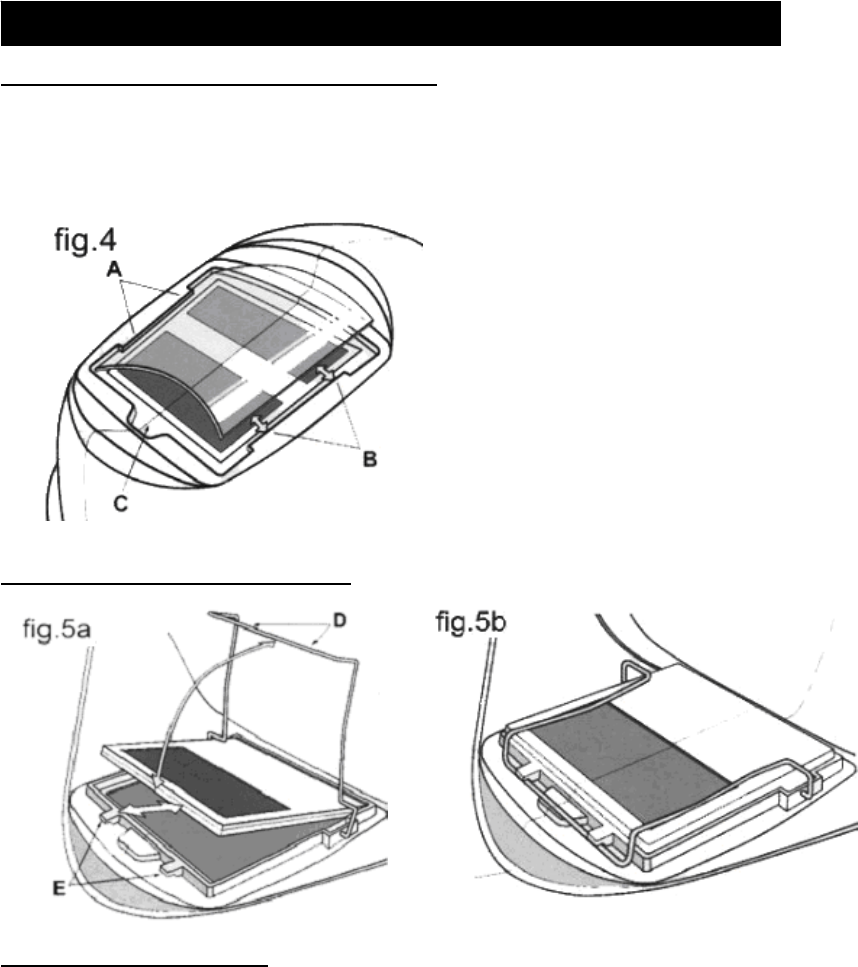
REPLACING FRONT OR REAR COVER LENS.
z When the front or rear cover lens becomes damaged (cracked, scratched, stained or pitted)
you must replace it. Place your finger or thumb into the recess at the bottom edge of the
window and flex the window upwards until it releases from one edge. (Replacement of front
cover lens is shown below in fig.4)
CHANGING THE SHADE CARTRIDGE. (See figs.5a & 5b)
FITTING NEW CARTRIDGE.
z Take the new shade cartridge and pass the potentiometer cable under the wire loop before
dropping the cartridge into its retaining frame inside the helmet. Hinge down the wire loop
clip and ensure that the front edge of the loop is properly retained under the retaining lugs
as shown in fig.5b.
z Fasten the potentiometer to the inside of the helmet with the shaft protruding through the
hole. Push the shade control knob onto the shaft.
z CLEANING. Clean helmet by wiping with a soft cloth. Clean cartridge surfaces regularly.
Use Windex or other mild cleaning solution. Clean sensors and solar cells with denatured
alcohol and a clean cloth and wipe dry with a lint-free cloth.
MAINTENANCE


