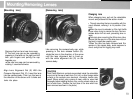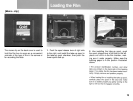
3. When the new roll has
been
inserted, be
sure to reset the lower spool stud by
pres-
sing it in. (Also, be sure to reset the take-up
spool stud in a similar manner.)
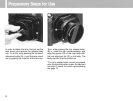
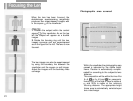
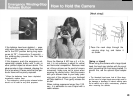
4.
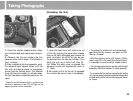
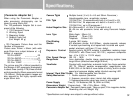
Pull out the backing paper, and insert the
tip into the slot on the take-up spool as
pic-
tured.
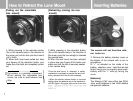
5. Wind the film advance lever until the
small arrow (the starting indicator on the
backing paper) aligns with the film starting
indicator
(
7
) on the camera body. Then
close the back cover.
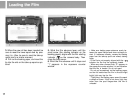
6.
Wind the film advance until it stops and
“1” appears in the exposure counter
window.
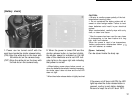
l
Make sure backing paper advances evenly be-
tween the spool
flanges
and does not begin to
slant.
If
it advances unevenly,
remove
the backing
paper from the take-up spool and refeed, starting
again.
l If
the
film is not properly aligned with the
‘7”
indicator. the film may be improperly loaded.
. When any other numeral than
“S”
appears in
the exposure counter window, it is an indication
that the film is loaded. So do not open!
.
Do
not pull excessively on the backing paper,
and do not load/unload the film in direct sunlight:
bright light may fog the film.
*
Tightly
wind
the backing paper around the
spool
a couple of times. If this is not done, light may
enter from the
spool
flanges
when
the film is
unloaded.
1717