06/08 Rev. AA QUICK REFERENCE
9864
15
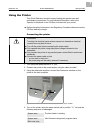
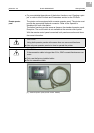
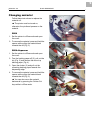
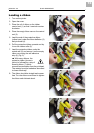
Starting to print
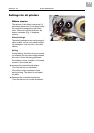
Settings for the material type
The parameter settings below describe setting up the label material.
When printing from a layout program, these settings are usually provided
automatically by the printer driver. For your first test prints, you need to
configure them manually.
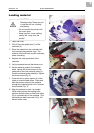
Material type y The label material is endless (continuous) which means that it contains no
punches/perforations, breaks or reflex marks that could be recognized by the
punch (die cut) sensor:
« Set the
PRINT PARAMETER > Material Type to endless.
y The label material contains punches/perforations, breaks or reflex marks that
can be recognized by the punch sensor (so-called “punched” material):
« Set the
PRINT PARAMETER > Material Type to “Punched.”
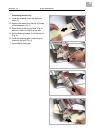
Material length « Set the
PRINT PARAMETER > Material Length to the length of the material (in mm).
Material width « Set the
PRINT PARAMETER > Material Width to the width of the material (in mm).
Only for punched/perforated (die cut) material:
Type of punch y Label material with breaks or punches:
« Set the
SYSTEM PARAMETER > Sensor Type to Punched.
y Label material with reflex marks:
« Set the
SYSTEM PARAMETER > Sensor Type to Reflex.
For more information on setting parameters: refer to “Info-Printouts and
Parameters.”
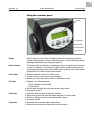
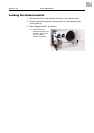
Printing the status report
To test the printer, print a status report. The width of the status printout can
be set to 4 inches (100 mm) or 2 inches (50 mm). This should match the width
of the label material used. The length of the printout is 8 inches (200 mm).
4-inch width
(100 mm) « Navigate to
INFO PRINTOUT > Printer Status.
The printout (two 8-inch labels) lists all of the printer’s current parameter
settings.
2-inch width
(50 mm) « Set the
SYSTEM PARAMETER > Print Info Mode to “Compact right.”
« Navigate to
INFO PRINTOUT > Printer Status.
This printout contains the same information as the 4-inch printout,
compressed to a 2-inch width.