40
GB
41
B
Connecting an RCA Audio/Video Input Cable
You can connect other audio/video equipment to your VCR using
audio/video cables if the appropriate outputs are available on the
equipment chosen.
Examples
: ◆ You wish to copy a video cassette with the help of a
second VCR (see page 42).
◆ You wish to play back and/or copy pictures taken
with a camcorder (see page 42).
◆ You wish to dub a prerecorded video cassette with
sound from a stereo system (see page 46).
☛ ◆ Regardless of the type of connection chosen, you
must always connect the coaxial cable supplied.
Otherwise, no picture will be visible on the screen
when the VCR is switched off.
◆ Make sure that both the television and the VCR are
switched off
before connecting the cables.
1 Connect one end of the RCA audio/video cable into the VIDEO
INPUT jack on the front of the VCR.
2 Plug the other end of the audio/video cable into the appropriate
output connector on the other system (VCR or camcorder).
3 Connect one end of the RCA audio cable supplied into the AUDIO
INPUT jacks on the front of the VCR.
➢ Take care to respect the colour coding of the left and right
channels.
4 Plug the other end of the audio cable into the appropriate output
connectors on the other system (VCR, camcorder or Hi-Fi sound
system).
1
3
3
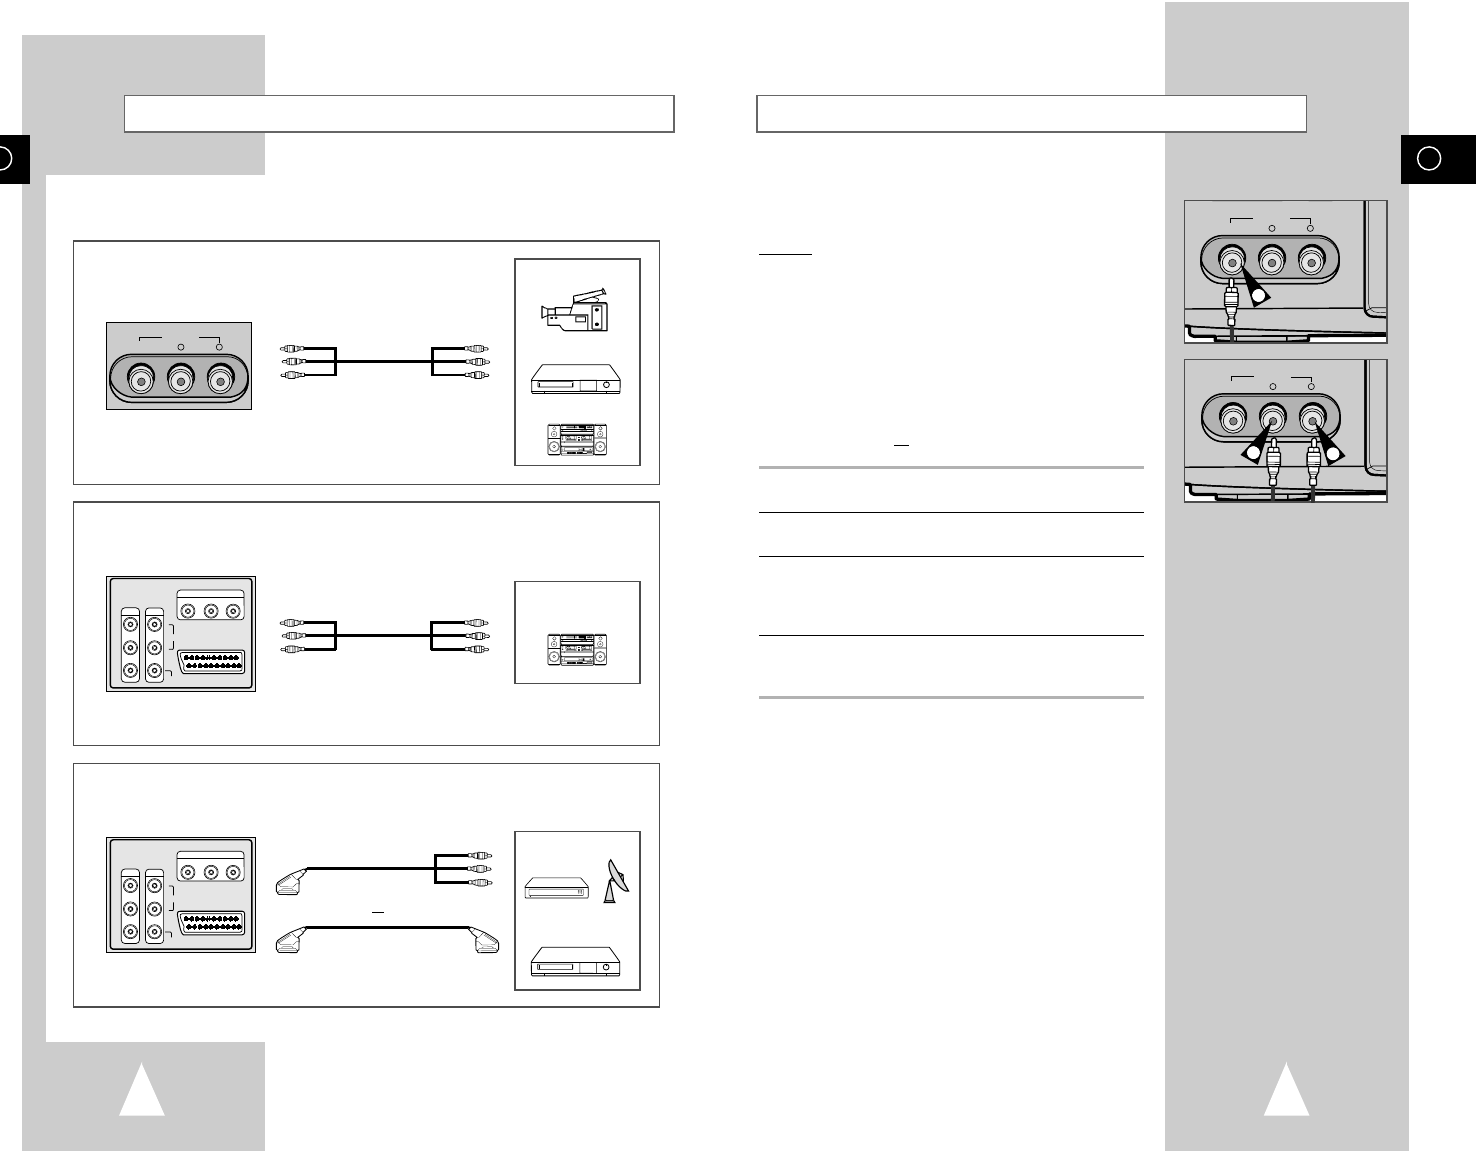
Connecting Other Equipment to Your VCR
➢ The RCA output connectors (OUT1 or OUT2) on the rear of the VCR
are used for equipment such as a stereo sound system.
REAR OF THE VCR
Stereo sound system
➢ The LINE 1 input connectors on the front of the VCR are used for
equipment such as camcorders, VCRs or stereo sound systems.
FRONT OF THE VCR
You can connect other audio and/or video equipment to your VCR in different ways. The following
illustrations give a few examples of the connection possibilities.
Camcorder
Stereo sound system
VCR
➢ The EURO AV connector on the rear of the VCR is used for equipment
with a SCART input/output such as a satellite tuner or VCR.
REAR OF THE VCR
Satellite tuner
VCR
or