Product overview
4 | A 200
Product overview
Putting the L 200 charger into operation
Setting up the charger
̈ Place the charger on a flat, even surface and use a non-slip pad.
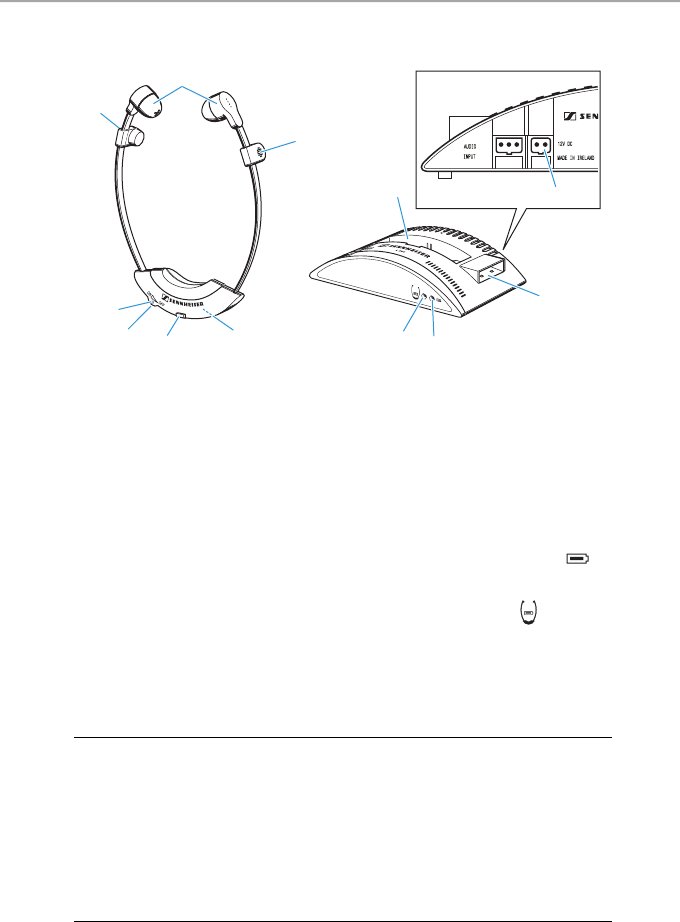
1 Ear pads
2 Microphones
3 Balance control
(at the rear)
4 Battery compartment
5 On/off/sound amplification
control
6 Indicator for sound
amplification
7 Charging compartment for A 200
8 DC socket for connection of
mains unit
9 Charging compartment for
optional spare rechargeable
battery
0 Charging indicator for optional
spare rechargeable battery
A Charging indicator for the A 200’s
rechargeable battery
CAUTION
Risk of staining furniture surfaces!
Furniture surfaces are often treated with varnish, polish or synthetics
which might cause stains when they come into contact with other syn-
thetics such as the device feet.
̈ Do not place the charger on delicate surfaces; if necessary, place a
pad under the charger.
7
4
5
6
1
2
3
9
8
2
A
0


