


59
PP-32
KOOLMASTER PP-32 REV.01
5.14 INSTALLATION
5.14.1 Step-by-Step Installation Guide
These are the basic steps to start-up your PP-32 controller.
1. Connect the control according to the wiring diagram enclosed with
this manual.
2. Turn on the power.
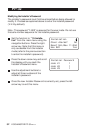
3. Adjust the Date and Time (sec. 5.14.5).
4. Step through the "19. Installation" menu and answer all questions in
order to customize the controller for your particular application (see
sec. 5.14.3).
5. Adjust dip switches. Refer to the dip switch table in section 4.2.
6. Assign output relays. The relay assignment may only be performed
from the installer mode (see sec. 5.14.2). Refer to section 5.14.6 to
assign the following relays:
Assign relays for each heater stage.
Assign relays for each fan stage;
Assign relays for the vent doors, if applicable;
Assign relays for the tunnel curtain, if applicable.
Assign relays for each clock output, if applicable.
Assign relays for each auxiliary output, if applicable.
Assign relays for the Low Static Pressure Alarm, if applicable.
7. Sensor assignment (see sec. 5.14.4):
Sensors must be assigned for each heating stage. Heater stages
use the average temperature of their assigned sensors to
operate.
Sensors must be assigned to be part of the average room
temperature. Fan stages operate according to this average
temperature.
Sensors must be assigned to each air inlet, in the case where
DWR-F-1A modules are used. Inlets use the average temperature
of their assigned sensors to operate.