


4
Installation Instructions
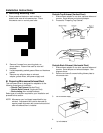
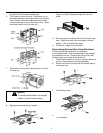
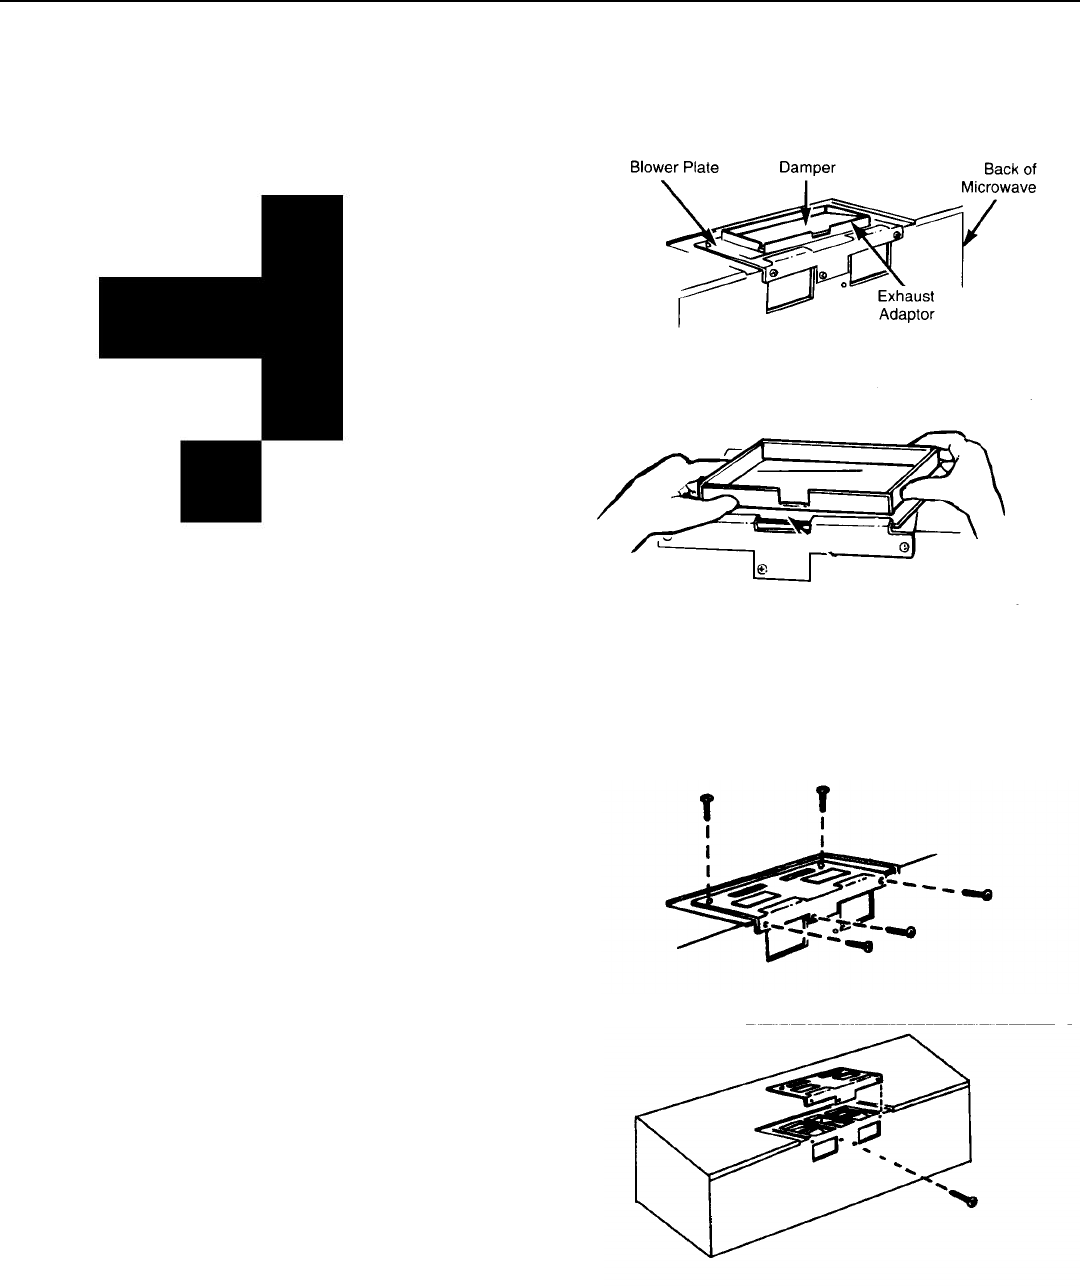
Outside Back Exhaust (Horizontal Duct)
1. Slide exhaust adaptor to one side, squeeze sides and
remove. Save damper and exhaust adaptor. See
diagram above.
2. Remove and save 5 screws holding blower plate to
microwave oven.
3. Lift off blower plate.
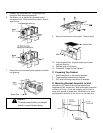
Outside Top Exhaust (Vertical Duct)
1. Slide exhaust adaptor to one side, squeeze sides and
remove. Save damper and exhaust adaptor.
2. Proceed to "Preparing Top Cabinet".
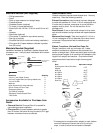
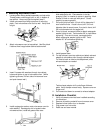
2. Remove 2 screws from mounting plate, as
shown above. Plate will be used as rear wall
template.
3. Locate separately packed grease filters and hardware
packet.
4. Remove any adhesive tape on exhaust
adaptor, grease filters, and power supply cord.
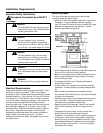
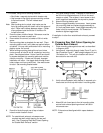
B. Preparing Microwave Exhaust Duct
This microwave oven is designed for adaptation to the
following three types of ventilation.
• Outside Top Exhaust (Vertical Duct)
• Outside Back Exhaust (Horizontal Duct)
• Recirculating (Non-vented/Ductless)
Select type of ventilation required for your installation and
proceed to that section.
NOTE: Microwave oven is shipped assembled for top
exhaust. Adjustments will need to be made to
assure proper alignment with current exhaust duct
after microwave oven is installed.
A. Removing Mounting Plate
1. Place protective blanket on work surface to
protect outer case of microwave oven. Place
microwave oven on control panel side.
4. Remove and save the screw that holds blower motor
to microwave.