9
CASTER LEVELING INSTRUC-
TIONS
(Continued)
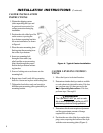
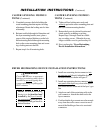
5. Completely unscrew the bolts holding the
caster mounting plate that requires leveling
adjustment. Retain the locking nuts for later
reassembly.
6. Reinsert each bolt through its flatwasher and
the fryer mounting bracket; next, place a
spacer of the required thickness on the bolt
before inserting the bolt through its mounting
hole on the caster mounting plate and screw-
ing a locking nut onto the bolt.
7. Repeat step 6 for all remaining bolts.
INSTALLATION INSTRUCTIONS (Continued)
WARNING
Fryers MUST have a movement-
limiting (restraining cable) device
installed to prevent tipping that
causes splashing or spilling of its
HOT contents.
NOTE: This movement-limiting
device is to be furnished and
installed by the fryer’s install-
ing contractor before the fryer
is connected to the gas line at its
desired location.
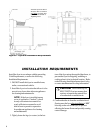
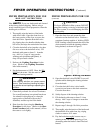
1. Install one restraining device connector into
the structure wall directly behind the fryer’s
desired location, as shown in Figure 2.
2. Install one restraining device connector on the
rear panel of the fryer very close to the quick-
disconnect device on the end of the fryer’s gas
line.
3. Attach one end of the restraining cable to the
wall connector. Attach the other end to the
fryer connector.
4. Confirm that the fryer cannot move far enough
away from the wall to cause excessive move-
ment of the flexible gas line or its associated
connectors.
FRYER RESTRAINING DEVICE INSTALLATION INSTRUCTIONS
!
CASTER LEVELING INSTRUC-
TIONS
(Continued)
8. Tighten all four locking nuts evenly and
securely against the caster mounting plate and
the fryer bottom mounting bracket.
9. Return the fryer to its desired location and
check again for wobbling or rocking.
Repeat steps 3 through 8 until no wobbl-
ing or rocking occurs. When the fryer no
longer wobbles or rocks, perform step 10.
10. Next, perform the “Fryer Restraining
Device Installation Instructions.”


