9
INSTINST
INSTINST
INST
ALLAALLA
ALLAALLA
ALLA
TION INSTRTION INSTR
TION INSTRTION INSTR
TION INSTR
UCTIONSUCTIONS
UCTIONSUCTIONS
UCTIONS (Continued)
CASTER LEVELING INSTRUC-
TIONS
1. Move the fryer to its desired location.
2. Determine whether the fryer tends to wobble
or rock when in its desired location. If it
does, perform steps 3 through 9. If it does
not, skip to step 10, then proceed to the
Installation Instructions.
WARNING
The fryer MUST NOT tip, rock or wob-
ble, to avoid splashing or spilling its HOT
shortening contents during operation.
3. Determine which caster requires adjustment
and the approximate amount of change
required to level the fryer.
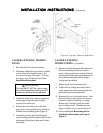
4. Position the side of the fryer on the ship-
ping carton, exposing the bottom of the fryer
with the caster mounting plates (Figure 4).
5. Completely unscrew the bolts holding the
caster mounting plate that requires the leveling
adjustment. Retain the locking nuts for later
reassembly.
CASTER LEVELING
INSTRUCTIONS (Continued)
6. Reinsert each bolt through its flatwasher and
the fryer mounting bracket; next, place a
spacer of the required size on the bolt before
inserting the bolt through its mounting hole on
the caster mounting plate and screwing a
locking nut onto the bolt.
7. Repeat step 6 for all remaining bolts.
8. Tighten all four locking nuts evenly and se-
curely against the caster mounting plate and
the fryer bottom mounting bracket.
9. Return the fryer to its desired location. Lock
the front casters to prevent fryer movement
and check again for wobbling or rocking.
Repeat steps 3 through 9 until no wobbl-
ing or rocking occurs. When the fryer no
longer wobbles or rocks, perform step 10.
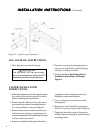
10. Perform the Fryer Restraining Device
Installation Instructions, referring to
Figure 2.
!
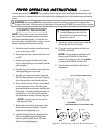
Figure 4. Typical Caster Installation


