


8
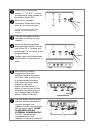
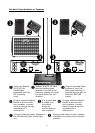
Remove the template
frame of the DS- 1
Still got the screws?
Replace the template
frame with a blank
template (Atomic Part #
ATBLANK – purchased
separately).
Still got the screws?
Replace the 8 screws.
(Whew!) You can now
load the DS-1 into the
Reactor as usual *.
The Reactor is now
ready to be used with a
Pro-rack or foot
controller style modeler
*
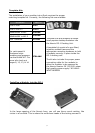
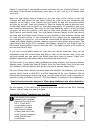
NOTE! When bypassing the DS-1 , the “R ETU R N ” in pu t on th e rear
jack panel of the Reactor 50 112/212 should be used as the
R eactor’s m ain in p u t, (see pag es 11 -14). Inserting a jack into the
R E TU R N p uts th e R eactor in “D irect M o de” an d au tom atically can cels
out the open audio cables from the DS-1.
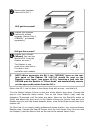
Return the DS-1 in to it’s place in th e A tom ic A m p w ith a snap – an d that’s it!
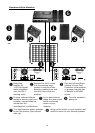
Turn the Master-Volume-Control on the rear of the Atomic Amp down. Connect the
amp to your favourite mains socket. Turn on the Power Switch (red), wait the
obligatory 30 seconds until the tubes are warm. Now turn the Stand-By switch on
(blue) and adjust the gain level on the Master-Volume the Atomic Amp and your
Modeler and you will hear those fantastic warm, crisp Guitar/Amp sounds blow your
tootsies off!
For Rich Kids: If you want a really professional stereo solution, buy a second Atomic
Reactor amp. Connect the Send-R-Output from the first Atomic Amp (the one with
the Modeler!) with the Return-Jack on the rear of the second Atomic Amp.