


8 / 11 EN
Hood / User Manual
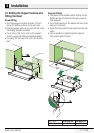
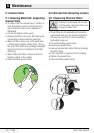
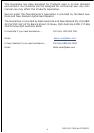
Closing Element
• The space between the edge of the hood and
the rear wall can be closed by applying the
element 20 provided, using the screws supplied
for this purpose.
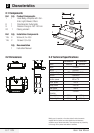
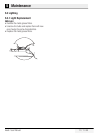
3.2 Connection
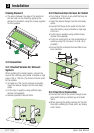
3.2.1 Ducted Version Air Exhaust
System
When installing the ducted version, connect the
hood to the chimney using either a flexible or rigid
pipe ø 150 or 120 mm, the choice of which is left
to the installer.
• To install a ø 120 mm air exhaust connection,
insert the reducer flange 9 on the hood body
outlet.
• Fix the pipe in position using sufficient pipe
clamps (not supplied).
• Remove possible charcoal filters.
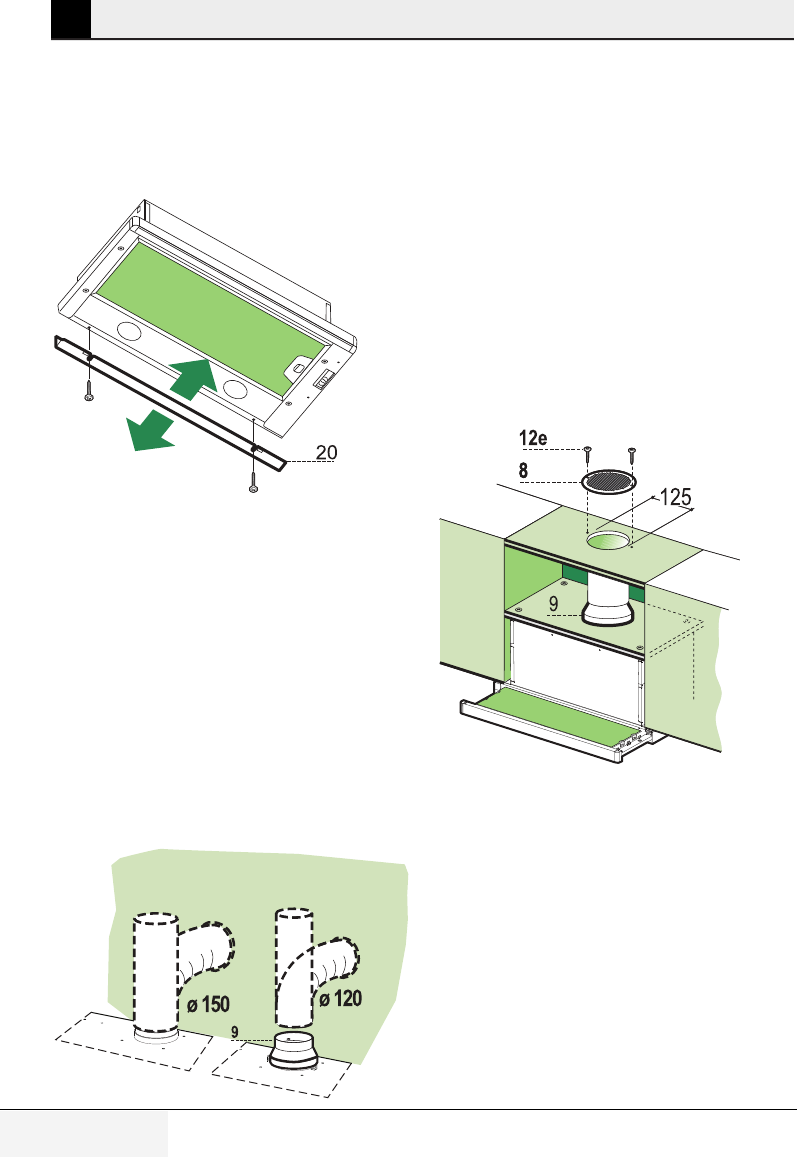
3.2.2 Recirculation Version Air Outlet
• Cut a hole ø 125 mm in any shelf that may be
positioned over the hood.
• Insert the reducer flange 9 on the hood body
outlet.
• Connect the flange to the outlet on the shelf
over the hood by using a flexible or rigid pipe
ø120 mm.
• Fix the pipe in position using sufficient pipe
clamps (not supplied).
• Fix the air outlet grid 8 on the recirculation air
outlet by using the 2 screws 12e (2,9 x 9,5)
provided.
• Ensure that the activated charcoal filters have
been inserted.
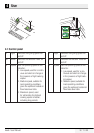
3.2.3 Electrical Connection
• Connect the hood to the mains through a two-
pole switch having a contact gap of at least
3mm.
• When opening the sliding carriage for the first
time after installing the hood, pull it out briskly
until it clicks.
3 Installation