


8
9
Note: To determine which screws to use, you must have enough of the screw
exposed underneath the cabinet to properly thread the screw into the nut.
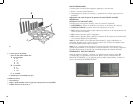
11. Screwing from inside the cabinet down into appliance holes, tighten 4 screws
in place to secure appliance to cabinet.
Note: Always tighten screws to ensure the appliance does not move or shake
during operation.
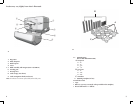
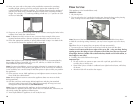
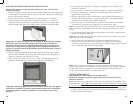
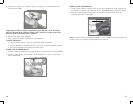
12. Pull out cord from cord storage behind appliance and plug into standard
electrical outlet. Extra cord can be fed back into storage or hung over cord
management hook behind unit (F).
Note: If you are connecting this appliance to the receptacle of another
†SpaceMaker™ appliance such as the toaster oven or coffeemaker, make sure you
can easily unplug the appliance following use.
13. Your †SpaceMaker™ appliance is now ready for use!
OVERHANGMOLDINGINSTALLATION
Forcabinetswithanoverhangmolding(seeIllustrationC)
Important:Alwayswearprotectiveglassesorgogglestopreventinjurywhen
drilling.
Note:Spacers are provided in case your cabinet has an overhang molding at the
front edge. Only use spacers on the rear screws of the appliance to ensure it is
level with the front.
1. Clear countertop under installation area to avoid getting dust or debris on other
appliances or items. Open cabinets and remove contents to make mounting
easier.
2. Clean both the underside and topside of the bottom panel of the cabinet.
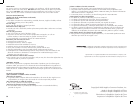
3. Using a ruler, measure the thickness of the overhang molding (G), accurately
noting the number for use in the following step.
Note: If you do not have a ruler, you may cut out the paper ruler provided on the
edge of your mounting template.
F
G
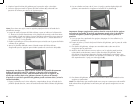
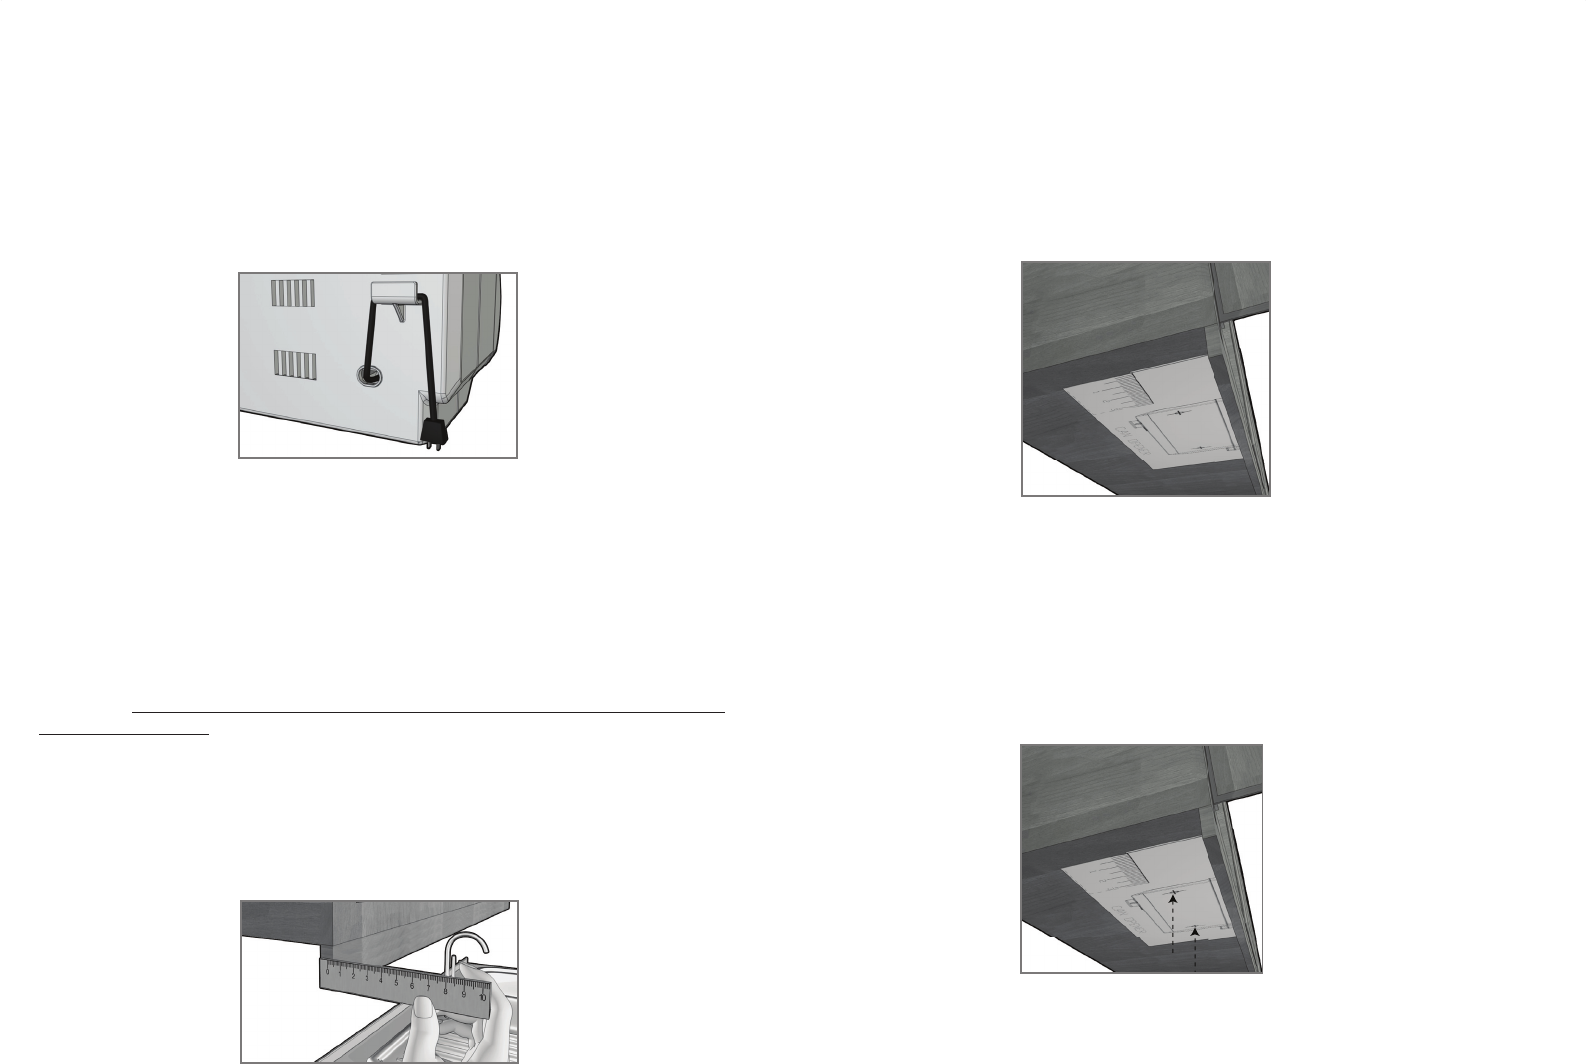
4. After measuring the overhang molding thickness as shown in Illustration G, look
at the dashed lines on the mounting template; each line has a measurement
next to it that indicates the thickness of the overhang molding used with that
line. For example, if your cabinet has an overhang molding thickness of ½”,
you will use the ½” dashed line on the template.
5. Fold the template along the dashed line that matches the thickness of your
overhang molding.
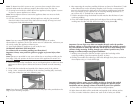
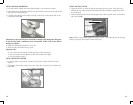
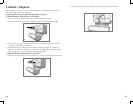
6. Place the folded template against the back edge of the overhang molding,
making sure the side with the drill hole marks is facing down (H).
Important:Donotalignscrewholesontemplatedirectlyunderthepartition
betweencabinets,asthiswillpreventyoufrominstallingtheapplianceproperly.
Paycloseattentiontowherethedrillholeswillbesetsoasnottodamageyour
cabinetsduringmounting.Drillingthroughyourcabinet’spartitionmaycause
damagetocabinetsandpreventproperinstallation.
7. Making sure to keep the fold line straight against the back edge of the
overhang molding, tape the template securely in place.
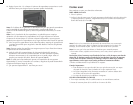
8. Drilling from under the cabinet up, drill holes through the 4 places marked on
the template using a ¼-inch drill bit (J).
Important:Alwaysensureyouaredrillingstraightupthroughthemarked
mountingholesonthetemplate.Drillingatananglemaypreventproper
installationandmaydamagecabinetsifthedrillbitpiercesthepartition.
9. Once holes are drilled, remove tape and mounting template.
10. Wipe dust and debris off the underside and topside of the cabinet surface.
11. Place a washer inside the cabinet over each of the 4 holes you drilled.
H
J