


12
CHECKING DOUGH CONSISTENCY
Although your bread maker will mix, knead and bake bread
automatically, when baking bread from scratch, it is recommended
that you learn to recognize condition of your dough. The ratio of flour to
liquid is the most critical factor in any bread recipe, yet the most easily
remedied. After 5 to 8 minutes in Knead 2, open bread maker to check
consistency of dough. Dough should be in a soft, tacky ball (feel sticky
like scotch tape). If it is too dry, add 1 tbsp. of liquid at a time. If it is too
wet, add 1 tbsp. of flour at a time.
USING YOUR BREAD MAKER
Note: Depending on the cycle or recipe used, some steps may not
apply or there may be additional steps. Refer to the respective
recipes instructions in the recipes portion of this booklet, as well
as the specific cycle instructions located at the end of these usage
instructions.
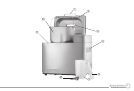
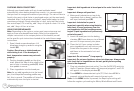
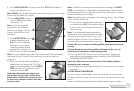
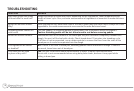
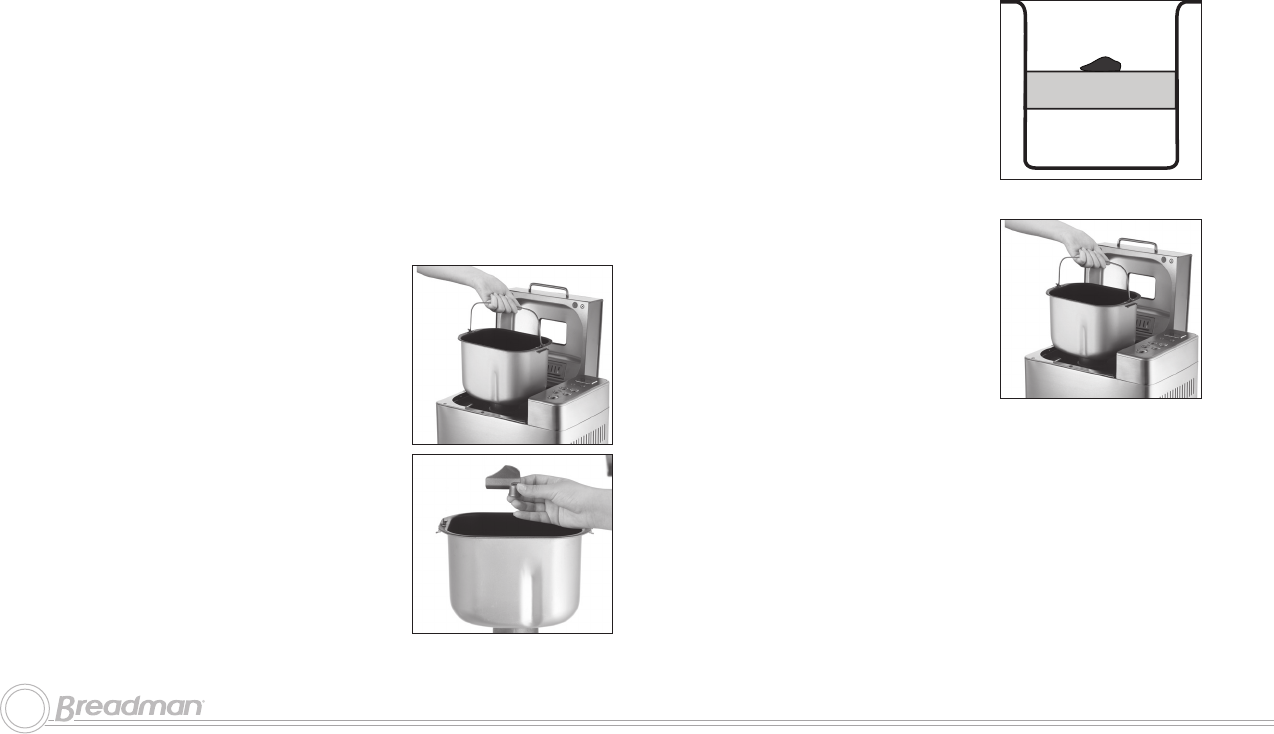
1. Open lid and remove bread pan. Lift
bread pan straight up and out using the
handle (B).
Caution: Do not turn or shake bread pan
while taking it out. If the bread pan is
bent, temperature sensor may not work
properly.
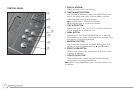
2. Position kneading paddle on the drive
shaft. Match flat side of drive shaft to flat
part of hole in kneading paddle (C). Make
sure paddle is secure.
3. Place ingredients into the bread pan.
Note: As you add ingredients into the bread
pan, the collapsible kneading paddle may
fall; this is normal. The paddle will stand up
automatically once the cycle is started.
Important: Add ingredients to bread pan in the order listed in the
recipe.
Important: Always add yeast last.
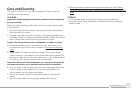
4. Make small indentation on top of dry
ingredients (not so deep it reaches the
wet layer) and add yeast (D).
Important:
Indentation for yeast is
important, especially when using the delay
bake timer. It keeps yeast away from the
wet ingredients until the kneading process
begins. (Liquid ingredients will prematurely
activate the yeast.)
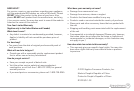
5. Insert the bread pan into the baking
chamber (E). Press down on rim of bread
pan until it snaps securely into place.
6. Close the lid. If your recipe includes
extra ingredients such as fruits or nuts
(listed after the yeast in the recipe),
add these to the automatic fruit and
dispenser.
Important: Do not exceed
2
/
3
cup capacity.
Important: Do not pour liquids or spices into dispenser. Always make
sure fresh fruit or vegetables are not wet; pat dry before putting
them in the dispenser.
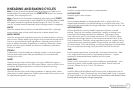
7. Plug into standard electrical outlet. Turn the On/Off (I/O) switch to
the on (I) position. Bread maker will beep and program 1 and 3:25
will appear in the display window (F).
8. Press MENU to choose desired cycle (F1). Each time MENU is
pressed, unit and display will move to the next cycle.
Note: As the MENU button is pressed, the Rapid cycle setting will
follow the regular cycle setting for White, Whole Wheat and French.
E
B
C
D
Dry
Yeast
Liquid