


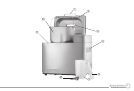

13
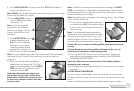
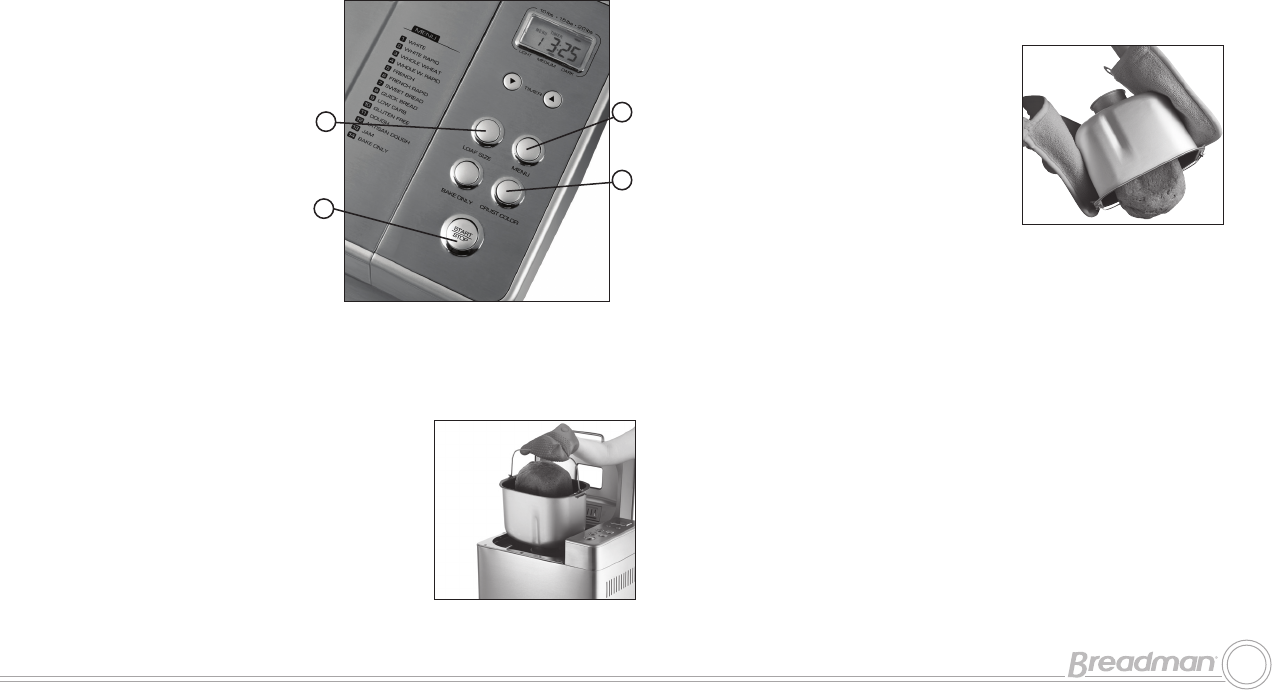
9. Press CRUST COLOR to choose crust color (F2). Bread maker is
preset for medium crust.
Note: CRUST will not be activated for the following cycles: Jam, Dough,
Artisan Dough, Bake Only, Rapid
10. Press LOAF SIZE to select
loaf size (F3). Bread maker
is preset to 2 lb.
Note: Loaf size cannot be
activated for the following
cycles: Jam, Dough, Artisan
Dough, Rapid, Gluten Free,
Low Carb
11. Press START/STOP button
to begin kneading cycle
(F4). The time remaining
will begin to count down
in display window. Bread
making time and loaf size
will be shown in display window.
Note: During kneading cycle, yeast will activate and viewing window
may begin to fog. (This will clear eventually so you can view the
progress.)
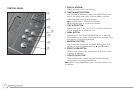
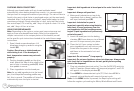
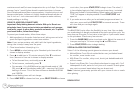
12. When your bread is finished baking,
bread maker will beep and “3:25” will
appear in display window. Press START/
STOP and open lid. Using oven mitts,
remove bread pan (G).
Important: Remember, bread pan and
loaf are both very hot! Be careful not to
place either on tablecloth, plastic surface
or other heat-sensitive surface that may
scorch or melt.
Note: If bread is not removed immediately after baking and START/
STOP is not pressed, the Keep Warm mode will begin. Bread maker
will automatically turn off after 60 minutes. For best results, remove
bread immediately after baking.
Note: Keep Warm does not apply to the following cycles: Jam, Dough,
Artisan Dough, Bake Only
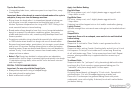
13. Turn bread pan upside down and shake
to release bread (H). Place bread upright
on wire rack to cool at least 20 minutes
before slicing.
Note: The collapsible kneading paddle is
designed to stay in the bread pan instead of
sticking in your bread. Check to see if the
paddle stayed in the pan. If not, follow the
caution statements below when removing.
Caution: Be sure to remove kneading paddle from the bread before
serving.
Caution: Bread pan, kneading paddle and bread will be very hot.
Allow bread to cool before removing the paddle.
14. Turn the On/Off (I/O) switch to the off (O) position. Unplug unit
and allow to cool completely before cleaning. (See CARE AND
CLEANING INSTRUCTIONS.)
Important: Make sure to clean the inside of the baking chamber
thoroughly after each use.
15. Once bread has cooled (approximately 2 hours) store in an airtight
container.
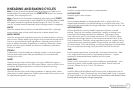
SLICING AND STORING BREAD
For best results, place bread on wire rack and allow to cool at least
20 minutes before slicing. Use electric knife or serrated knife for even
slices.
Store unused bread, tightly sealed (sealable plastic bags or plastic
1
2
4
3
G
F
H