


26 27
OPERATING YOUR BREVILLE PRODUCT OPERATING YOUR BREVILLE PRODUCT
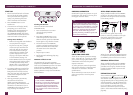
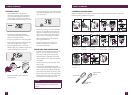
Lock Hopper
Indicates if the bean hopper has not been
properly inserted and locked into position.
The auto grind, dose & tamp function cannot
be used during this time and 3 beeps will
sound if user attempts to activate.
Overheat Please Wait
Indicates if the grinder is used excessively
and needs time to cool. The auto grind, dose
& tamp function cannot be used during this
time and 3 beeps will sound if user attempts
to activate.
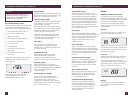
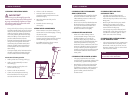
Change Filter
Indicates when the water filter in the water
tank needs to be replaced. For information
on changing the filter, refer to 'Installing
The Water Filter', page 34.
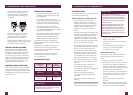
The regularity of this alert is determined
by the water hardness setting (Hrd1-Hrd5)
selected. For information, refer to 'Setting
Water Hardness', page 14 and 'Water
Hardness (Hrd3)', page 24.
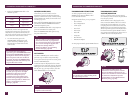
TRANSPORTING AND STORING
We recommend draining both boilers
completely before transporting the machine
or storing for an extended period of time.
This procedure is also intended as an
anti-freeze measure in the event the machine
is exposed to extreme cold temperatures.
CAUTION
Never open DESCALE ACCESS valves
while machine is still hot. Always
turn off the machine and allow to cool
for at least 1 hour prior to starting
descale process.
CAUTION
During descale process, water may
flow through group head and the drip
tray will fill with water.
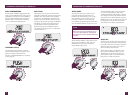
Step 1 – Preparation
a) Ensure the machine is off and has cooled
for at least 1 hour.
b) Empty water tank, remove water filter
then replace and lock water tank back
into position.
c) Ensure drip tray is empty and fully
inserted into position.
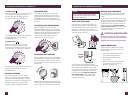
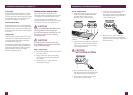
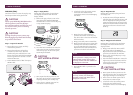
Step 2 – Empty Boilers
a) Remove the grey silicone cover on the
lower front panel marked DESCALE
ACCESS. Place a cloth over the
drip tray to stop steam escaping.
REMOVE
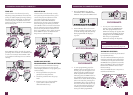
b) Use a flat-head screwdriver to rotate the
right screw counter-clockwise until the
valve is fully open. As the valve opens,
steam may be released.
CAUTION
HOT WATER & STEAM
c) Next, repeat the above process on the
left screw. As the valve is opened, water
may begin flowing into the drip tray.
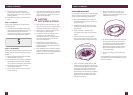
d) Allow valves to remain open until no
more water or steam escapes.
e) Close both valves by rotating screws
clock-wise until seated. Do not
overtighten screws to avoid damaging
the valves. Replace the grey silicone
cover over the valves.
f) Empty drip tray and reinsert into
position. Use caution as the drip tray
may be hot due to the water and steam
from the boilers.