


MODEL EI5936SS
Page 7
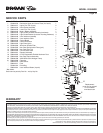
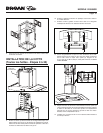
15. Remove wiring cover and connect house wiring to hood
wiring – black to black, white to white, green to green. Re-
attach wiring cover.
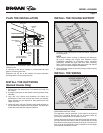
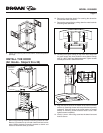
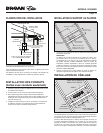
FRONT
DUCT LENGTH
DECORATIVE
FLUE
6” ROUND STEEL DUCT
(Ducted Hood)
6” ROUND FLEXIBLE
METAL DUCT
(Non-Ducted Hood)
16. FOR DUCTED HOOD
Measure, cut, and install steel duct between hood’s duct
connector and duct rough-in in ceiling. Use duct tape to
make all joints secure and air tight.
FOR NON-DUCTED HOOD
Measure, cut, and install flexible metal duct between hood’s
duct connector and non-duct plenum. Use duct tape to
make all joints secure and air tight.
CAUTION
Do not use plastic duct.
1 7.
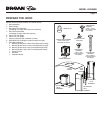
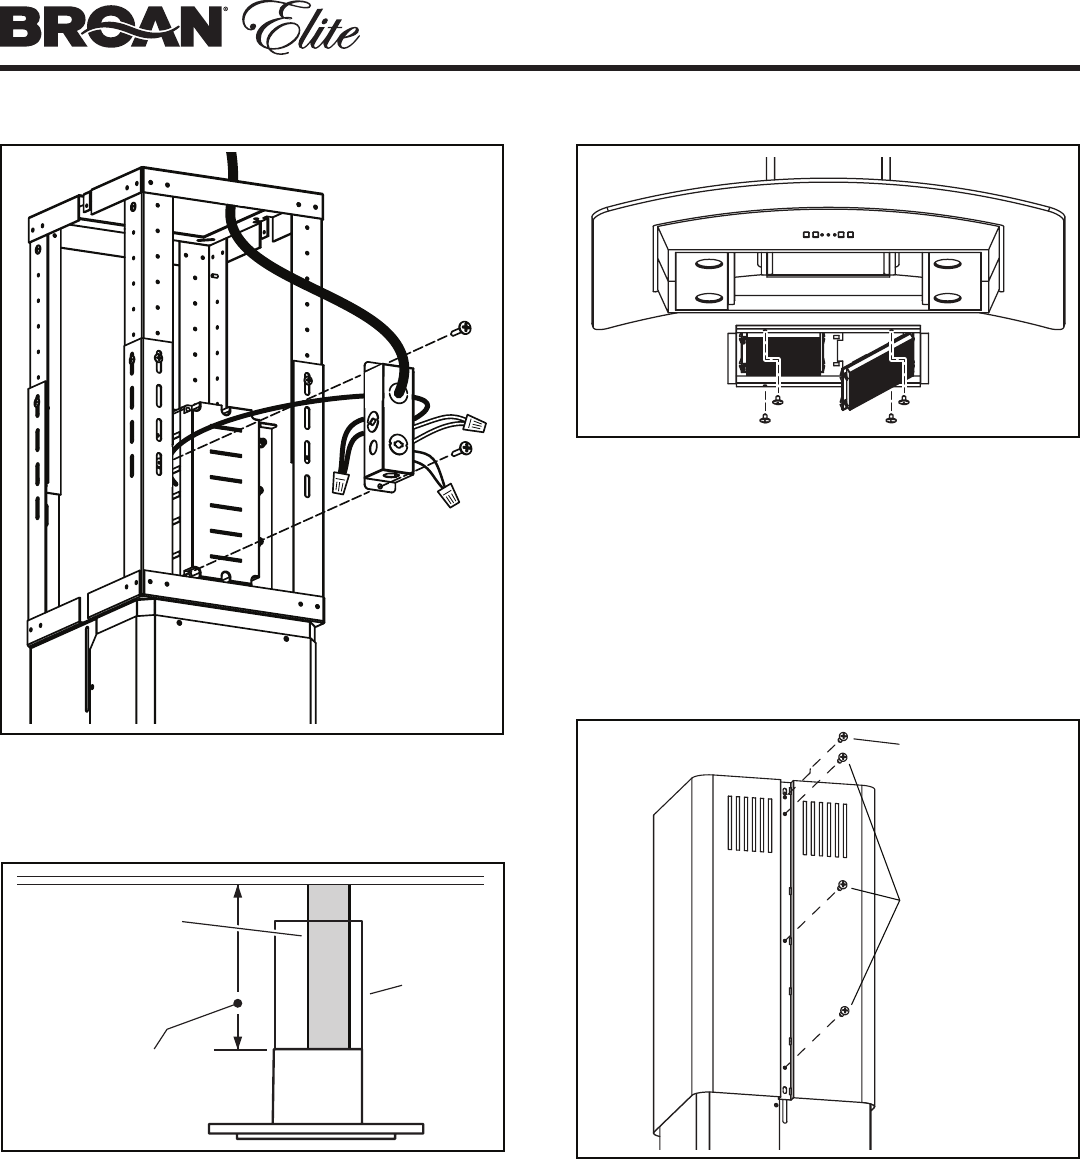
NON-DUCT HOOD ONLY
Attach filter tray to bottom of hood using (4) .188” x .375”
mounting screws.
18.
NON-DUCT HOOD ONLY
Snap in 2-non-duct filters into filter trays by engaging filter
tab on side, rotating upward, and pressing firmly on (2) filter
clips.
19. Reinstall grease filter by aligning rear filter tab with slots
in the hood. pull down the metal latch tab, push filter into
position and release. Make sure filter is securely engaged
after installation.
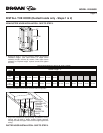
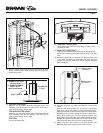
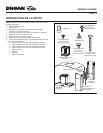
20. Carefully place the (2) upper flue sections on the hood
frame.
Note that the louvers should be on top for a non-ducted
application, and on the bottom for most ducted applications.
Make sure that the clearance holes (larger) are in front of the
attachment holes (smaller) where the two flue halves meet.
While gently pushing the two flue sections together and
sliding them to the top of the frame, attach the flue sections
together through the top attachment slots and into the upper
frame mounting holes using (2) 4mm x 12mm screws.
21. Gently push the lower parts of the flues together and
complete attachment using (6) 3mm x 5mm screws.
4mm x 12mm
SCREWS
3mm x 5mm
SCREWS