


SBB00101-1-1007 Page 9
CART AND GRILL ASSEMBLY
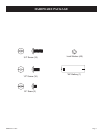
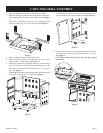
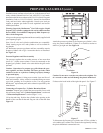
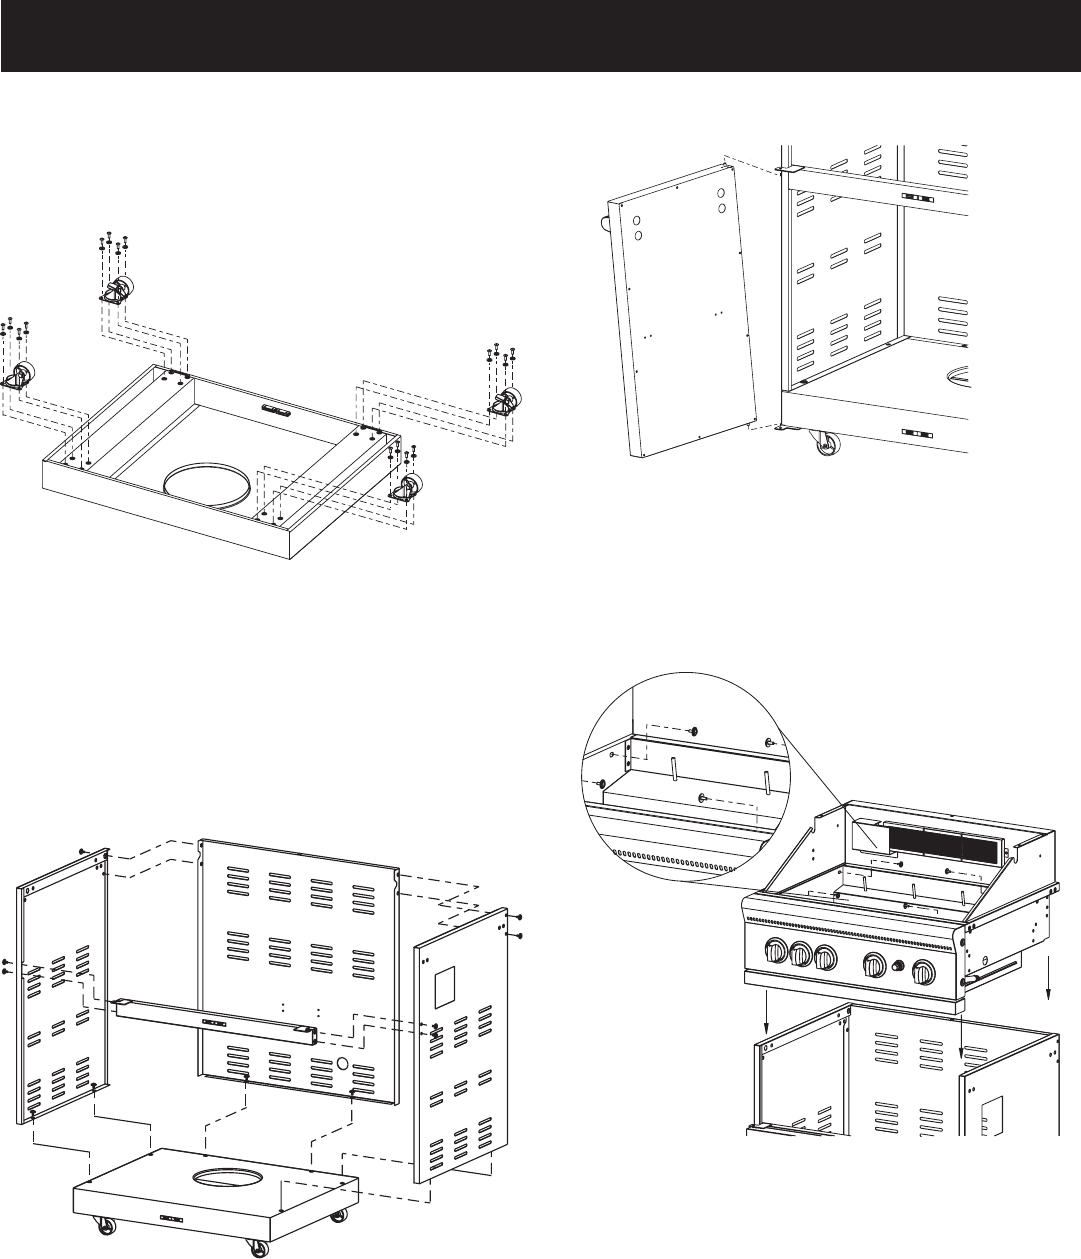
1. Place cart bottom face-down on a non-abrasive surface.
2. Attach two locking casters to front of cart bottom with four (4)
lock washers, and 3/4” screws per locking caster. See Figure
1.
3. Attach two (2) non-lock casters to back of cart bottom with
four (4) washers, and 3/4” screws per caster. See Figure 1.
Figure 1
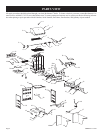
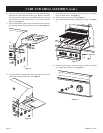
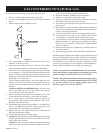
4. Place cart bottom face-up. Lock front casters.
5. Attach cart back to back of cart bottom with two (2) lock
washers and 1/2” panel screws. See Figure 2.
6. Attach cart side panels to cart back with two (2) lock washers
and 1/2” screws per cart side. Then, attach side panels to the
cart bottom with two (2) lock washers and 1/2” screws per
side. See Figure 2.
7. With flange on door brace positioned upward, attach door brace
to cart sides with four (4) 1/2” screws. See Figure 2.
Figure 2
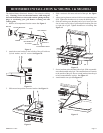
8. Place bottom pivot pins on doors into cart bottom and snap
spring-loaded top pivot pins into door brace. See Figure 3.
Figure 3
10. Place grill head onto cart. Attach grill head to cart from in
-
side of the grill with four (4) lock washers, and 1/2” screws.
See Figure 4.
CAUTION: Assure that gas line does not get trapped
under body.
Figure 4