


Page 6
INITIAL SET-UP
1. Insert an empty funnel into the funnel rails.
2. Place an empty decanter under the funnel.
3. Connect the brewer to the power source.
4. Model CDBC – Press the "ON/OFF" switch (indicator glowing).
Model CEZ – Place the "ON/OFF" switch in the "ON" upper position.
5. Water will flow into the tank and stop when the tank is filled to its capacity.
6. Wait approximately twenty minutes for the water in the tank to heat to the proper temperature.
7. Place a small vessel beneath the faucet and open the faucet handle. Release it when you hear the tank refilling.
If brewer is not equipped with a faucet, place a empty decanter beneath the funnel and initiate a brew cycle.
8. Model CDBC – Place an empty decanter/server beneath the funnel and press the "ON/OFF" switch (indicator
glowing) then momentarily press and release the "BREW" switch.
Model CEZ – Place an empty decanter beneath the funnel and place the "ON/OFF" switch in the "ON" upper
position then momentarily press and release the "BREW" switch.
9. Allow the cycle to finish and measure the amount of water in the decanter/server. It should be 64 ounces ±
2. Refer to the adjustments section of this manual should the volume need to be increased or decreased.
The brewer is now ready for use in accordance with the coffee brewing instructions below.
COFFEE BREWING
1. Insert a BUNN
®
filter into the funnel.
2. Pour fresh coffee grounds into the filter and level the bed of grounds by gently shaking.
3. Slide the funnel into the funnel rails.
4. Place an empty decanter/server beneath the funnel.
5. Model CDBC – Press the "ON/OFF" switch (indicator glowing) then momentarily press and release the "BREW"
switch.
Model CEZ – Place the "ON/OFF" switch in the "ON" upper position then momentarily press and release the
"BREW" switch.
6. When brewing is completed, simply discard the grounds and filter.
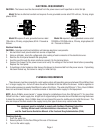
ADDITIONAL WARMER SWITCHES (CDBC only)
Pressing any additional warmer switch so that the indicator is glowing, supplies power to the associated
warmer.
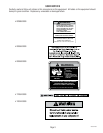
READY INDICATOR
This indicator glows when the preset temperature has been achieved. The word "NOT" above "READY" will glow
in all other instances.
TEMPERATURE INDICATORS (Feature disabled from the factory – refer to page 8.)
The indicator glows to communicate the brew water temperature. Two indicators will glow when the
temperature is between them.
OPERATING CONTROLS (cont.)
29079 042803