WARNING
DO NOT reach below the GRIND
ADJUST knob while the unit is
running.
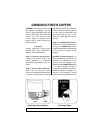
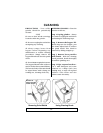
Step 3. Load hopper - Pour coffee
beans into the hopper and fill to the
desired level (See illustration
below). One of two approaches may
be used: (a) pre-weigh the beans for
a desired amount of fresh coffee to
be ground or (b) fill the hopper up
to its capacity (slightly over one
pound of coffee beans). With either
method, be sure to replace the
hopper lid to maintain coffee
freshness. You are now nearly ready
to grind. For a further detailed
explanation of the two grinding
methods, refer to the next section
at the top of Page 8.
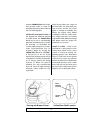
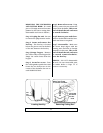
Step 4. Observe the Operating
Knob - Before grinding your first
coffee, take a moment and become
familiar with the function of the
Operating Knob. This knob is
located on the front of the coffee
grinder (See illustration below).
Notice the dial is divided into
increments ranging between Off
and 20 cups. Each incremental
mark (labeled in cups of coffee) is
intended as a general setting. The
actual coffee output varies with the
blend of coffee beans and the grind
setting for the same amount
(weight) of coffee. Finer grinds
require higher cup settings while
coarser grinds use lower cup
settings. Generally, an “8 CUPS"
setting grinds enough for eight cups
of coffee at a drip grind setting.
Learning Operating KnobPouring Beans Into Hopper
7
NOTE:HIGHER SETTINGS = STRONGER COFFEE
LOWER SETTINGS = WEAKER COFFEE


